config.json
In this part of the tutorial, you will build the Study Config, public/tutorial/config.json. The completed version is public/tutorial/_answers/config.json. Use the completed version to check the step you just finished, not as something to copy all at once.
Before you start editing tutorial files, complete the Installation guide using the Starting from the Template Repository workflow.
Step 1: Run the local server
Start the local server from the root of your template repository:
yarn serve
Before editing the tutorial Study Config, open public/global.json. This file follows the Global Config schema. The template already registers the tutorial config. You should see tutorial listed in both configsList and configs.
{
  "$schema": "https://raw.githubusercontent.com/revisit-studies/study/v2.4.2/src/parser/GlobalConfigSchema.json",
  "configsList": ["tutorial"],
  "configs": {
    "tutorial": {
      "path": "tutorial/config.json"
    }
  }
}
Open http://localhost:8080. You should see the tutorial study listed.
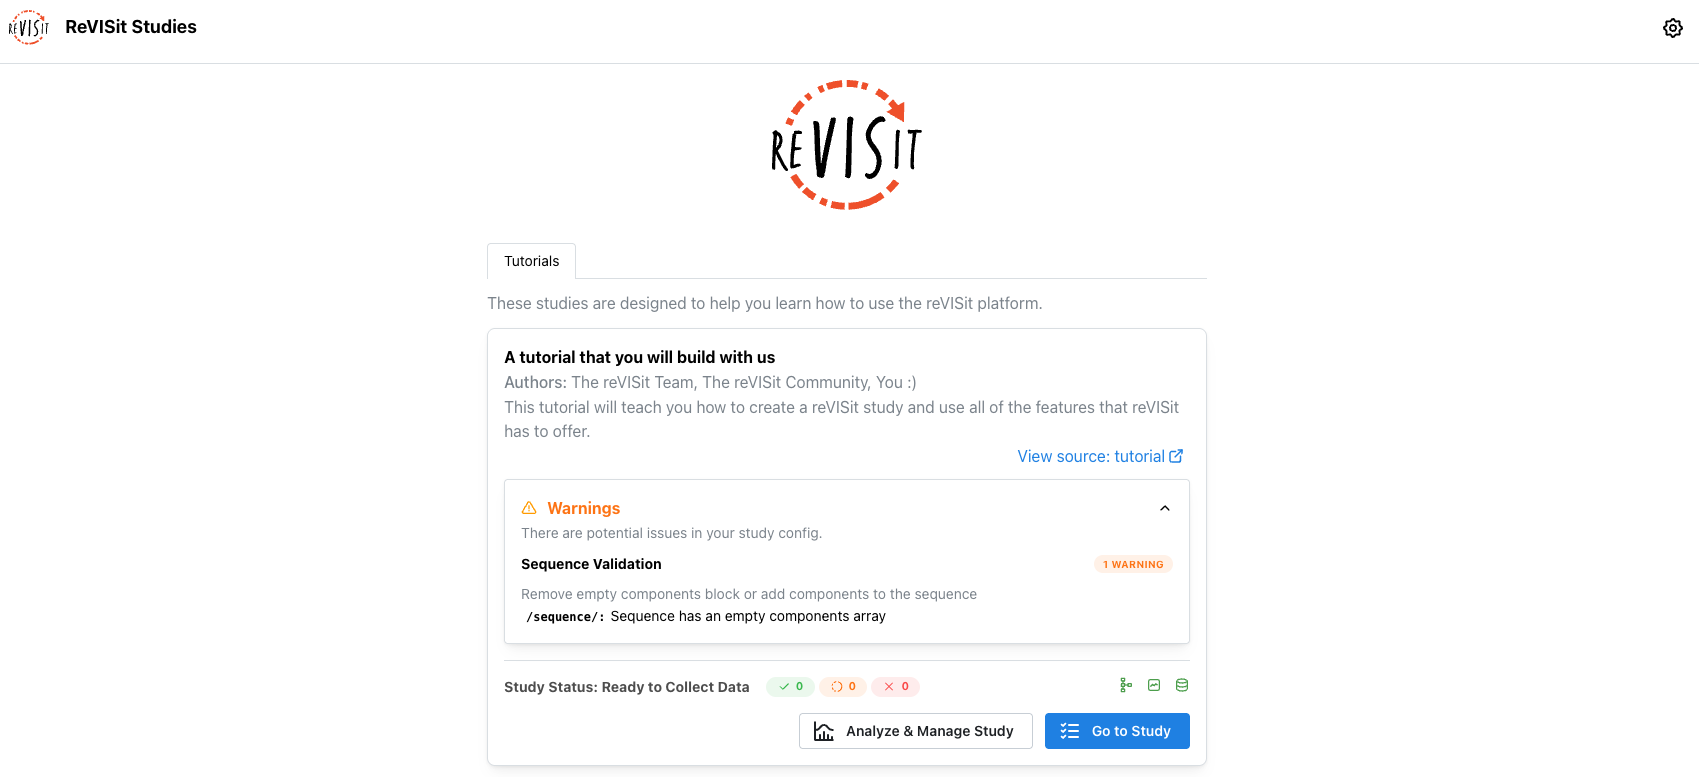
At this point, the tutorial config should show a warning that the sequence is empty. You can ignore this warning for now. It is intentional because public/tutorial/config.json currently has an empty sequence.components array. If you enter the study now, reVISit may go directly to the study end page because no components have been added to the sequence yet.
Step 2: Add the welcome component
If you go into the tutorial study right now, you will be directed straight to the end page, which should look like this.
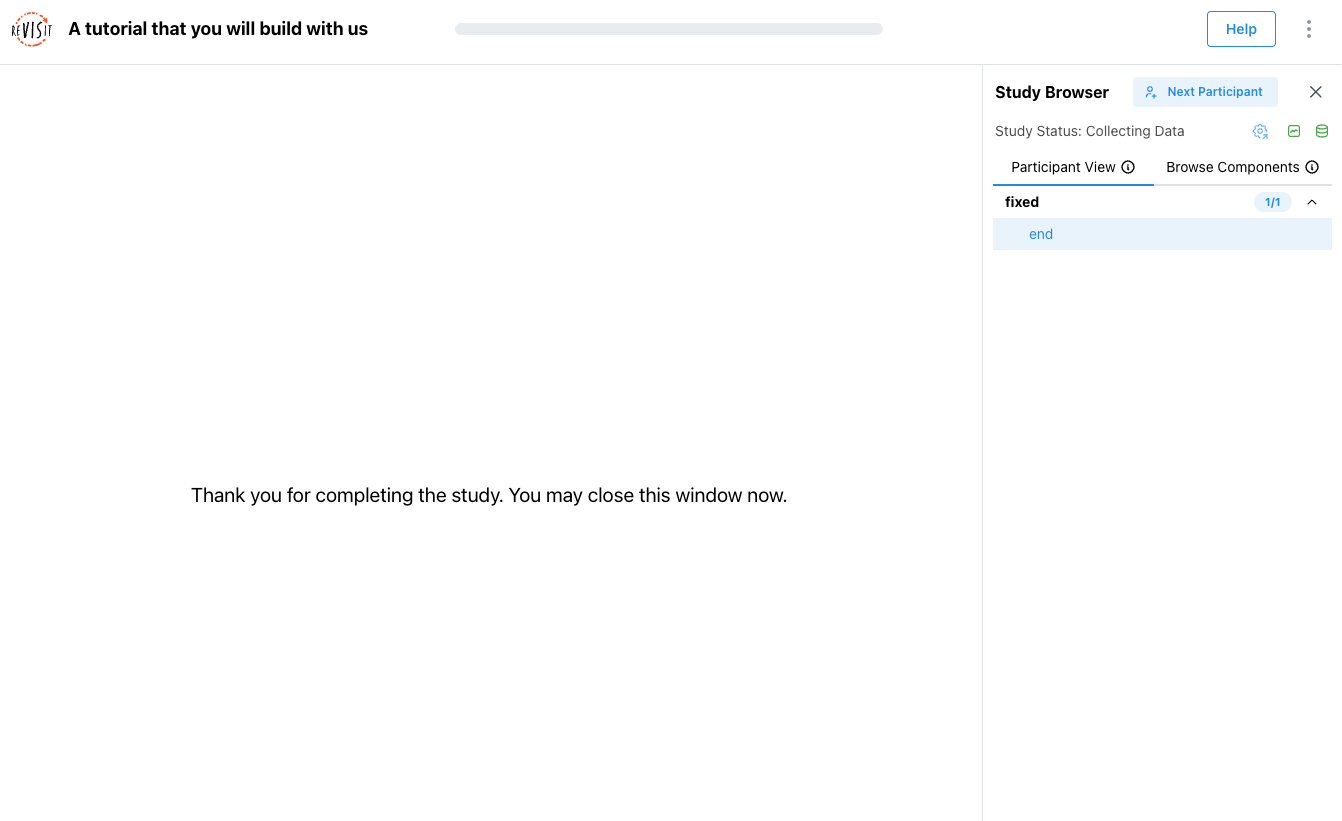
Inside the empty components object, add a basic Markdown component named welcome.
"components": {
  "welcome": {
    "type": "markdown",
    "path": "tutorial/assets/welcome.md",
    "response": []
  }
}
This component displays the Markdown file at public/tutorial/assets/welcome.md.
Now add welcome to the sequence:
"sequence": {
  "order": "fixed",
  "components": [
    "welcome"
  ]
}
Because this is a fixed sequence, participants see the component names in this array from top to bottom.
Refresh the local study or click "Next participant" to reload the Study Config and start a fresh preview. You should now see the welcome page.
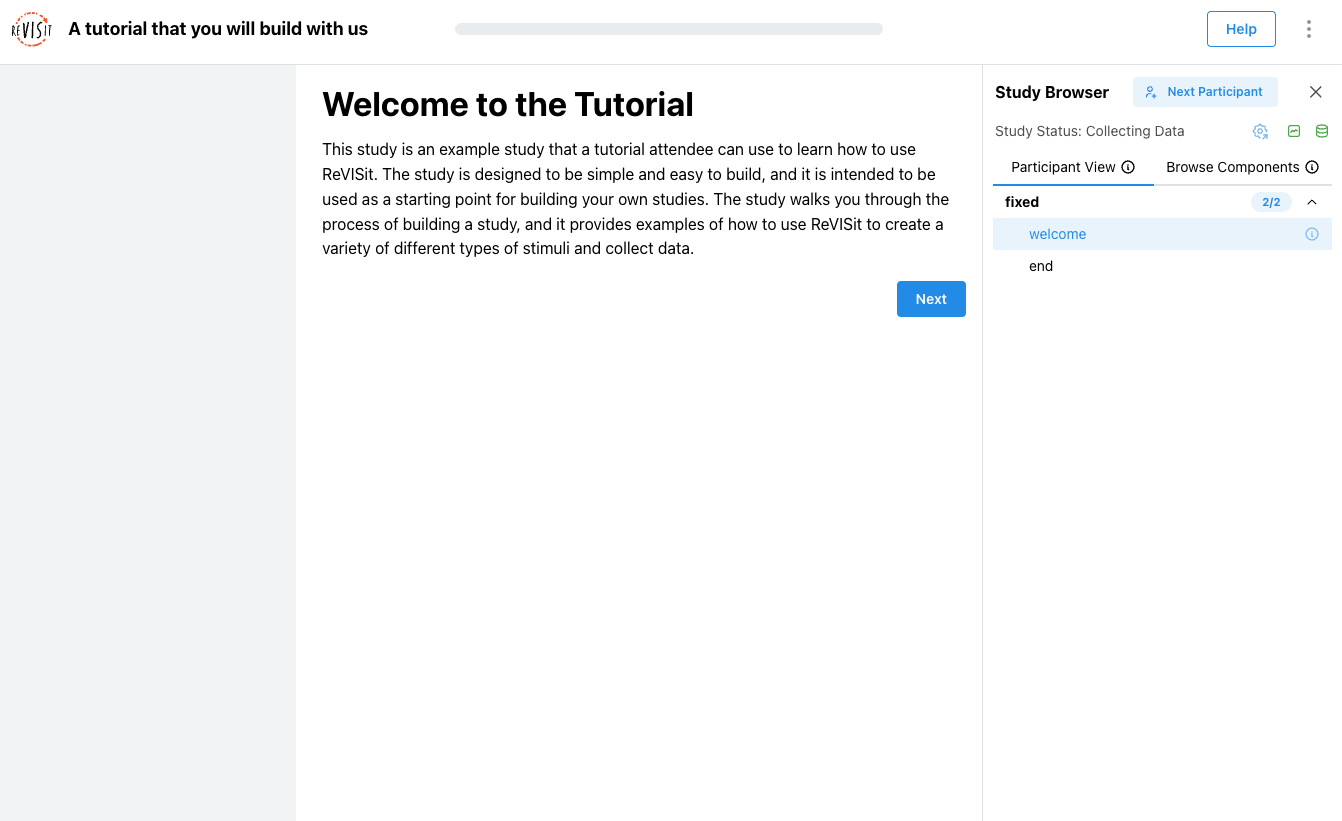
A common mistake is to add the component but forget the sequence entry. If the component exists in components but is not listed in sequence.components, the component will not show up.
Step 3: Add the consent component
Add a comma after the welcome component, then add a second Markdown component named consent.
"components": {
  "welcome": { ... },
  "consent": {
    "type": "markdown",
    "path": "tutorial/assets/consent.md",
    "nextButtonText": "I agree",
    "response": []
  }
}
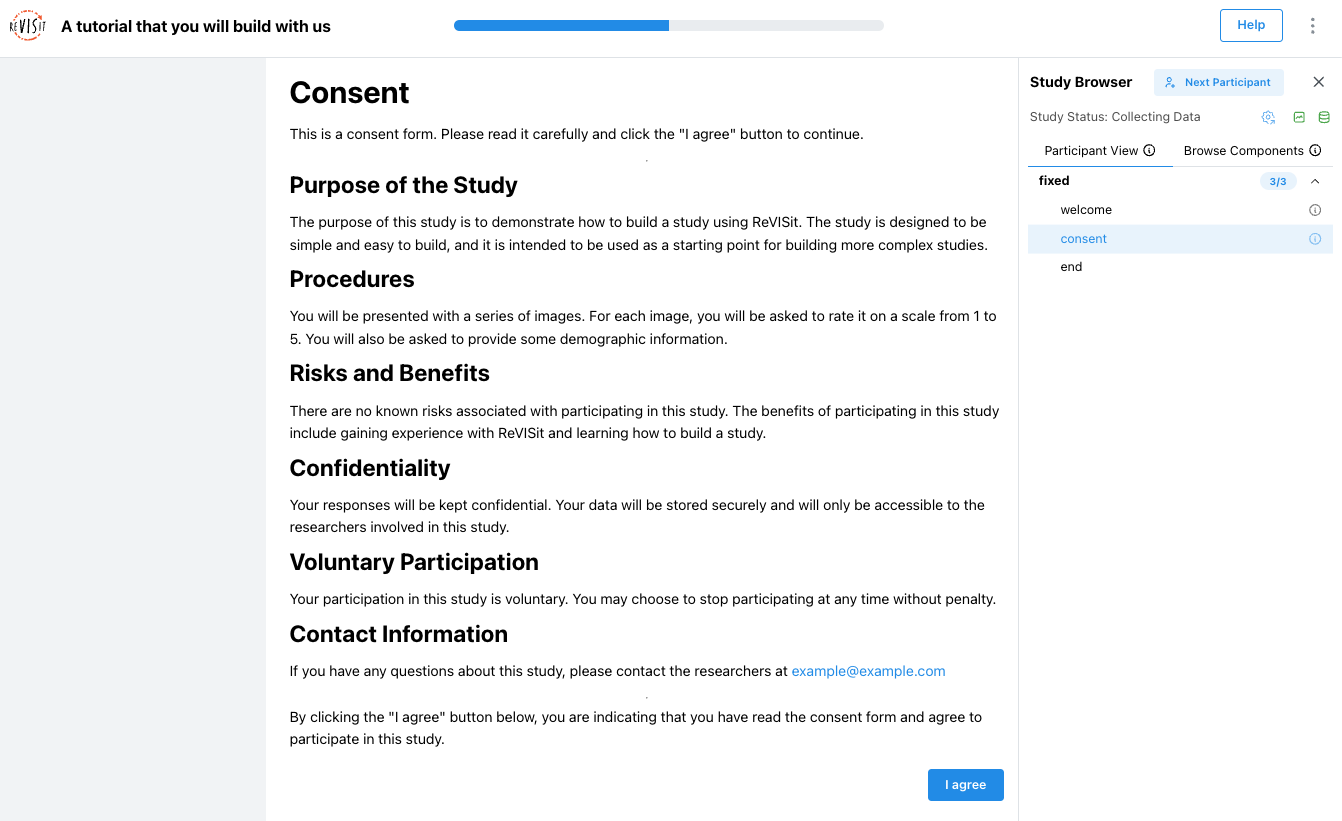
This component displays public/tutorial/assets/consent.md. The nextButtonText field changes the text on the next button, which is useful for consent pages because the button can say exactly what the participant is agreeing to.
Add consent after welcome in the sequence:
"sequence": {
  "order": "fixed",
  "components": [
    "welcome",
    "consent"
  ]
}
Refresh the study or click "Next participant". You should see the welcome page first, then the consent page with an "I agree" button.
Step 4: Add demographics with several form elements
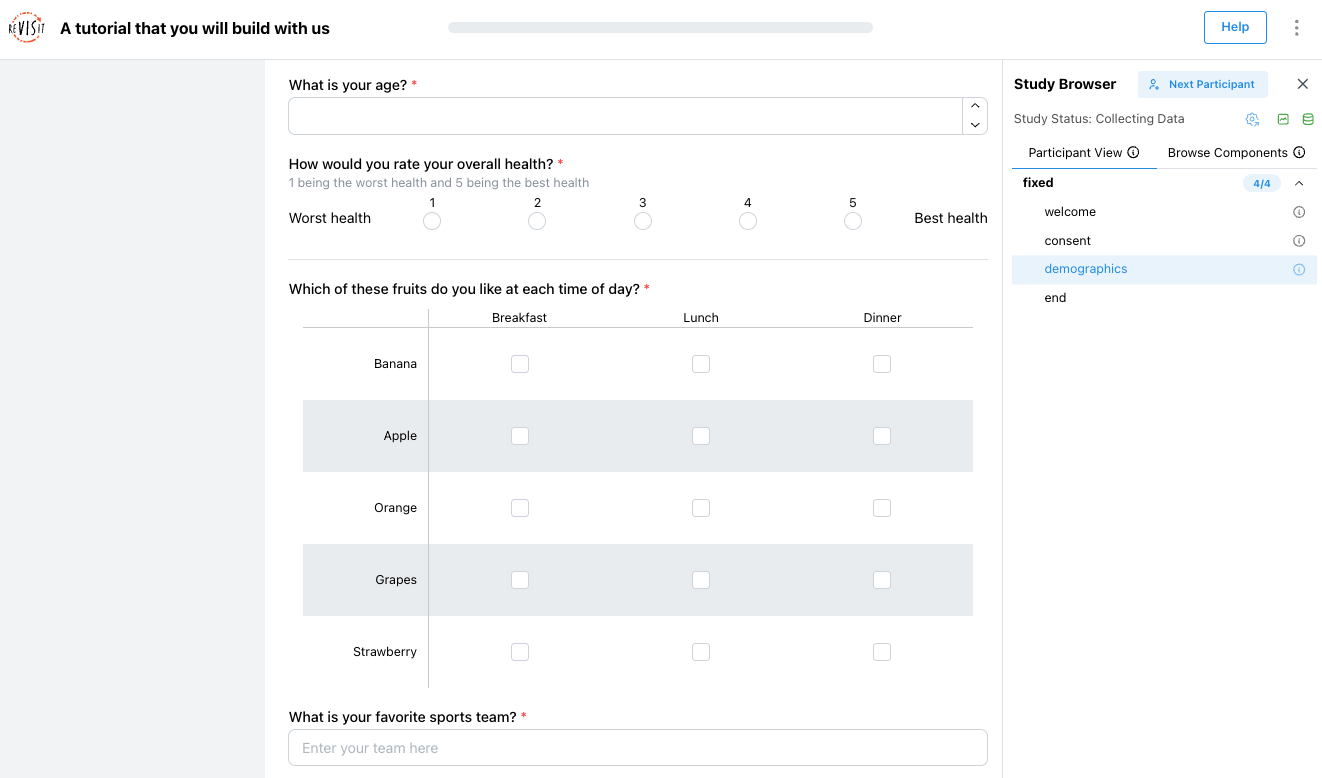
Add a questionnaire component named demographics. A questionnaire component is used to collect form-based answers from the participant, such as demographic information, survey responses, or post-task feedback.
ReVISit supports many form response types inside a questionnaire, including numerical inputs, Likert scales, dropdowns, checkboxes, sliders, dividers, and matrix questions. For the full list of available response types, see the Response reference.
"components": {
  "welcome": { ... },
  "consent": { ... },
  "demographics": {
    "type": "questionnaire",
    "response": [
      {
        "id": "age",
        "type": "numerical",
        "prompt": "What is your age?"
      },
      {
        "id": "health",
        "type": "likert",
        "prompt": "How would you rate your overall health?",
        "secondaryText": "1 being the worst health and 5 being the best health",
        "numItems": 5,
        "rightLabel": "Best health",
        "leftLabel": "Worst health"
      },
      {
        "id": "dividerResponse",
        "type": "divider",
        "location": "belowStimulus"
      },
      {
        "id": "fruits",
        "type": "matrix-checkbox",
        "prompt": "Which of these fruits do you like at each time of day?",
        "answerOptions": ["Breakfast", "Lunch", "Dinner"],
        "questionOptions": ["Banana", "Apple", "Orange", "Grapes", "Strawberry"]
      },
      {
        "id": "q-short-text",
        "type": "shortText",
        "prompt": "What is your favorite sports team?",
        "placeholder": "Enter your team here"
      },
      {
        "id": "operating-systems",
        "type": "checkbox",
        "prompt": "Which of these operating systems do you use?",
        "minSelections": 1,
        "maxSelections": 2,
        "options": ["Windows", "macOS", "Linux"],
        "withOther": true
      },
      {
        "id": "q-slider",
        "type": "slider",
        "prompt": "How would you rate this tutorial so far?",
        "secondaryText": "Your answer is not legally binding.",
        "startingValue": 50,
        "options": [
          { "label": "Bad", "value": 0 },
          { "label": "Alright", "value": 50 },
          { "label": "Good", "value": 100 }
        ]
      }
    ]
  }
}
This one component introduces several form elements: numerical input, Likert scale, divider, matrix checkbox, short text, checkbox, and slider.
Add demographics to the sequence:
"sequence": {
  "order": "fixed",
  "components": [
    "welcome",
    "consent",
    "demographics"
  ]
}
Click "Next participant" and confirm that the demographics page appears after consent.
Step 5: Add training with feedback
Add a questionnaire component named trainingWithFeedback.
"components": {
  "welcome": { ... },
  "consent": { ... },
  "demographics": { ... },
  "trainingWithFeedback": {
    "type": "questionnaire",
    "response": [
      {
        "id": "training",
        "type": "radio",
        "prompt": "Yes is the correct answer, click it",
        "options": ["Yes", "No"]
      }
    ],
    "correctAnswer": [
      {
        "id": "training",
        "answer": "Yes"
      }
    ],
    "provideFeedback": true,
    "trainingAttempts": 2,
    "allowFailedTraining": false,
    "nextButtonDisableTime": 5000
  }
}
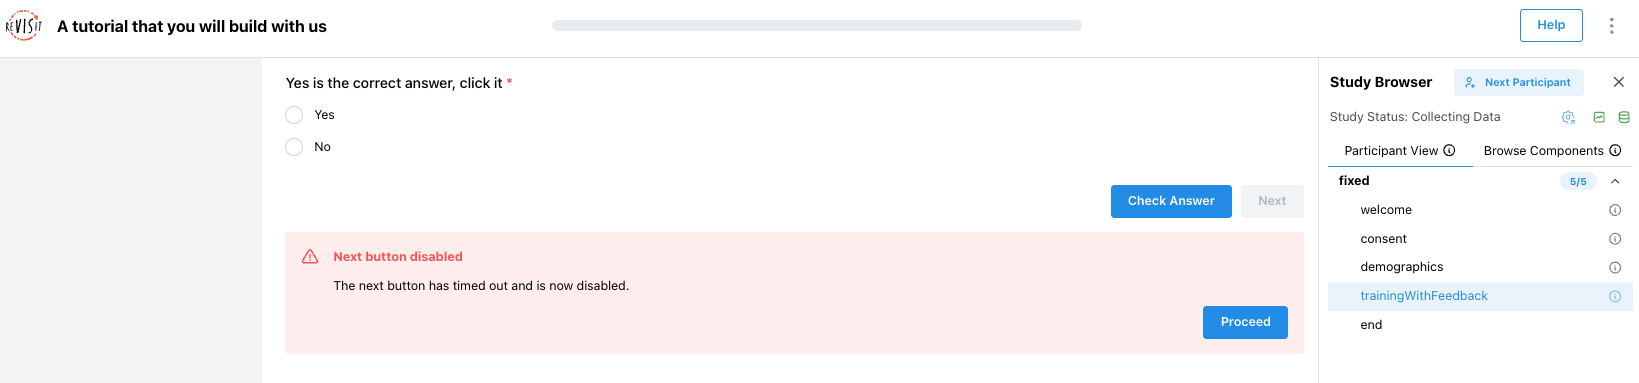
correctAnswersays which answer is correct. Theidmust match the response id,training.provideFeedback: truetells to show feedback after the participant answers.trainingAttempts: 2gives the participant two attempts.allowFailedTraining: falseprevents the participant from continuing after failing the allowed attempts.nextButtonDisableTime: 5000disables the next button after 5 seconds.
Add trainingWithFeedback to the sequence after demographics.
"sequence": {
  "order": "fixed",
  "components": [
    "welcome",
    "consent",
    "demographics",
    "trainingWithFeedback"
  ]
}
When you preview this page, the next button becomes a Check answer button. If the participant answers incorrectly twice, reVISit stops them from continuing. If they answer correctly, they can move forward.
Step 6: Add the coin image component
Add an image component named coinImage.
"components": {
  "welcome": { ... },
  "consent": { ... },
  ...,
  "trainingWithFeedback": { ... },
  "coinImage": {
    "type": "image",
    "path": "tutorial/assets/coins.png",
    "nextButtonLocation": "sidebar",
    "response": [
      {
        "id": "cost-effective",
        "type": "radio",
        "prompt": "Which coin is most effective to produce?",
        "location": "sidebar",
        "options": ["Penny", "Nickel", "Dime", "Quarter", "Half Dollar"]
      },
      {
        "id": "cost-ineffective",
        "type": "dropdown",
        "prompt": "Which coin is least cost effective to produce?",
        "location": "sidebar",
        "options": ["Penny", "Nickel", "Dime", "Quarter", "Half Dollar"]
      }
    ]
  }
}
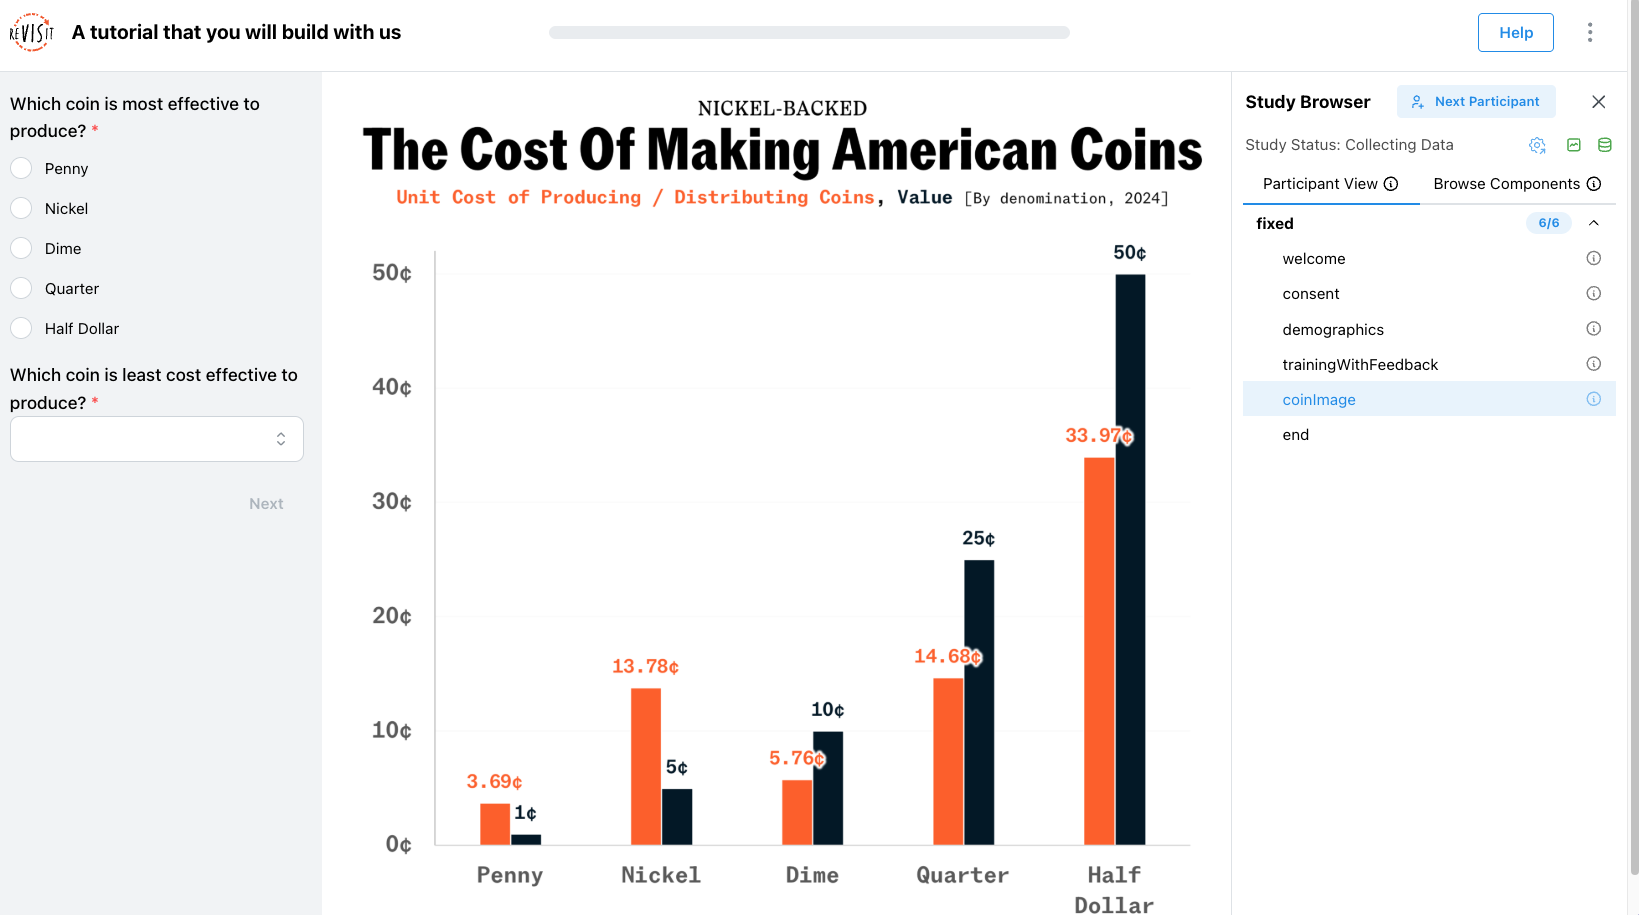
This component displays public/tutorial/assets/coins.png and places the questions in the sidebar.
Add coinImage to the sequence after trainingWithFeedback.
"sequence": {
  "order": "fixed",
  "components": [
    "welcome",
    "consent",
    "demographics",
    "trainingWithFeedback",
    "coinImage"
  ]
}
Step 7: Add Vega components
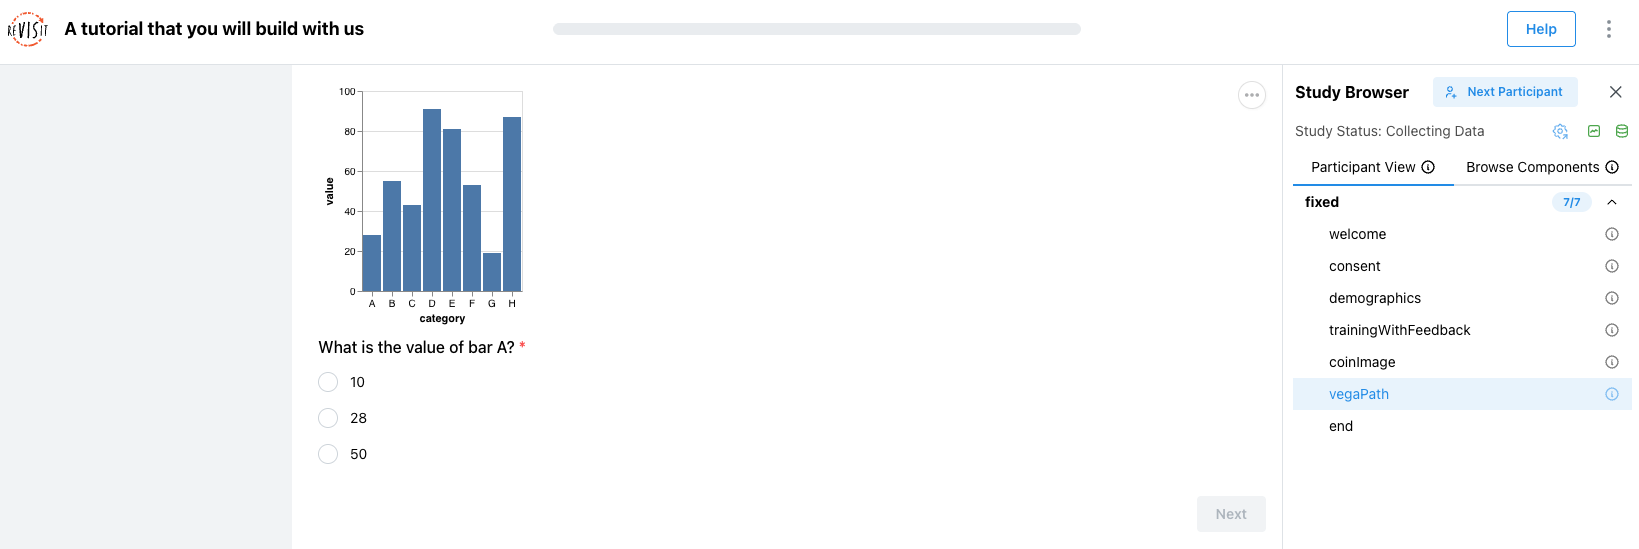
Add vegaPath, which loads a Vega chart from a separate file.
"components": {
  "welcome": { ... },
  "consent": { ... },
  ...,
  "coinImage": { ... },
  "vegaPath": {
    "type": "vega",
    "path": "tutorial/assets/simpleChart.json",
    "response": [
      {
        "id": "simple-vega",
        "type": "radio",
        "prompt": "What is the value of bar A?",
        "options": ["10", "28", "50"]
      }
    ]
  }
}
Then add vegaConfig, which puts the Vega-Lite chart definition directly in the Study Config.
"components": {
  "welcome": { ... },
  "consent": { ... },
  ...,
  "vegaPath": { ... },
  "vegaConfig": {
    "type": "vega",
    "config": {
      "$schema": "https://vega.github.io/schema/vega-lite/v5.json",
      "description": "A simple bar chart with embedded data.",
      "data": {
        "values": [
          { "category": "A", "value": 28 },
          { "category": "B", "value": 55 },
          { "category": "C", "value": 43 }
        ]
      },
      "mark": "bar",
      "encoding": {
        "x": {
          "field": "category",
          "type": "nominal",
          "axis": { "labelAngle": 0 }
        },
        "y": {
          "field": "value",
          "type": "quantitative"
        }
      }
    },
    "response": [
      {
        "id": "dynamic-vega",
        "type": "radio",
        "prompt": "What is the value of bar A?",
        "options": ["10", "28", "50"]
      }
    ]
  }
}
There are two ways of defining Vega components in reVISit. If you'd like to learn more, visit Vega stimulus docs. Use path when the visualization specification is easier to maintain as its own file. Use config when the chart is small enough to keep inside the Study Config.
Add vegaPath and vegaConfig to the sequence.
"sequence": {
  "order": "fixed",
  "components": [
    "welcome",
    "consent",
    "demographics",
    "trainingWithFeedback",
    "coinImage",
    "vegaPath",
    "vegaConfig"
  ]
}
Step 8: Add reactive Vega
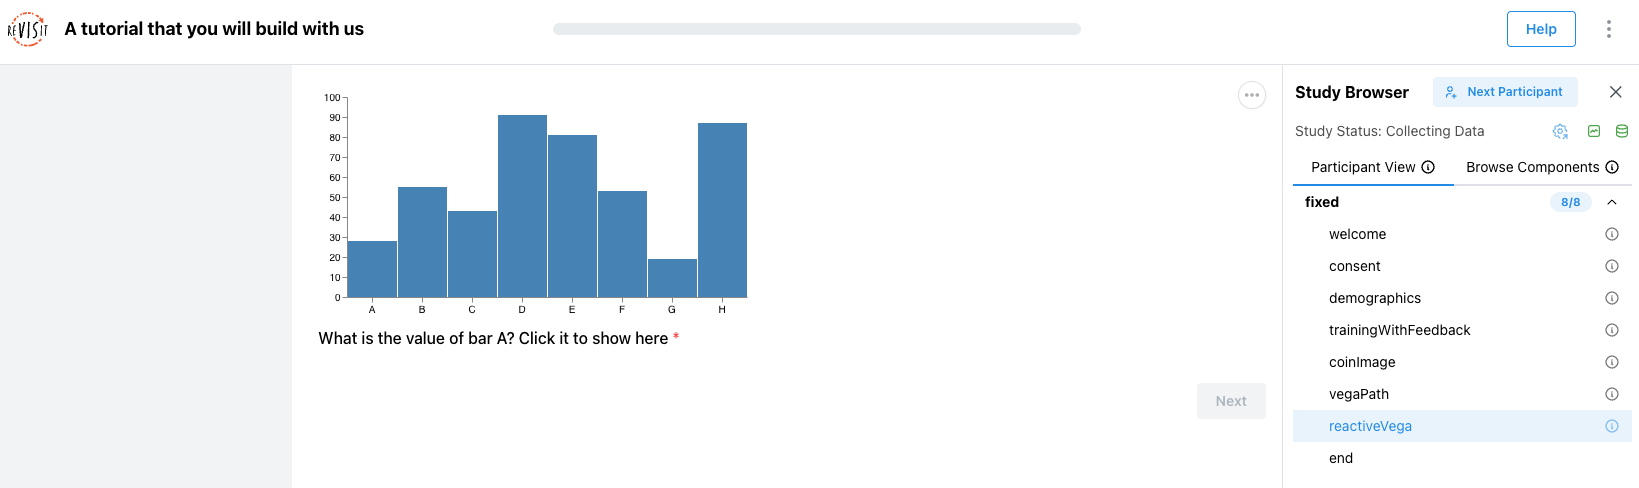
Add reactiveVega.
"components": {
  "welcome": { ... },
  "consent": { ... },
  ...,
  "vegaConfig": { ... },
  "reactiveVega": {
    "type": "vega",
    "path": "tutorial/assets/reactive.json",
    "response": [
      {
        "id": "reactiveResponse",
        "type": "reactive",
        "prompt": "What is the value of bar A? Click it to show here"
      }
    ]
  }
}
A reactive response records an interaction from the visualization itself. In this example, the participant clicks a mark in the Vega chart and that interaction becomes the response.
Add reactiveVega to the sequence.
"sequence": {
  "order": "fixed",
  "components": [
    ...,
    "vegaConfig",
    "reactiveVega"
  ]
}
Step 9: Add website components
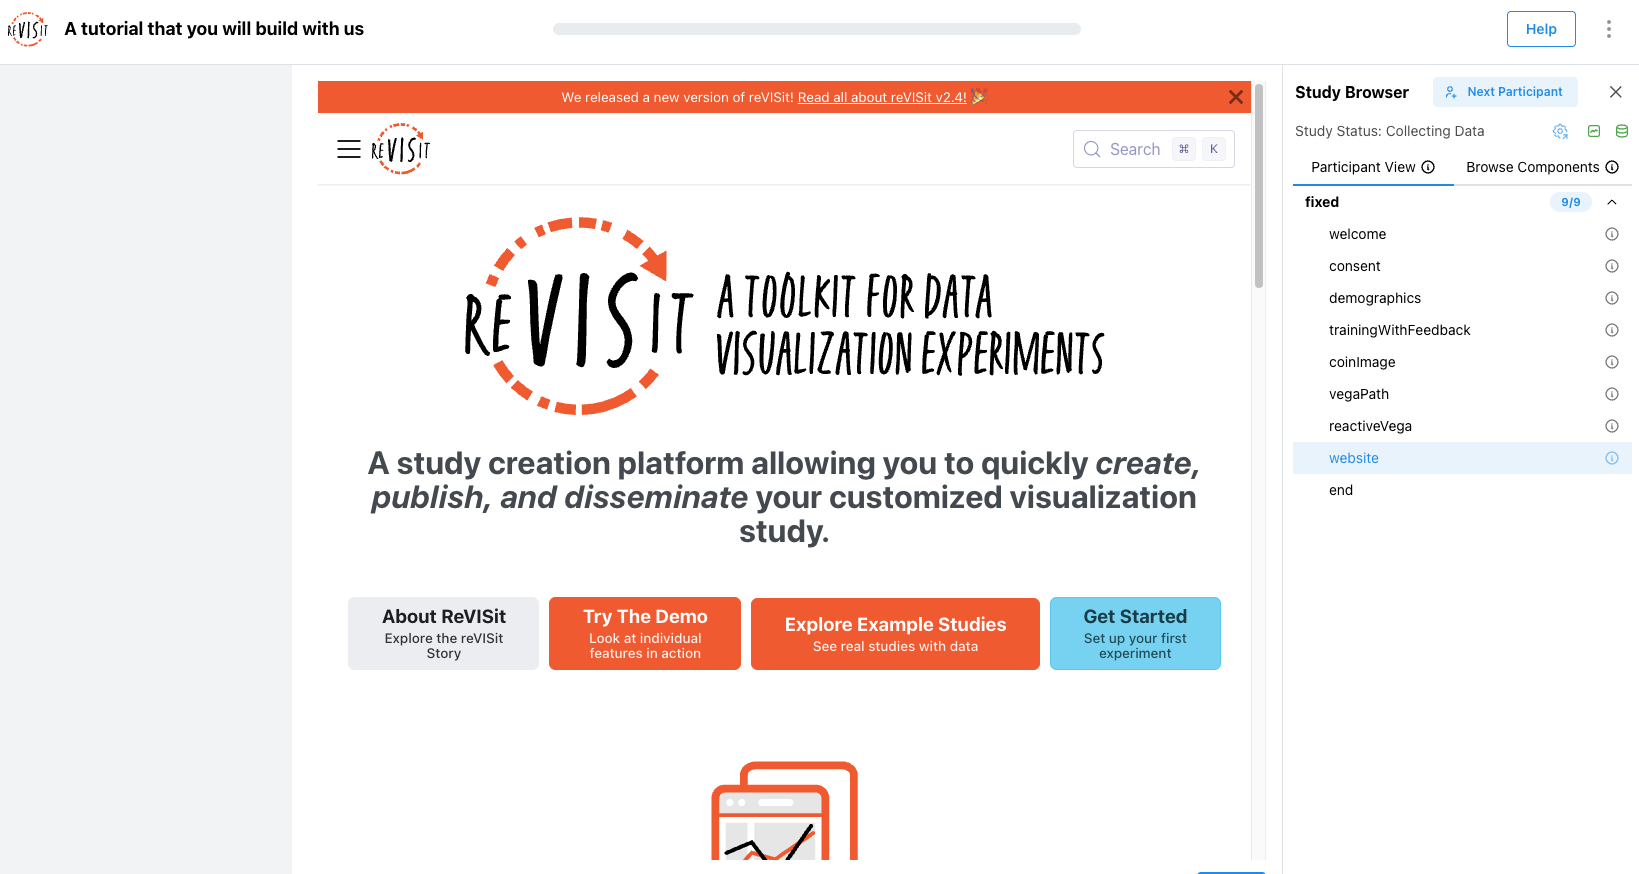
First, add a simple website component. This embeds a web page in the study as an iframe.
"components": {
  "welcome": { ... },
  "consent": { ... },
  ...,
  "reactiveVega": { ... },
  "website": {
    "type": "website",
    "path": "https://revisit.dev",
    "response": []
  }
}
This is useful when a study asks participants to inspect a website or web-based visualization. The empty response array means the page is shown without collecting a form response.
Add website to the sequence.
"sequence": {
  "order": "fixed",
  "components": [
    ...,
    "reactiveVega",
    "website"
  ]
}
Next, add a reactive website named reactiveWebsite.
"components": {
  "welcome": { ... },
  "consent": { ... },
  ...,
  "website": { ... },
  "reactiveWebsite": {
    "type": "website",
    "path": "tutorial/assets/bar-chart-interaction.html",
    "instructionLocation": "aboveStimulus",
    "description": "A trial for the user to click the largest bar",
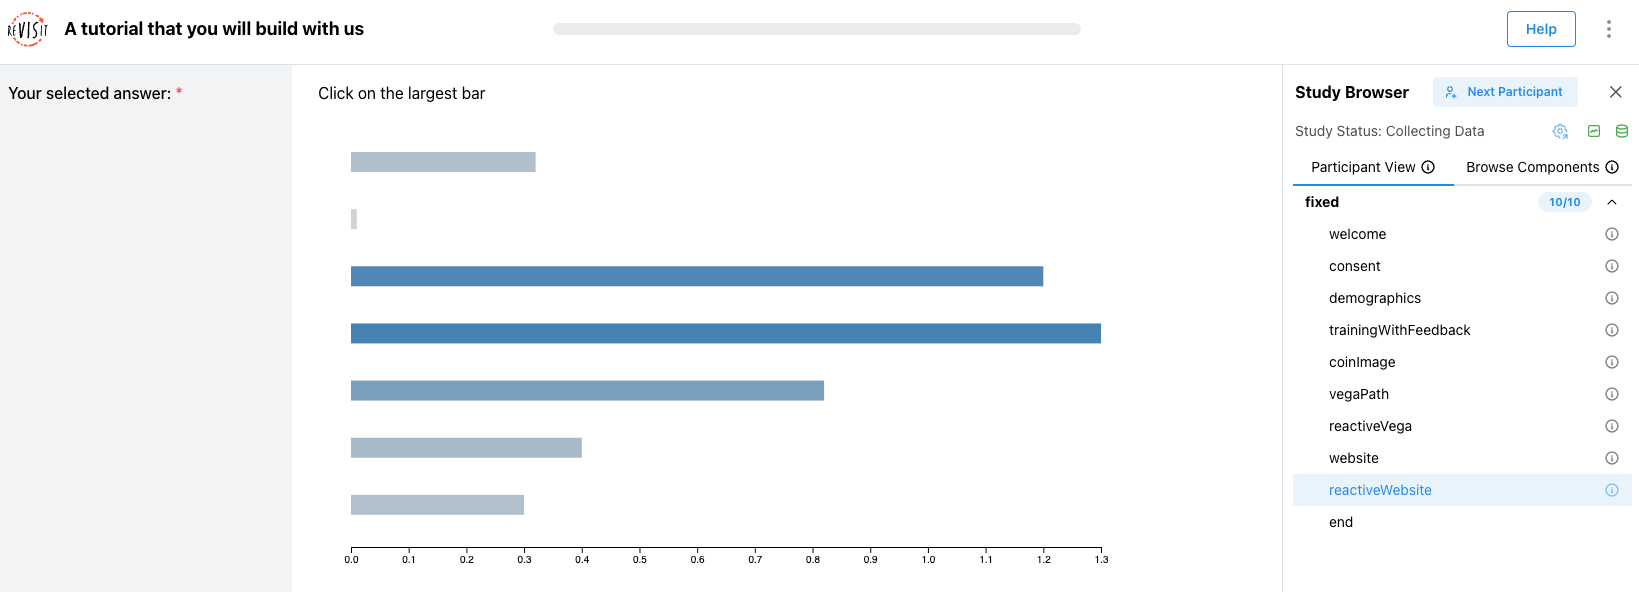
    "instruction": "Click on the largest bar",
    "response": [
      {
        "id": "barChart",
        "prompt": "Your selected answer:",
        "location": "sidebar",
        "type": "reactive"
      }
    ],
    "parameters": {
      "barData": [0.32, 0.01, 1.2, 1.3, 0.82, 0.4, 0.3]
    }
  }
}
This component loads a local HTML page and passes barData into it through parameters. The page can render a different chart based on those values. The response is reactive, so the HTML page can send the participant's selection back to reVISit.
Add reactiveWebsite to the sequence after website.
"sequence": {
  "order": "fixed",
  "components": [
    ...,
    "website",
    "reactiveWebsite"
  ]
}
Step 10: Add reactExampleCars
Add the first React component trial.
"components": {
  "welcome": { ... },
  "consent": { ... },
  ...,
  "reactiveWebsite": { ... },
  "reactExampleCars": {
    "type": "react-component",
    "path": "tutorial/assets/ReactExample.tsx",
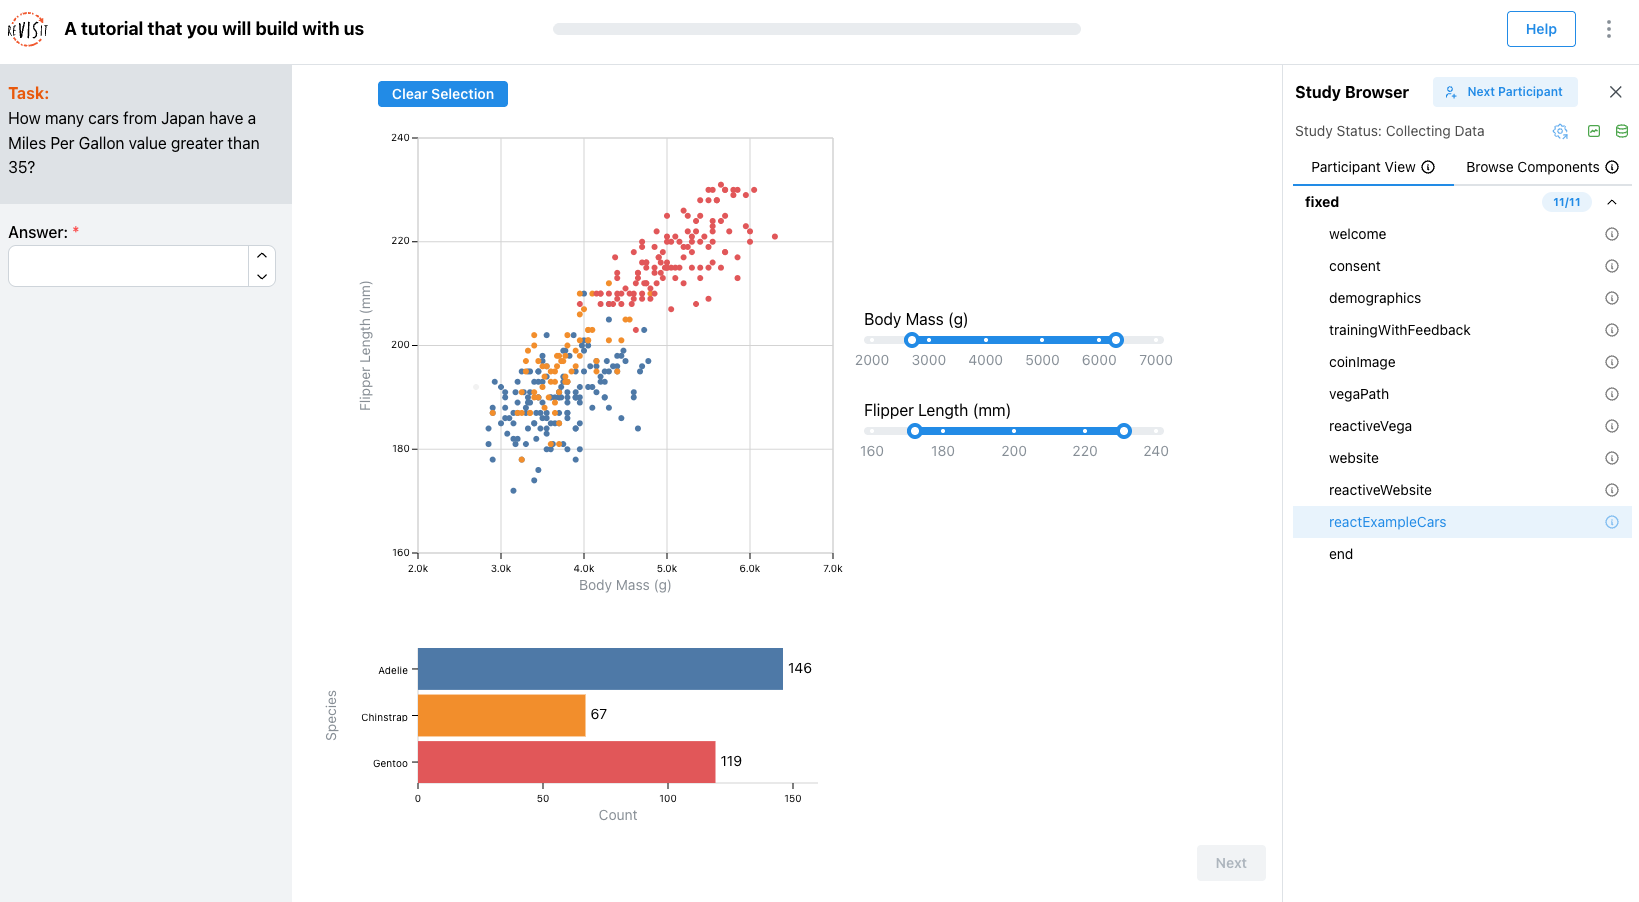
    "instruction": "How many cars from Japan have a Miles Per Gallon value greater than 35?",
    "response": [
      {
        "id": "response",
        "prompt": "Answer:",
        "location": "sidebar",
        "type": "numerical",
        "max": 100,
        "min": 0
      }
    ],
    "correctAnswer": [
      {
        "id": "response",
        "answer": 17
      }
    ],
    "parameters": {
      "dataset": "cars",
      "x": "Miles per Gallon",
      "y": "Weight (lbs)",
      "category": "Origin",
      "ids": "id",
      "brushType": "Rectangular Selection"
    }
  }
}
This component renders ReactExample.tsx. The parameters object tells the React component which dataset and fields to use.
React component paths are relative to src/public/, not the root public/ folder. The path tutorial/assets/ReactExample.tsx points to src/public/tutorial/assets/ReactExample.tsx.
Add reactExampleCars to the sequence.
"sequence": {
  "order": "fixed",
  "components": [
    ...,
    "reactiveWebsite",
    "reactExampleCars"
  ]
}
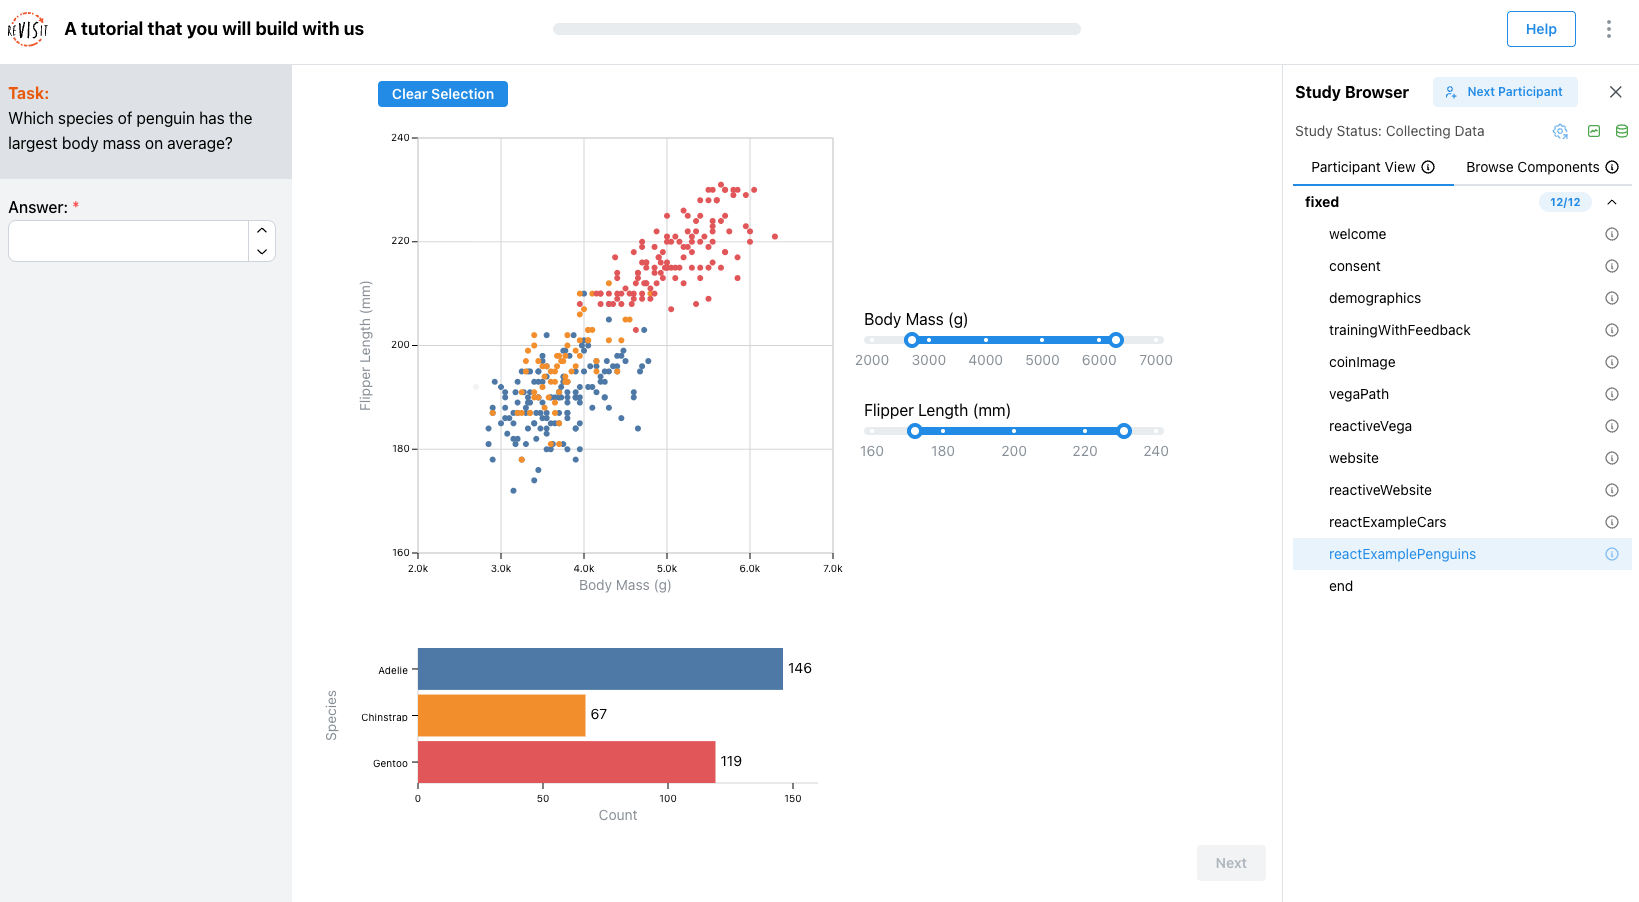
Step 11: Add reactExamplePenguins
Add a second React component trial that uses the same React file with different parameters.
"components": {
  "welcome": { ... },
  "consent": { ... },
  ...,
  "reactExampleCars": { ... },
  "reactExamplePenguins": {
    "type": "react-component",
    "path": "tutorial/assets/ReactExample.tsx",
    "instruction": "Consider only penguins with a body mass greater than 4000 g AND a flipper length greater than 200 mm. How many penguins match these conditions?",
    "response": [
      {
        "id": "response",
        "prompt": "Answer:",
        "location": "sidebar",
        "type": "numerical",
        "max": 100,
        "min": 0
      }
    ],
    "correctAnswer": [
      {
        "id": "response",
        "answer": 15
      }
    ],
    "parameters": {
      "dataset": "penguin",
      "x": "Body Mass (g)",
      "y": "Flipper Length (mm)",
      "category": "Species",
      "ids": "id",
      "brushType": "Slider Selection"
    }
  }
}
This step shows why parameters are useful. The Study Config can reuse the same React component while changing the task, dataset, fields, and interaction style.
Add reactExamplePenguins to the sequence.
"sequence": {
  "order": "fixed",
  "components": [
    ...,
    "reactExampleCars",
    "reactExamplePenguins"
  ]
}
Step 12: Add example1 and example2
Add two simple questionnaire components.
"components": {
  "welcome": { ... },
  "consent": { ... },
  ...,
  "reactExamplePenguins": { ... },
  "example1": {
    "type": "questionnaire",
    "response": [
      {
        "id": "q-example-1",
        "type": "shortText",
        "prompt": "Example question"
      }
    ]
  },
  "example2": {
    "type": "questionnaire",
    "response": [
      {
        "id": "q-example-2",
        "type": "dropdown",
        "prompt": "Example question",
        "options": ["Option 1", "Option 2"]
      }
    ]
  }
}
These components are intentionally simple. You will reuse them in the interruption examples in the next step.
Step 13: Add attention checks and interruptions
Attention checks and interruptions help you add quality-control moments without rewriting the main study flow. An attention check can catch participants who are not reading carefully, while an interruption can insert a check, break, or reminder between normal tasks.
A sequence block can be fixed, random, or latinSquare. A fixed block shows components in the order you list them. A random block shuffles the components for each participant. A Latin square block balances ordering across participants. See the study sequence guide for more sequence patterns.
You can also nest sequence blocks. For example, the following sequence keeps welcome and consent fixed, then randomizes later tasks:
"sequence": {
  "order": "fixed",
  "components": [
    "welcome",
    "consent",
    {
      "id": "randomizedTasks",
      "order": "random",
      "components": [
        "coinImage",
        "vegaPath",
        "reactiveVega"
      ]
    }
  ]
}
First, add an attentionCheck component.
"components": {
  "welcome": { ... },
  "consent": { ... },
  ...,
  "example2": { ... },
  "attentionCheck": {
    "type": "questionnaire",
    "response": [
      {
        "id": "q-example-2",
        "type": "dropdown",
        "prompt": "Attention check question",
        "options": ["Option 1", "Option 2"]
      }
    ]
  }
}
Then add a deterministic interruption block to the sequence:
"sequence": {
  "order": "fixed",
  "components": [
    "welcome",
    "consent",
    ...,
    {
      "id": "attentionDeterministic",
      "order": "fixed",
      "components": [
        "example1",
        "example2",
        "example1",
        "example2"
      ],
      "interruptions": [
        {
          "firstLocation": 0,
          "spacing": 2,
          "components": [
            "attentionCheck"
          ]
        }
      ]
    }
  ]
}
This is deterministic because the attention check appears at a predictable spacing.
Now add a random interruption block:
"sequence": {
  "order": "fixed",
  "components": [
    "welcome",
    "consent",
    ...,
    {
      "id": "attentionRandom",
      "order": "fixed",
      "components": [
        "example1",
        "example2",
        "example1",
        "example2"
      ],
      "interruptions": [
        {
          "spacing": "random",
          "numInterruptions": 3,
          "components": [
            "attentionCheck"
          ]
        }
      ]
    }
  ]
}
Step 14: Add skip logic
Skip logic lets a study respond to a participant's answer. You can use it to branch around questions that do not apply, end a block when someone fails an attention check, or send participants to a follow-up task. The exact skip condition shapes are listed in SkipConditions.
First, add exampleWithAnswer.
"components": {
  "welcome": { ... },
  "consent": { ... },
  ...,
  "attentionCheck": { ... },
  "exampleWithAnswer": {
    "type": "questionnaire",
    "response": [
      {
        "id": "q-example-1",
        "type": "numerical",
        "prompt": "What is 2 + 2?"
      }
    ]
  }
}
Then add a skip block to the sequence:
"sequence": {
  "order": "fixed",
  "components": [
    "welcome",
    "consent",
    ...,
    {
      "id": "skipResponse",
      "order": "fixed",
      "components": [
        "exampleWithAnswer",
        "example1"
      ],
      "skip": [
        {
          "name": "exampleWithAnswer",
          "check": "response",
          "responseId": "q-example-1",
          "value": 4,
          "comparison": "notEqual",
          "to": "end"
        }
      ]
    }
  ]
}
This block asks the participant What is 2 + 2?. If the response is not equal to 4, reVISit skips to the end of this nested block. If the response is 4, the participant continues to example1.
The responseId must match the response id inside exampleWithAnswer.
Step 15: Add the microphone library and audio settings
Finally, add the microphone check library and turn on audio recording for the study.
Add importedLibraries after studyMetadata:
"importedLibraries": [
  "mic-check"
],
Then add recordAudio to uiConfig:
"uiConfig": {
  "recordAudio": true,
  "contactEmail": "contact@revisit.dev",
  "helpTextPath": "tutorial/assets/help.md",
  "logoPath": "revisitAssets/revisitLogoSquare.svg",
  "withProgressBar": true,
  "autoDownloadStudy": false,
  "withSidebar": true
}
Add the microphone check component to the sequence after consent:
"sequence": {
  "order": "fixed",
  "components": [
    "welcome",
    "consent",
    "$mic-check.components.audioTest",
    "demographics",
    ...
  ]
}
The ${library}.components.X syntax references a component defined in an imported library. The $ prefix tells reVISit to look up the component in the library namespace rather than in your local components object. The same syntax works for sequences (${library}.sequences.X).
Because uiConfig.recordAudio enables audio recording for the study, turn audio recording off for the welcome and consent pages:
"components": {
  "welcome": {
    "type": "markdown",
    "recordAudio": false,
    "path": "tutorial/assets/welcome.md",
    "response": []
  },
  "consent": {
    "type": "markdown",
    "recordAudio": false,
    "path": "tutorial/assets/consent.md",
    "nextButtonText": "I agree",
    "response": []
  },
  ...
}