Stage Management
Overview
Stage Management helps you organize participants into different parts of your study. It’s useful for studies that have multiple sections or happen over time. Using stages makes it easier to track, filter, and analyze participants based on when they took part in the study, either as a pilot participant or during different phases of data collection.
Getting Started
Go to the Manage tab under Analysis and open the Stage Management section.
All studies start with a DEFAULT stage, which cannot be removed. The default color is orange (#F05A30), but you can change it if you want.
Adding a New Stage
- Click the Add New Stage button.

- Enter a stage name and pick a color. You can type a color code or choose one from the color picker.
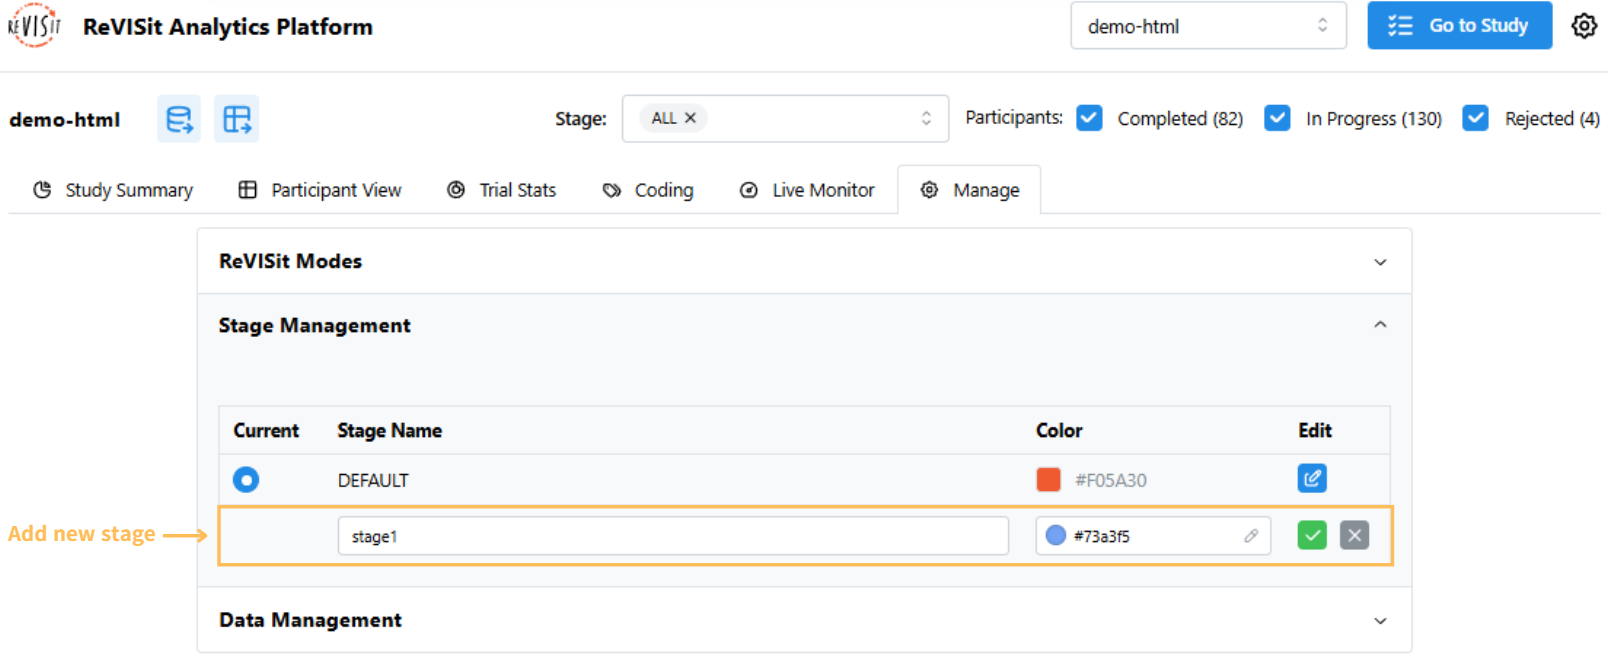
- Click the green check mark to save.
Stage names cannot be DEFAULT, ALL, or N/A.
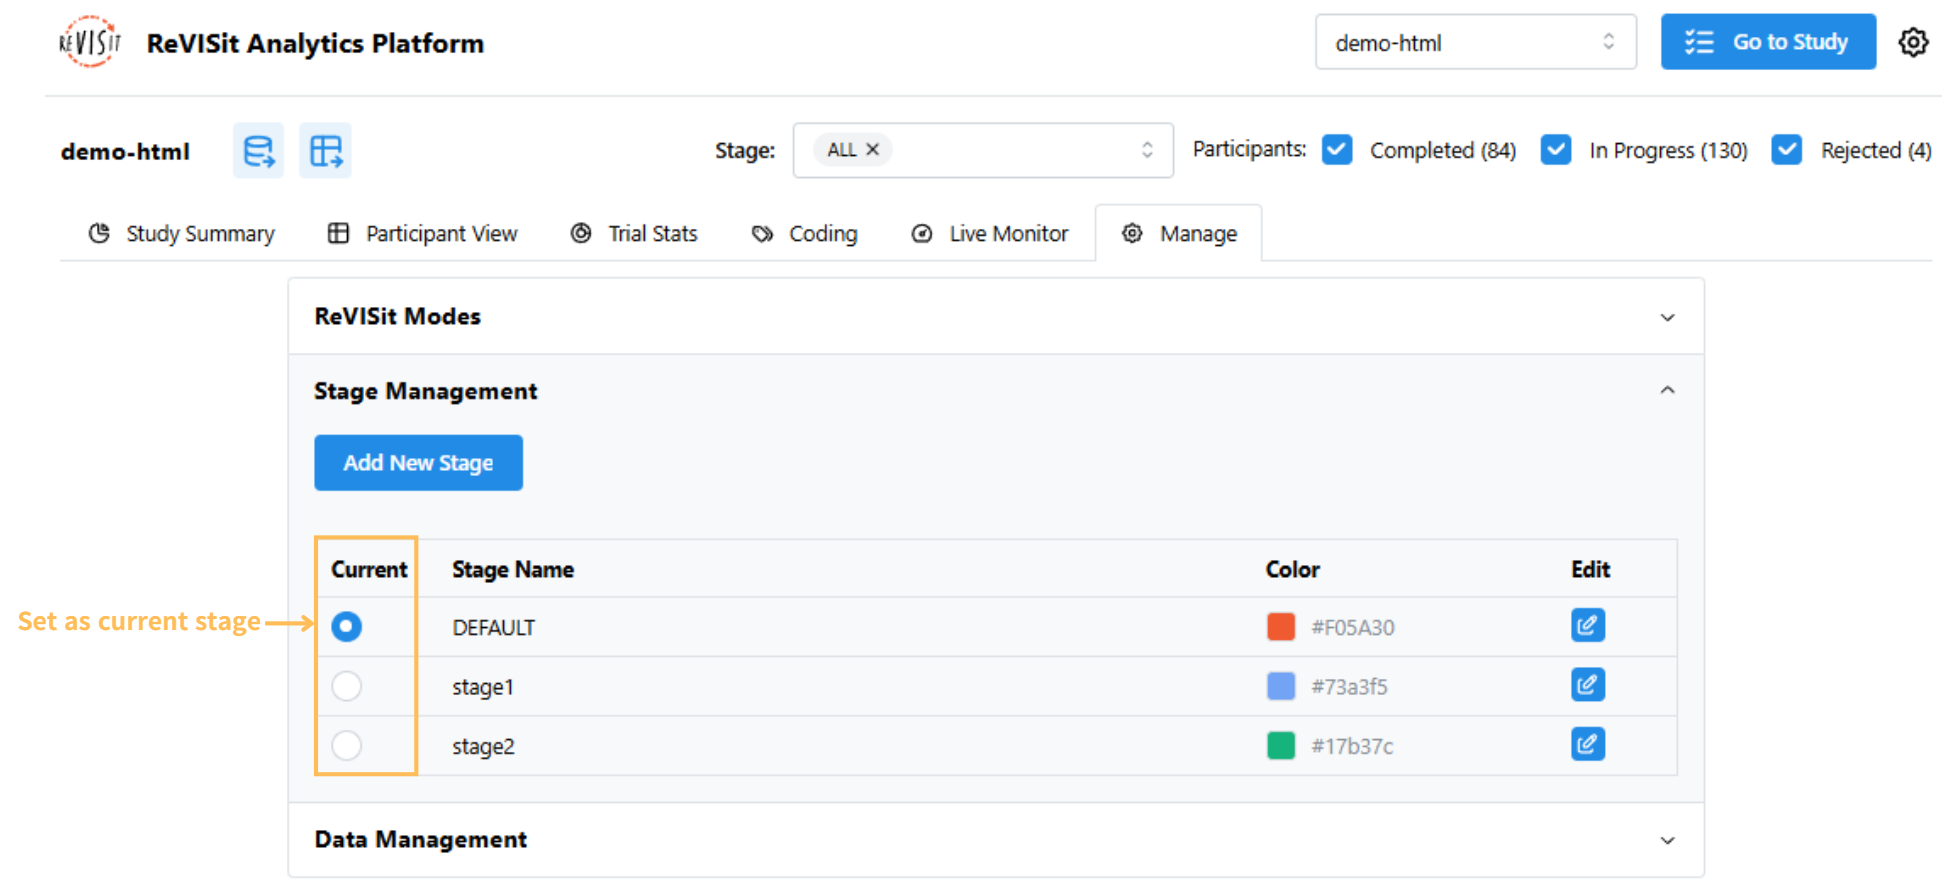
Setting the Current Stage
The current stage determines where all new participants will be added. To set a stage as the current one, simply click the radio button next to the stage you want. Once selected, any participants added afterward will automatically be placed in this stage.
Changing Stage Colors
Each stage has a color to help you identify it in the analysis views. To change a stage color:
- Click the edit icon.
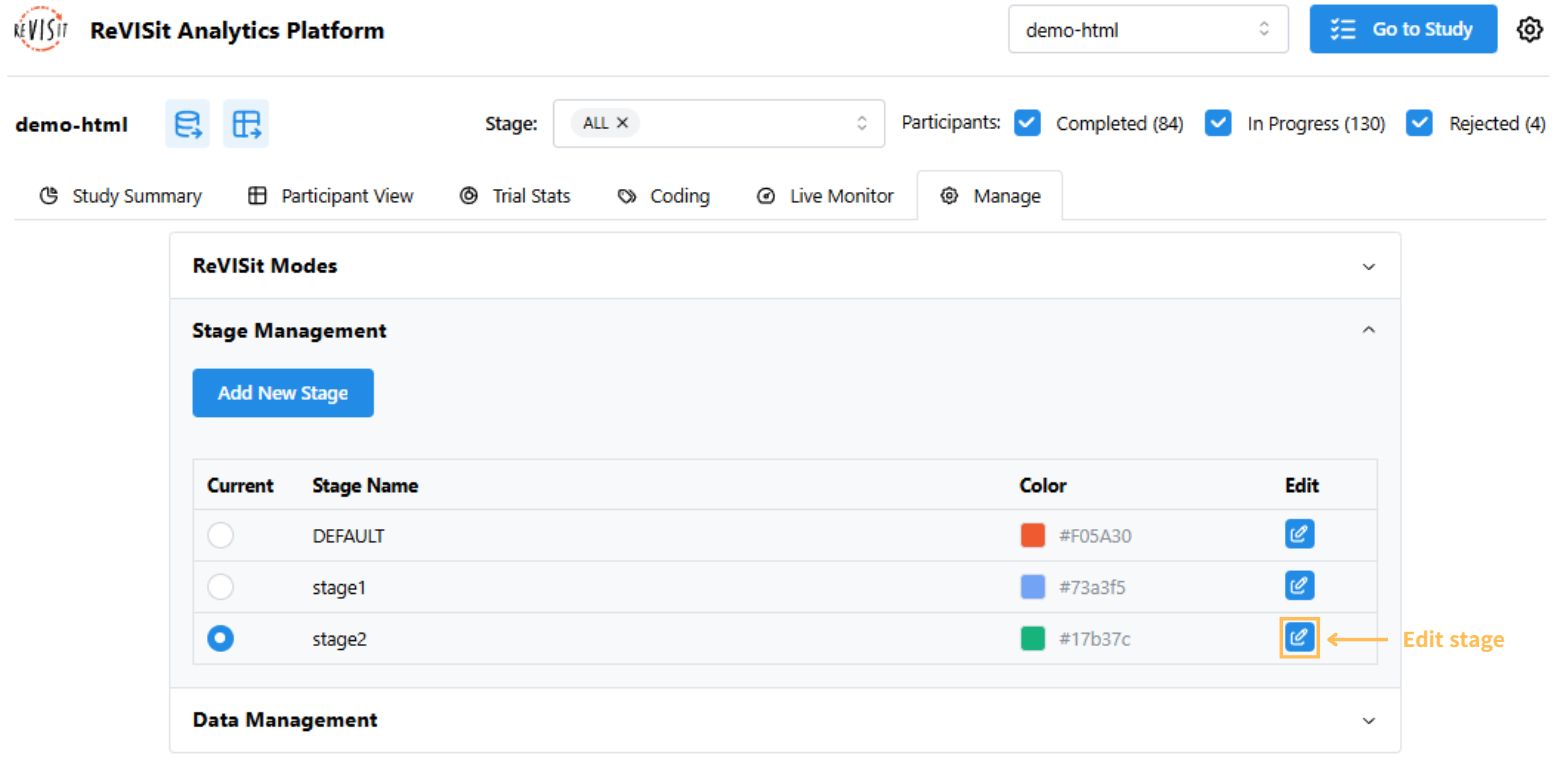
-
Pick a new color or enter a color code.
-
Click the green check mark to save.

Stage names cannot be changed after you create them, but you can always change the color.
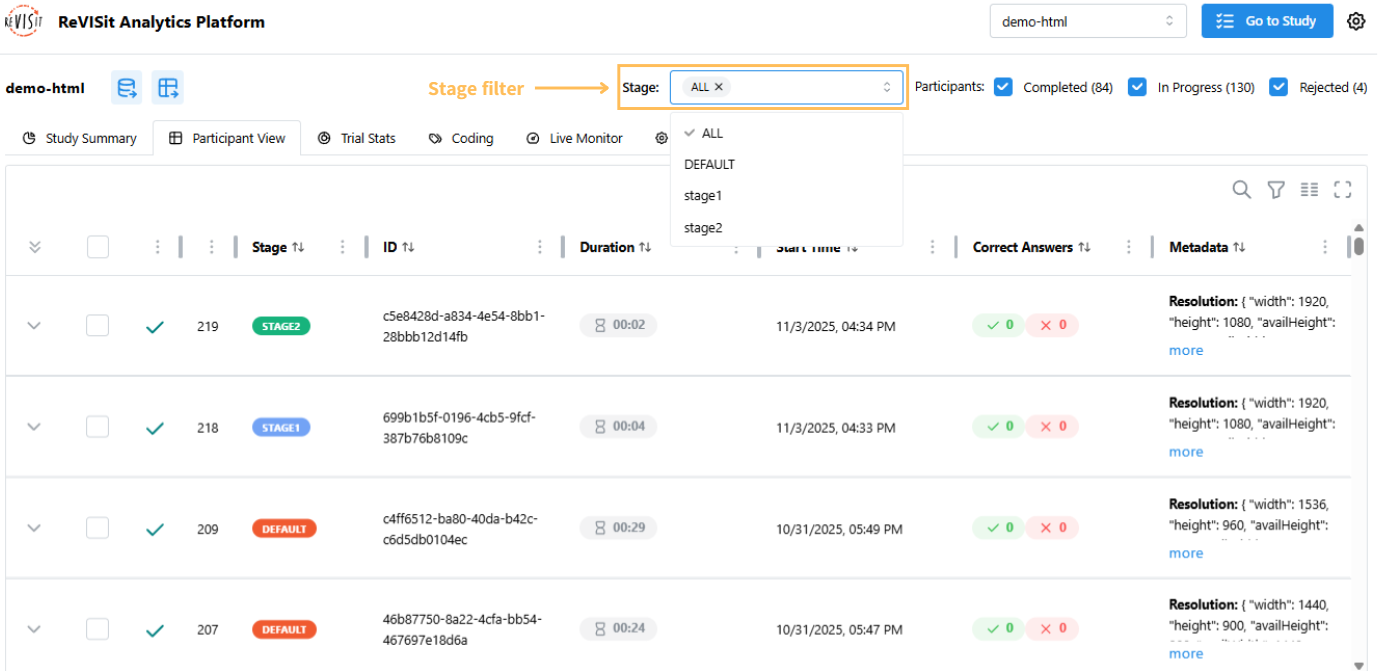
Stage Filter in Participant View
Each participant’s stage is shown in the table, making it easy to see and group participants. You can filter by stage using the filter at the top and select one or more stages.