replication-config.json
In this part of the tutorial, you will build a Study Config for a replication study, public/tutorial/replication-config.json. The completed version is public/tutorial/_answers/replication-config.json. Use the completed version to check the step you just finished, not as something to copy all at once.
Before you start editing tutorial files, complete the Installation guide using the Starting from the Template Repository workflow. If you have not done so already, finish the config.json tutorial first, then come back to this page.
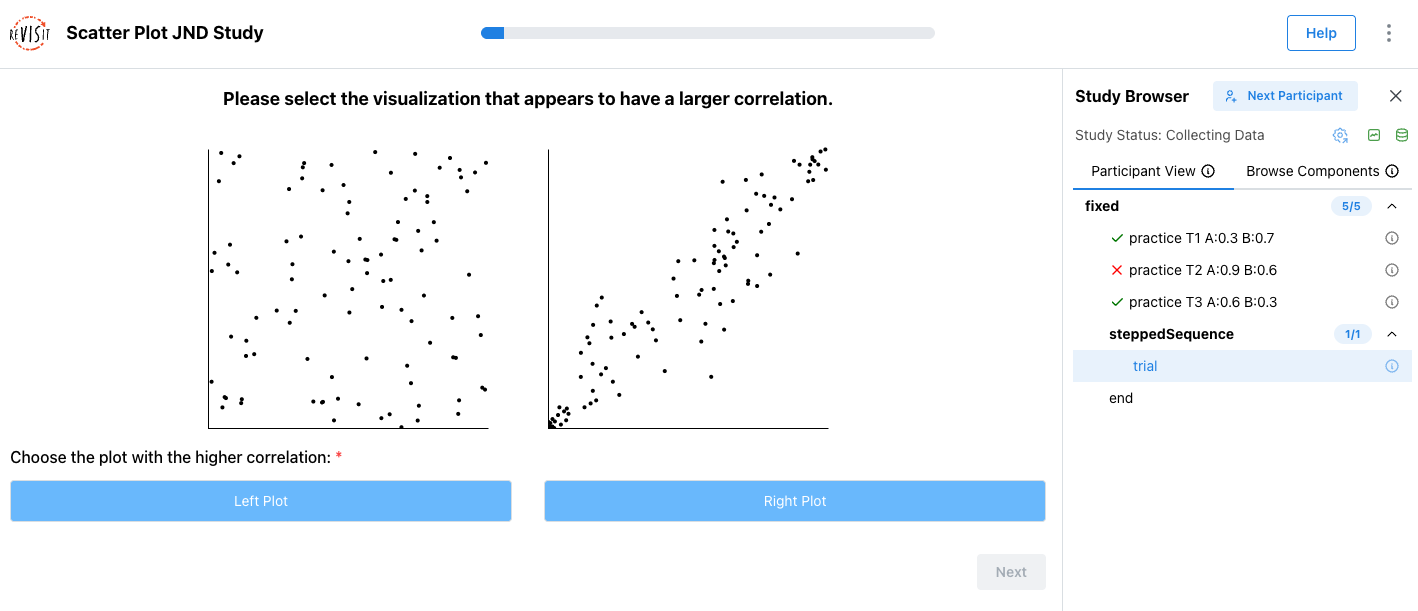
In this tutorial, we will build an example that looks more like a real study. The study asks participants to compare two scatterplots and choose which one appears to have the larger correlation.
The study starts with three practice trials so participants can learn the task before the main trials begin. After that, the study uses a dynamic block sequence: if a participant answers correctly, the next comparison becomes harder; if they answer incorrectly, the next comparison becomes easier. This lets the study adapt to each participant’s performance while it is running.
Step 1: Run the local server and register the config
Start the local server from the root of your template repository:
yarn serve
Before editing the replication Study Config, open public/global.json. Add replication to configsList and configs.
{
  "$schema": "https://raw.githubusercontent.com/revisit-studies/study/v2.4.3/src/parser/GlobalConfigSchema.json",
  "configsList": [
    "tutorial",
    "replication"
  ],
  "configs": {
    "tutorial": {
      "path": "tutorial/config.json"
    },
    "replication": {
      "path": "tutorial/replication-config.json"
    }
  }
}
Open http://localhost:8080. You should now see the replication study listed.
Step 2: Add the reusable scatter plot base component
First, navigate to src/public/tutorial/assets/replication/ and open ScatterWrapper.tsx.
This file contains an empty placeholder for now. We will write a wrapper component that renders two scatter plots side by side.
The scatter plots use pre-generated datasets from public/tutorial/assets/datasets/size_100. Each file contains 100 points with a specific correlation value, and the file names follow the pattern dataset_{correlation}_size_100.csv.
The individual scatter plot component is already written in Scatter.tsx. Scatter.tsx loads one dataset file and renders it as a D3 scatter plot.
/**
 * Authors: The ReVISit team
 * Description:
 *    This file is the wrapper component for the Scatter plots
 */

import {
  Center, Group, Stack, Text,
} from '@mantine/core';
import { Scatter } from './Scatter';
import { StimulusParams } from '../../../../store/types';

/**
 * Holds 2 Scatter Plots
 * @param param0 - r1 is the correlation value for 1, r2 is the correlation value for 2,
 * onClick is a function that determines the functionality when a graph is clicked.
 * @returns 2 Scatter Plots
 */
export default function ScatterWrapper({ parameters }: StimulusParams<{ r1: number; r2: number }>) {
  const { r1, r2 } = parameters;
  const r1DatasetName = `dataset_${r1.toFixed(2)}_size_100.csv`;
  const r2DatasetName = `dataset_${r2.toFixed(2)}_size_100.csv`;

  return (
    <Stack style={{ width: '100%', height: '100%' }}>
      <Text style={{
        textAlign: 'center', paddingBottom: '0px', fontSize: '18px', fontWeight: 'bold',
      }}
      >
        Please select the visualization that appears to have a larger correlation.
      </Text>
      <Center>
        <Group style={{ gap: '40px' }} mb="md">
          <Scatter r={r1} datasetName={r1DatasetName} />
          <Scatter r={r2} datasetName={r2DatasetName} />
        </Group>
      </Center>
    </Stack>
  );
}
This wrapper reads r1 and r2 from the component parameters, converts them into dataset file names, and renders two scatter plots side by side.
Now, let's go to public/tutorial/replication-config.json.
We have used components in config.json. In replication-config.json, we will learn how to use baseComponents to define reusable component templates and repeat them with different parameters.
Replace the empty baseComponents object with scatterBase.
"baseComponents": {
  "scatterBase": {
    "type": "react-component",
    "path": "tutorial/assets/replication/ScatterWrapper.tsx",
    "response": [
      {
        "id": "buttonsResponse",
        "type": "buttons",
        "prompt": "Choose the plot with the higher correlation:",
        "required": true,
        "location": "belowStimulus",
        "options": [
          {
            "label": "Left Plot",
            "value": "left"
          },
          {
            "label": "Right Plot",
            "value": "right"
          }
        ]
      }
    ]
  }
}
baseComponents are templates. They are not added to the sequence directly. Other components inherit from them via "baseComponent": "scatterBase" and override only the fields that change, usually parameters.
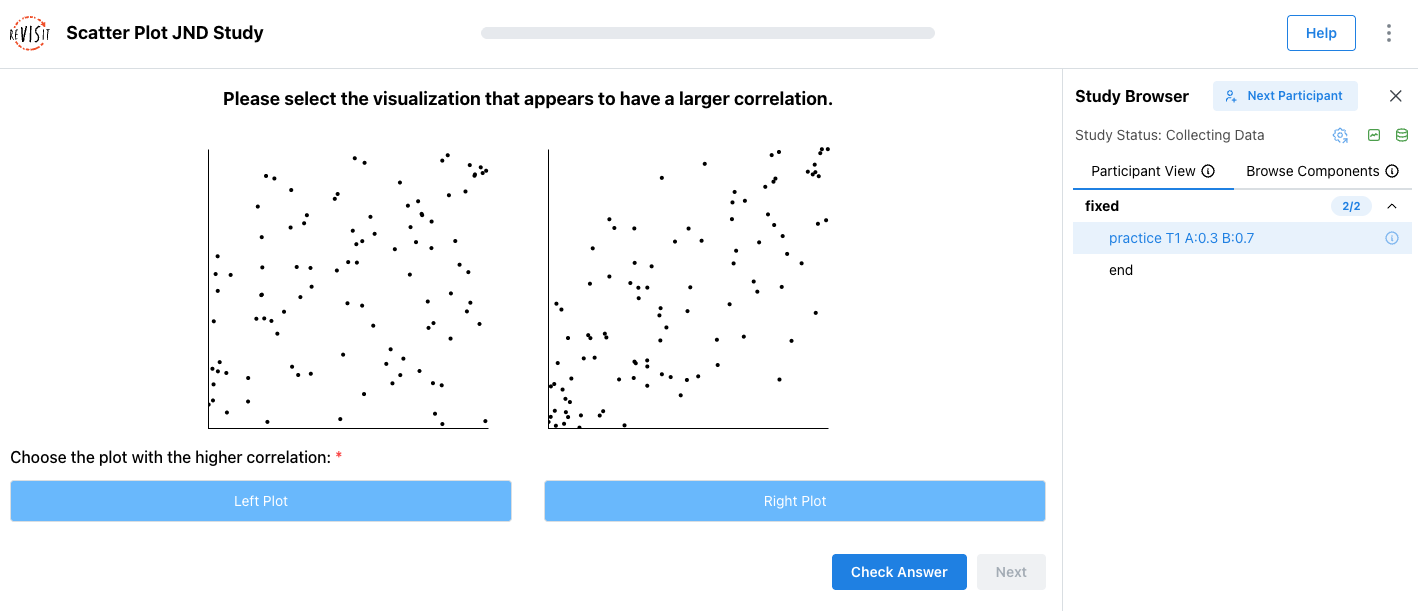
Step 3: Add the first component (practice T1 A:0.3 B:0.7)
Let’s add the first component using baseComponent. Replace the empty components object with the first practice trial.
"components": {
  "practice T1 A:0.3 B:0.7": {
    "baseComponent": "scatterBase",
    "parameters": {
      "r1": 0.3,
      "r2": 0.7
    },
    "correctAnswer": [
      {
        "id": "buttonsResponse",
        "answer": "right"
      }
    ],
    "provideFeedback": true
  }
}
This trial inherits the stimulus and response from scatterBase. The parameters values tell the React component which correlations to show in the left and right plots.
For this practice trial, r2 is larger than r1, so the correct answer is "right". The id in correctAnswer must match the response id from the base component: buttonsResponse.
Add the component to the sequence.
"sequence": {
    "order": "fixed",
    "components": [
      "practice T1 A:0.3 B:0.7"
    ]
  }
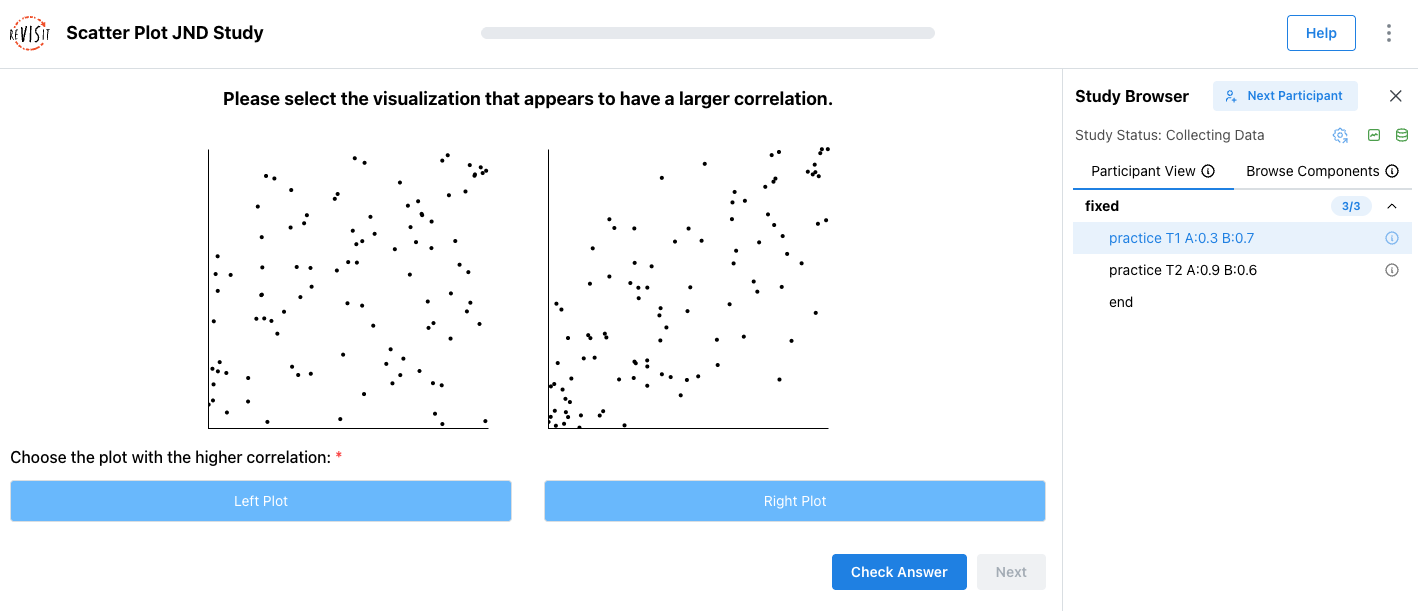
Step 4: Add the second component (practice T2 A:0.9 B:0.6)
Add a comma after the first component, then add the second component. This time, use 0.9 for r1 and 0.6 for r2.
"components": {
  "practice T1 A:0.3 B:0.7": { ... },
  "practice T2 A:0.9 B:0.6": {
    "baseComponent": "scatterBase",
    "parameters": {
      "r1": 0.9,
      "r2": 0.6
    },
    "correctAnswer": [
      {
        "id": "buttonsResponse",
        "answer": "left"
      }
    ],
    "provideFeedback": true
  }
}
This trial uses the same base component, but with different correlation values. Here, r1 is larger than r2, so the correct answer is "left".
Add the second practice trial to the same fixed sequence block:
"sequence": {
    "order": "fixed",
    "components": [
      "practice T1 A:0.3 B:0.7",
      "practice T2 A:0.9 B:0.6"
    ]
  }
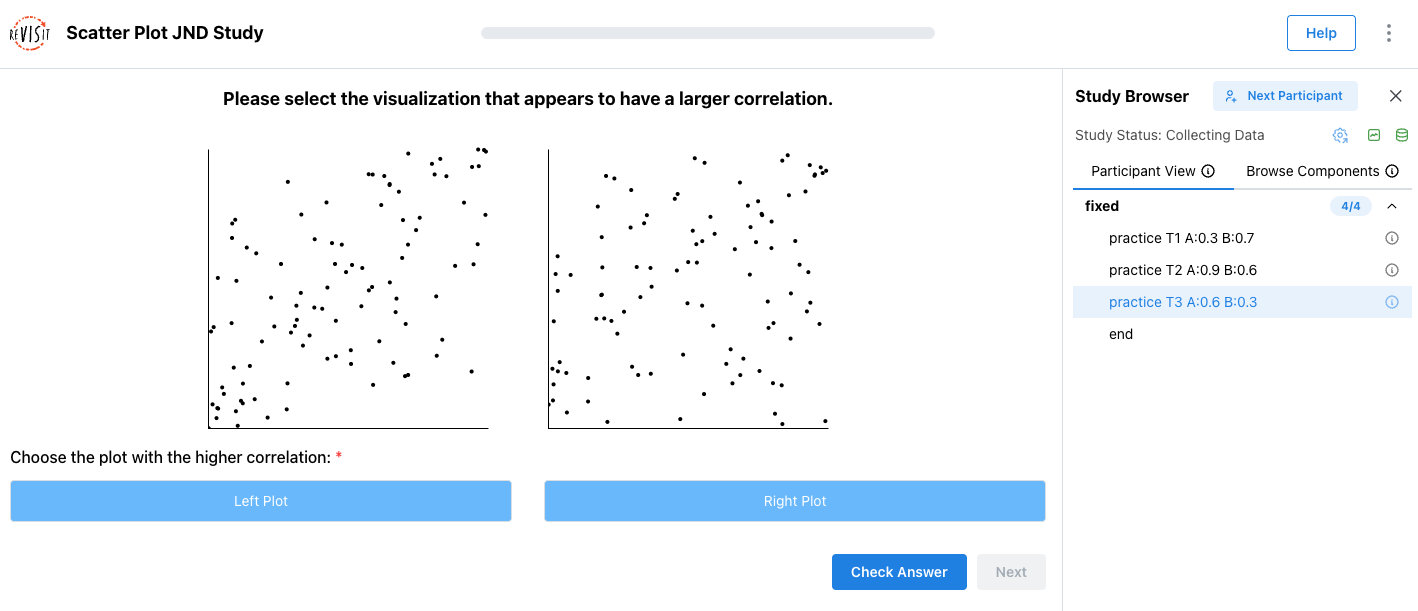
Step 5: Add the third component (practice T3 A:0.6 B:0.3)
Add the third component after the second.
"components": {
  "practice T1 A:0.3 B:0.7": { ... },
  "practice T2 A:0.9 B:0.6": { ... },
  "practice T3 A:0.6 B:0.3": {
    "baseComponent": "scatterBase",
    "parameters": {
      "r1": 0.6,
      "r2": 0.3
    },
    "correctAnswer": [
      {
        "id": "buttonsResponse",
        "answer": "left"
      }
    ],
    "provideFeedback": true
  }
}
Again, this trial inherits from scatterBase. The left plot has the higher correlation, so the answer is "left".
Add the third practice trial to the sequence:
"sequence": {
    "order": "fixed",
    "components": [
      "practice T1 A:0.3 B:0.7",
      "practice T2 A:0.9 B:0.6",
      "practice T3 A:0.6 B:0.3"
    ]
  }
All three practice trials use provideFeedback, so participants can learn what the task is asking before the study moves on to the next section.
Step 6: Add the Dynamic JND Block
This is the exciting part of the tutorial: building a dynamic block for the sequence.
A regular sequence lists every component ahead of time. A dynamic block works differently. Instead of listing all trials in the config, it calls a function while the study is running. That function can look at the participant’s previous answers and decide which component should appear next.
In this replication study, the dynamic block will adapt the scatterplot comparison. The participant always sees two scatterplots and chooses which one has the stronger correlation. If they answer correctly, the next comparison becomes harder by making the two correlations more similar. If they answer incorrectly, the next comparison becomes easier.
Navigate to src/public/tutorial/assets/replication/ and open JNDDynamic.tsx.
This file currently contains a placeholder. We will replace it with a jump function that returns the next trial. The function returns:
component: the component to show nextparameters: the values passed into that trial, such asr1andr2, which represent the correlation values for the two scatterplotscorrectAnswer: the correct button response for the generated trial
import { JumpFunctionParameters, JumpFunctionReturnVal, StoredAnswer } from '../../../../store/types';

const findLatestTrial = (allDynamicAnswers: StoredAnswer[]) => {
    const trials = allDynamicAnswers
        .sort((a, b) => parseInt(a.trialOrder.split('_').at(-1) || '0', 10) - parseInt(b.trialOrder.split('_').at(-1) || '0', 10));

    return trials.at(-1)!;
};

export default function func({ answers }: JumpFunctionParameters<{ r1: number, r2: number, counter: number }>): JumpFunctionReturnVal {
    const allDynamicAnswers = Object.values(answers)
        .filter((answer) => answer.componentName === 'trial');

    // First trial
    if (allDynamicAnswers.length === 0) {
        return {
            component: 'trial',
            parameters: {
                r1: 0.1,
                r2: 0.9,
            },
            correctAnswer: [{ id: 'buttonsResponse', answer: 'right' }],
        };
    }

    if (allDynamicAnswers.length === 9) {
        return { component: null };
    }

    const latestTrial = findLatestTrial(allDynamicAnswers);

    const right = latestTrial.parameters.r2 === 0.9;

    const approachingValue = right ? latestTrial.parameters.r1 + 0.1 : latestTrial.parameters.r2 + 0.1;

    const r1 = right ? 0.9 : approachingValue;
    const r2 = right ? approachingValue : 0.9;

    return {
        component: 'trial',
        parameters: {
            r1,
            r2,
        },
        correctAnswer: [{ id: 'buttonsResponse', answer: right ? 'left' : 'right' }],
    };
}
This function looks at the participant’s previous answers within the dynamic block. It starts with a large correlation difference, using 0.1 for one scatterplot and 0.9 for the other. If the participant answers correctly, the function makes the lower correlation value a little higher, so the two scatterplots look more similar and the next task becomes harder. The dynamic block stops after nine trials.
Before adding the dynamic block to the sequence, add a reusable dynamic trial component named trial. The jump function will return this component each time it generates a new dynamic trial.
"components": {
  "practice T1 A:0.3 B:0.7": { ... },
  "practice T2 A:0.9 B:0.6": { ... },
  "practice T3 A:0.6 B:0.3": { ... },
  "trial": {
    "baseComponent": "scatterBase"
  }
}
The trial component inherits from scatterBase; the dynamic function will provide its parameters and correctAnswer while the study is running.
Make sure to add the trial component. The dynamic block will fail if trial is not defined in components.
Then, inside the sequence, add the dynamic block after the three practice trials.
"sequence": {
    "order": "fixed",
    "components": [
      "practice T1 A:0.3 B:0.7",
      "practice T2 A:0.9 B:0.6",
      "practice T3 A:0.6 B:0.3",
      {
        "order": "dynamic",
        "id": "steppedSequence",
        "functionPath": "tutorial/assets/replication/JNDDynamic.tsx",
        "parameters": {}
      }
    ]
  }