Connecting to Firebase
reVISit is inherently a serverless program. Because of this, we set up a storage engine in order to store the data that is gathered from users as they move through the study. While you can test the program locally without any storage, you will need to set up some sort of storage in order to save study participant data. Our intention is that those who create the study have full control over the data that is generated by participants -- no data is ever linked back to the reVISit repository or those who have contributed to its creation. See the Deployment section for more information about deploying your study to GitHub.io once the connection to Firebase has been set up.
Firebase is an app development platform that has extremely useful tools such as storage and real-time synchronization. With Firebase alone, a study creator can capture all data from participants and then export that data for further analysis. In what follows, there are two main products we will be using: the Firestore database and Firebase's storage product.
Create a Firebase Project
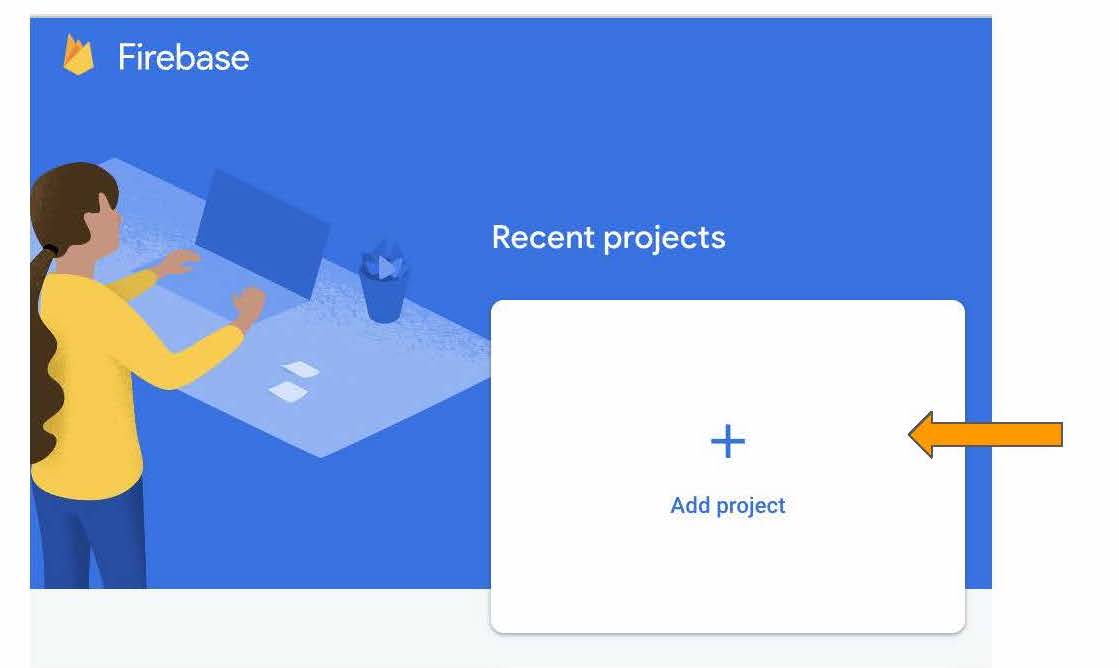
Navigate to Firebase and go to your console.

Create a new Firebase project
Name your Project Accordingly
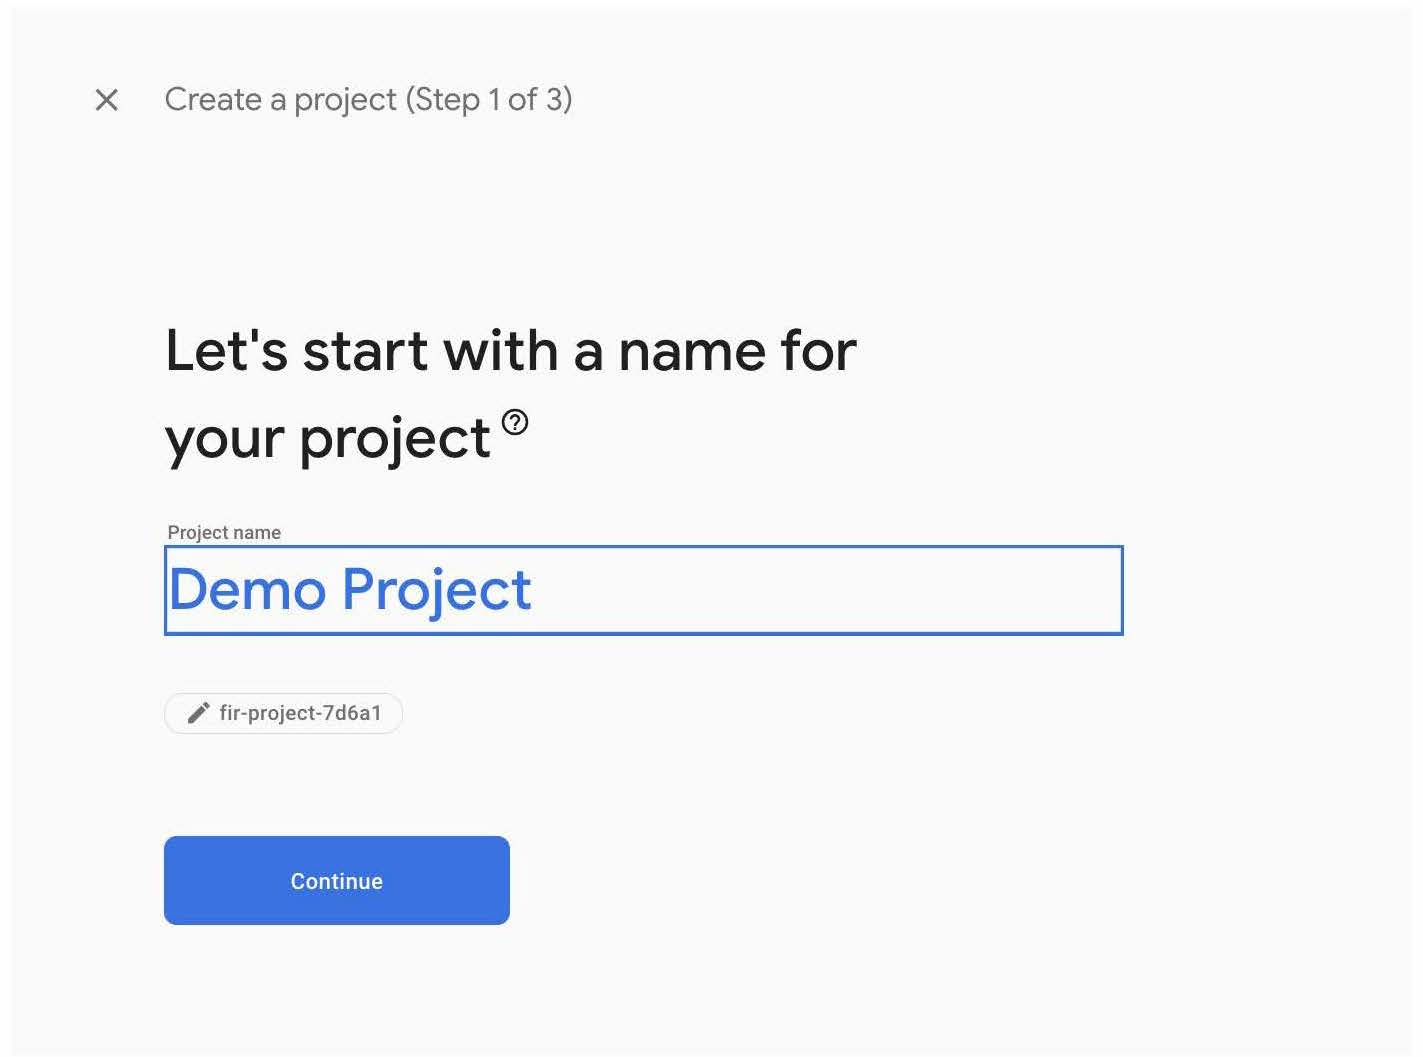
Enabling google analytics is not necessary. Feel free to disable this when prompted.
Adding a Firestore Database
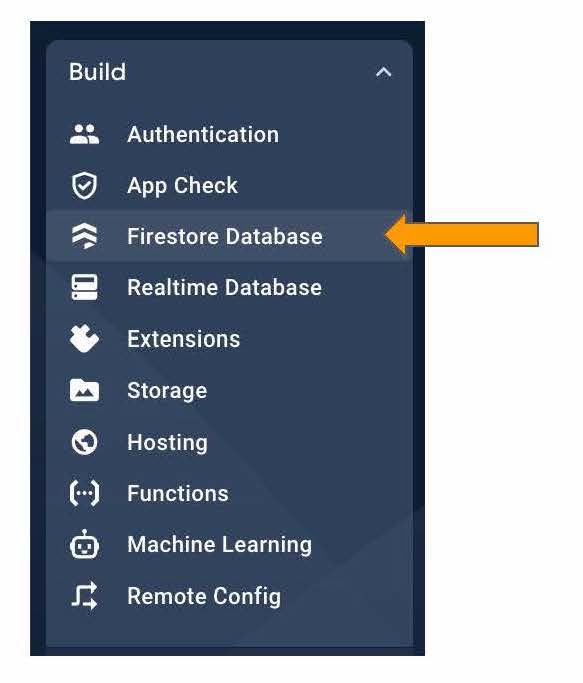
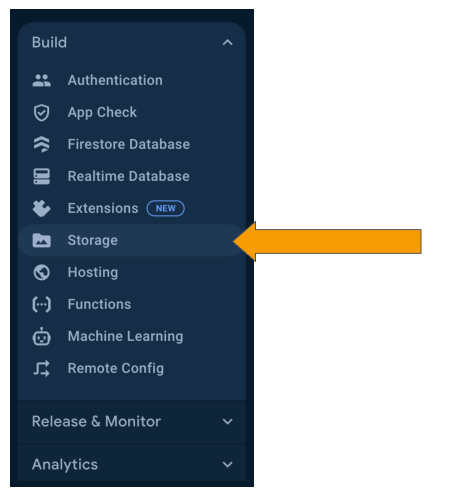
With your project created, we are now going to add a Firestore database to it. On the left-hand side, you should see a "Build" dropdown menu. From that, select "Firestore Database".
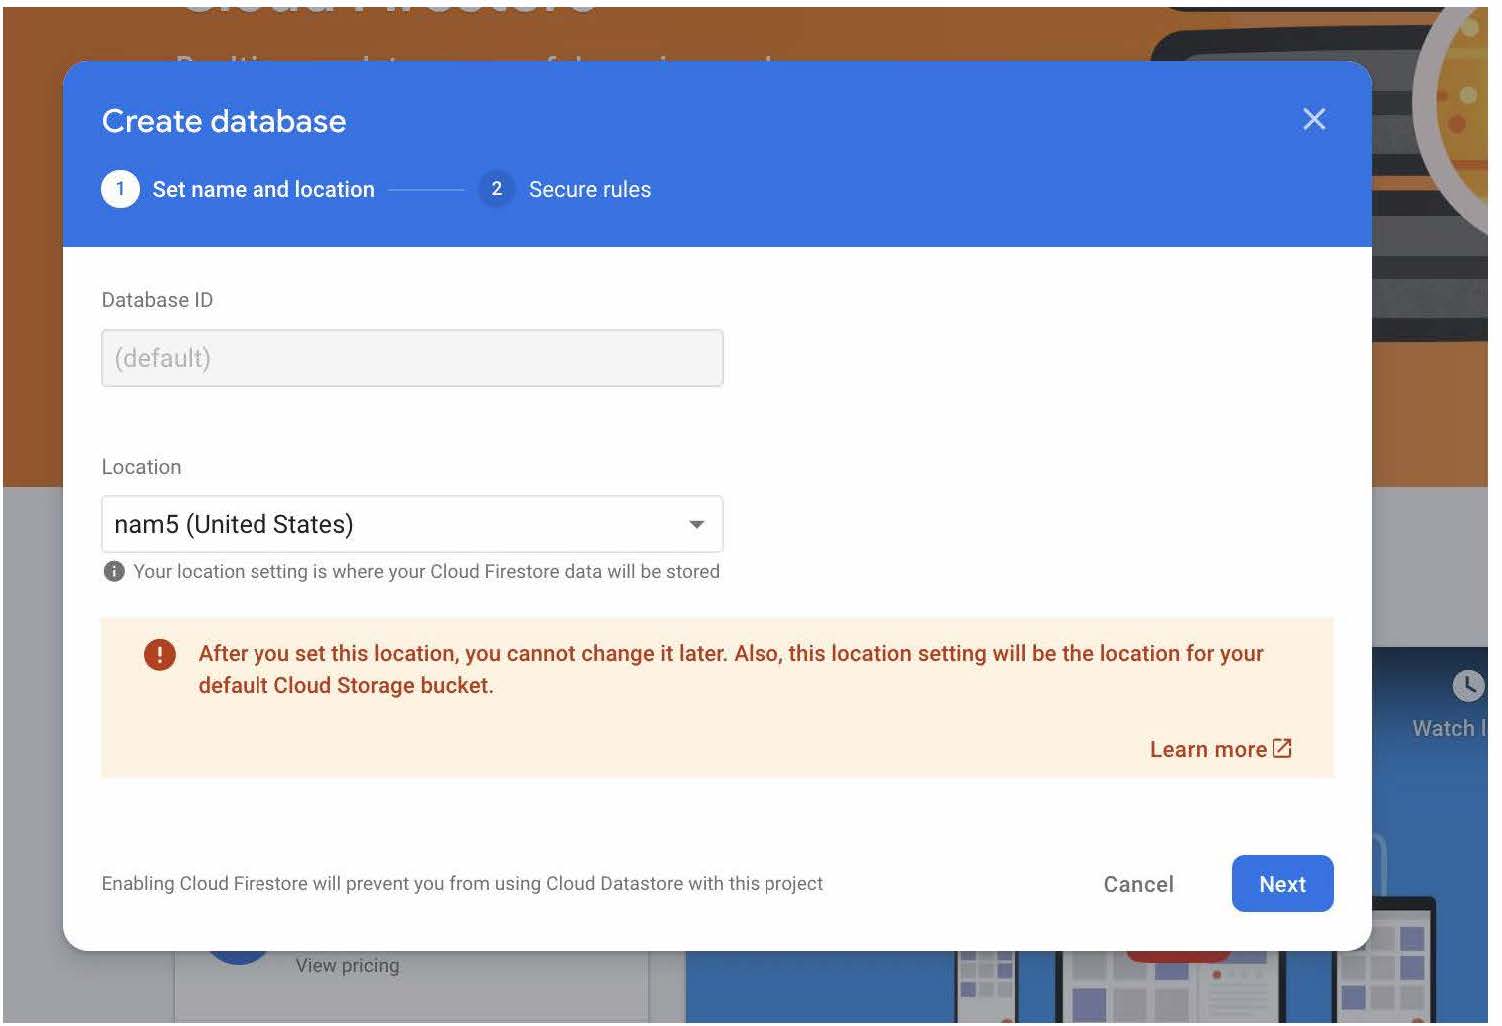
Click "Create Database" in the center of the screen.
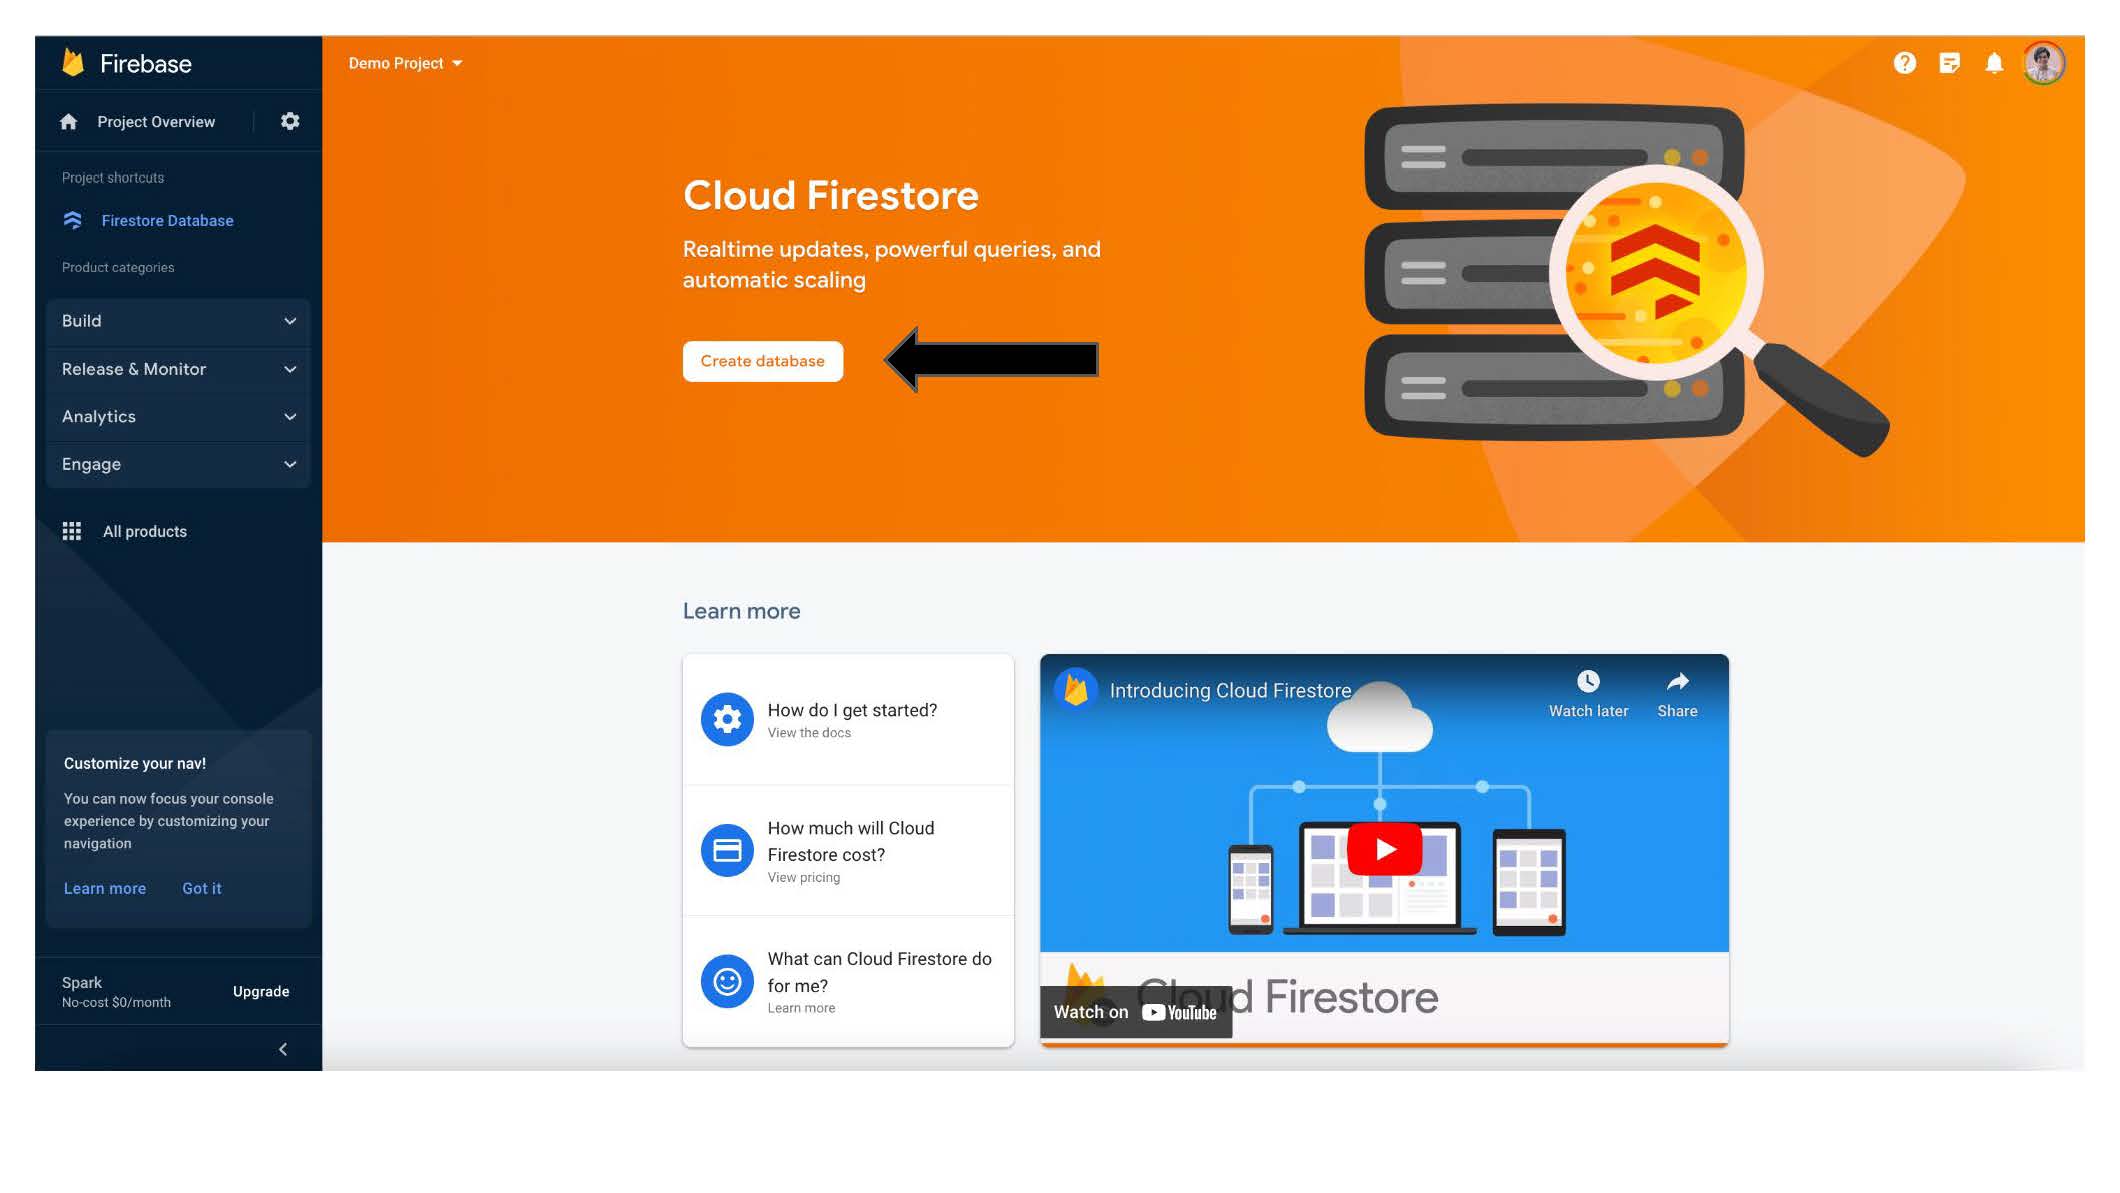
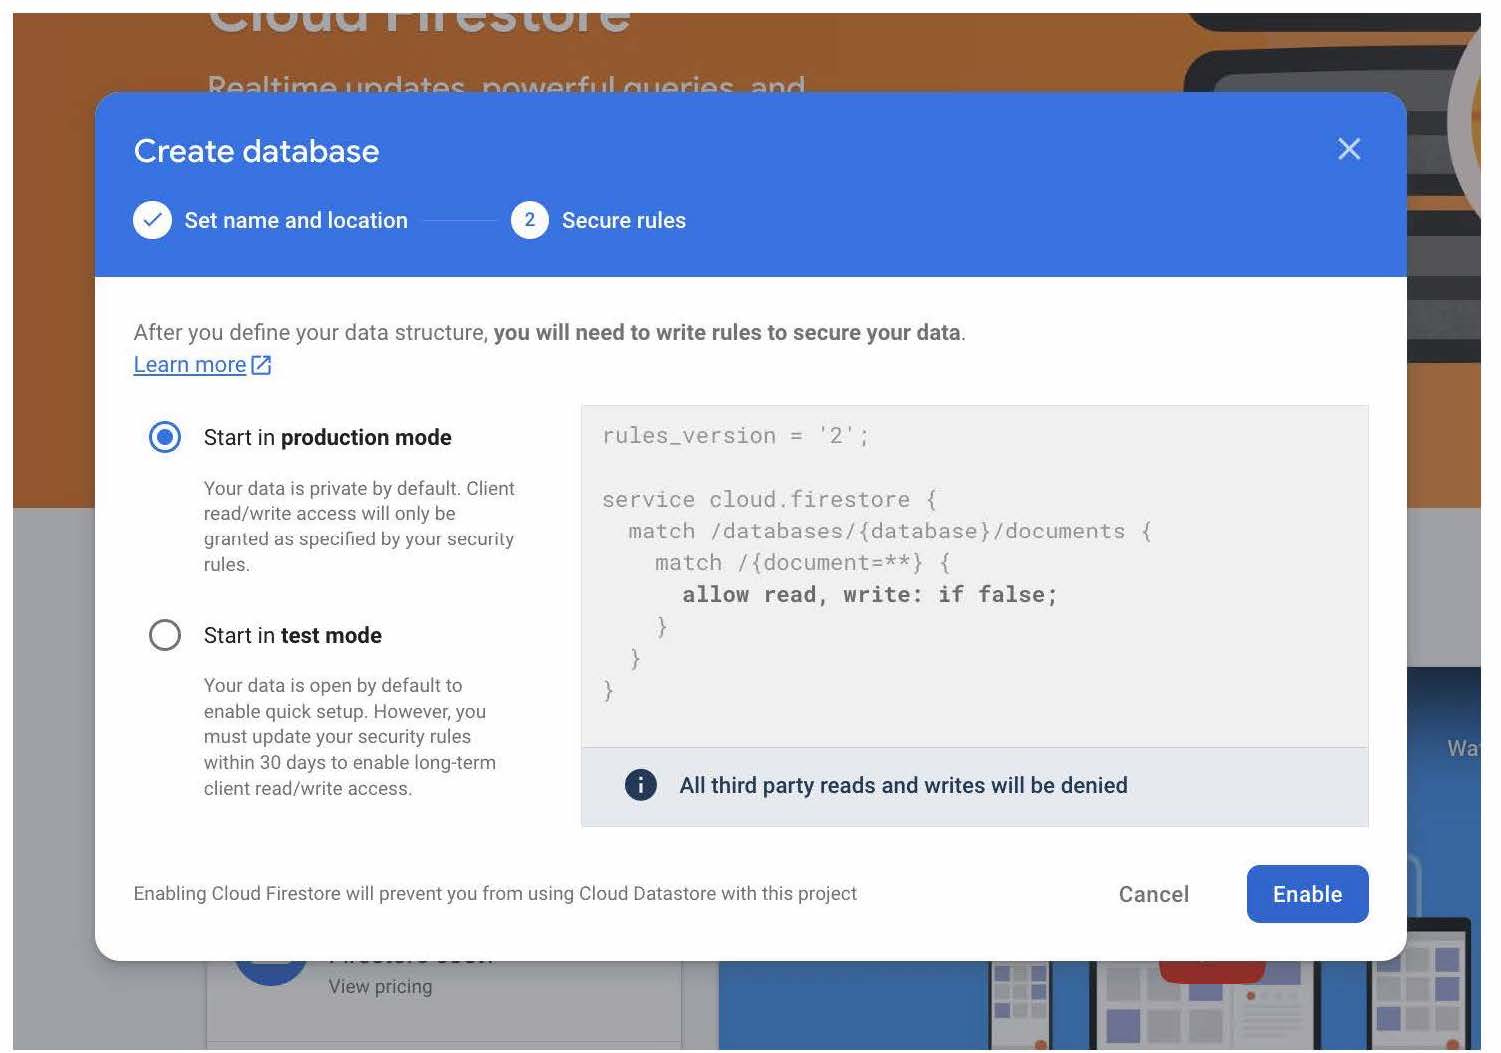
For the next two steps, there is no need to change the defaults. Simply click "Next" and then "Enable".
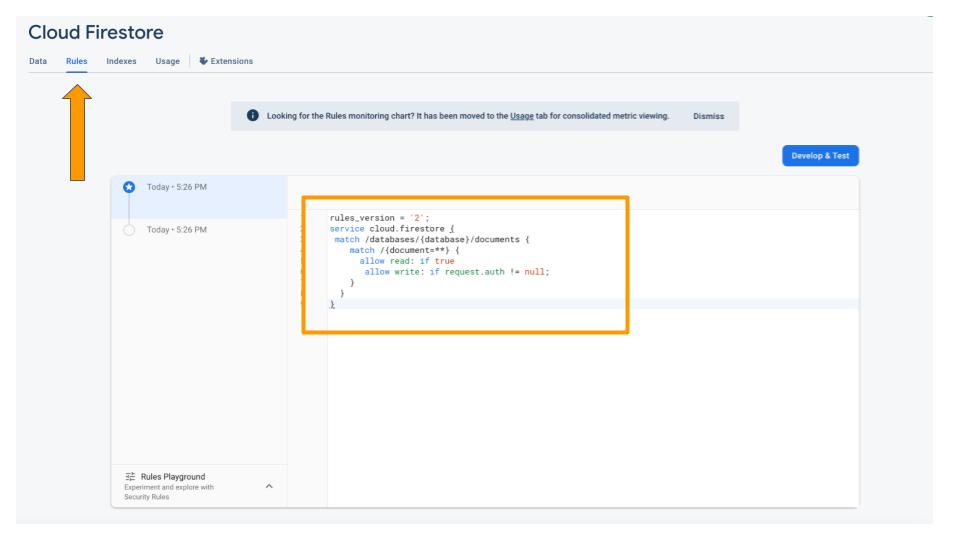
With the new database created, we'll want to change the read/write rules to only allow authenticated users to write to the database. Go to the 'rules' tab (second tab) and copy and paste the following code. Then click "publish".
rules_version = '2';
service cloud.firestore {
 match /databases/{database}/documents {
    match /{document=**} {
    	allow read: if true
      allow write: if request.auth != null;
    }
  }
}
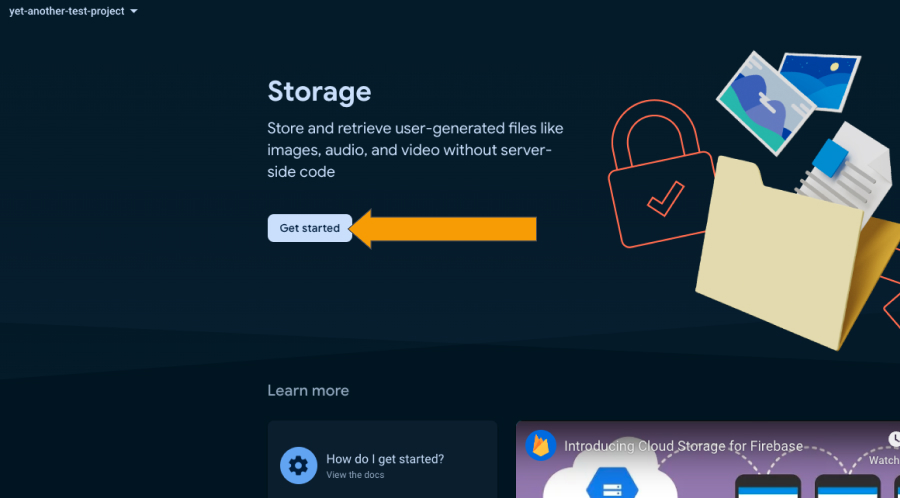
Adding Firebase Storage
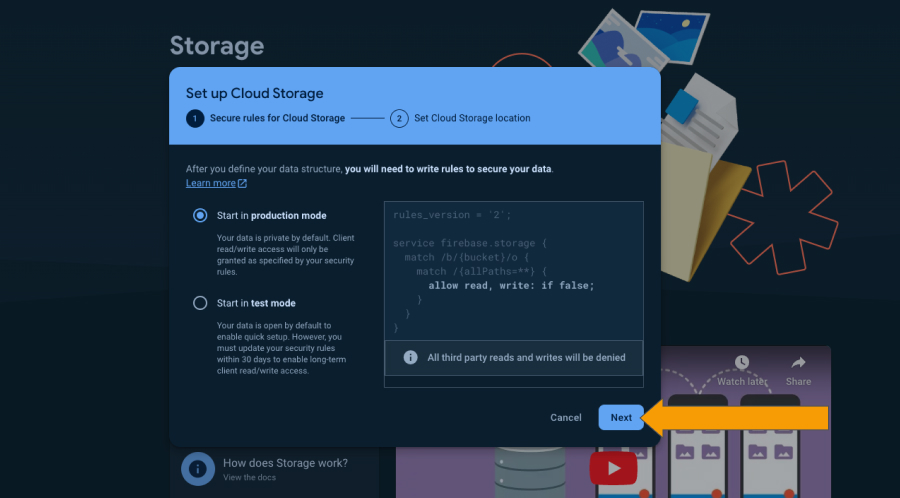
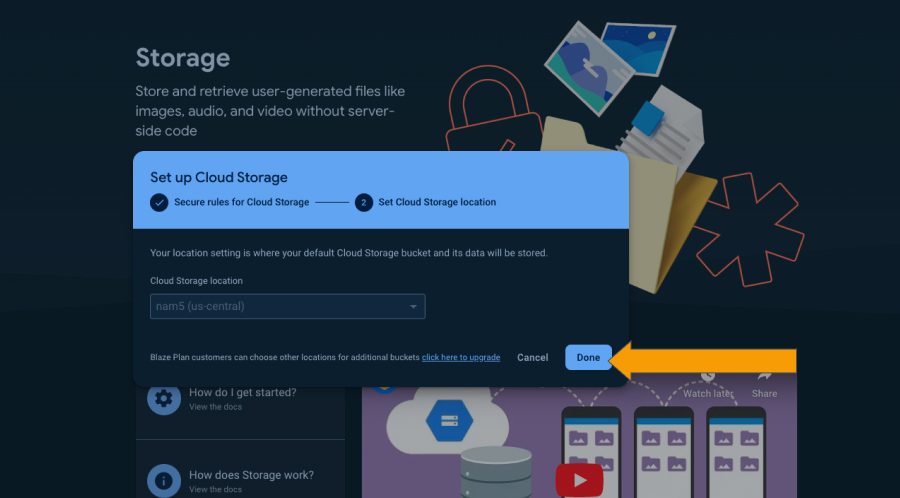
Once that is finished, we will enable standard Firebase storage. Click the "Build" dropdown menu again and navigate to "Storage". We can leave the options as their defaults.
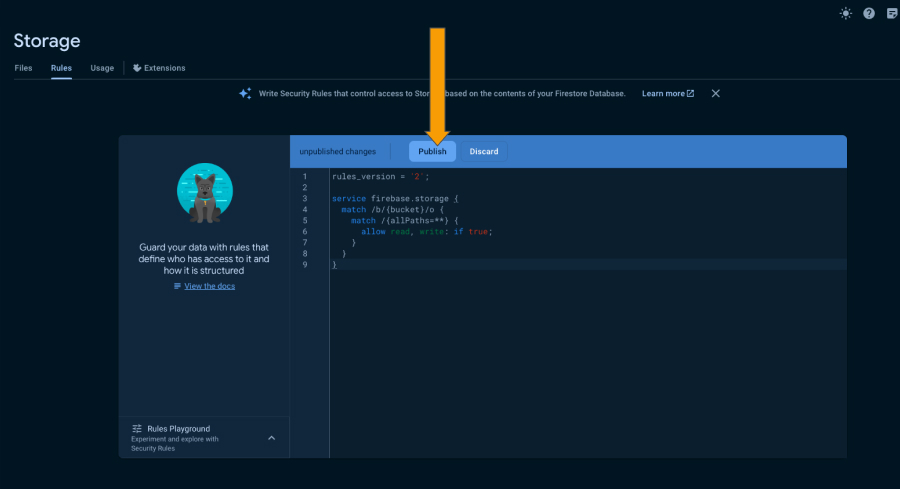
Once the storage product is enabled, navigate to the "rules" tab.
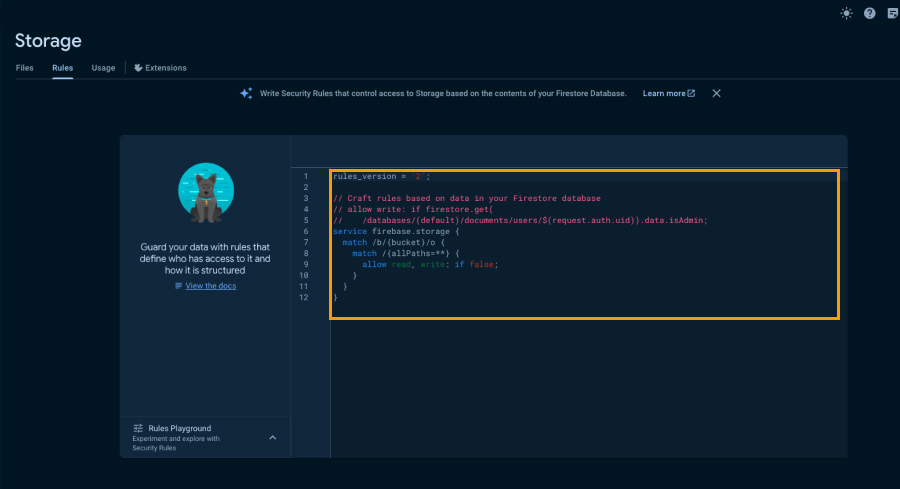
Replace the existing rule with the following code and then publish:
rules_version = '2';

service firebase.storage {
  match /b/{bucket}/o {
    match /{allPaths=**} {
      allow read, write: if true;
    }
  }
}
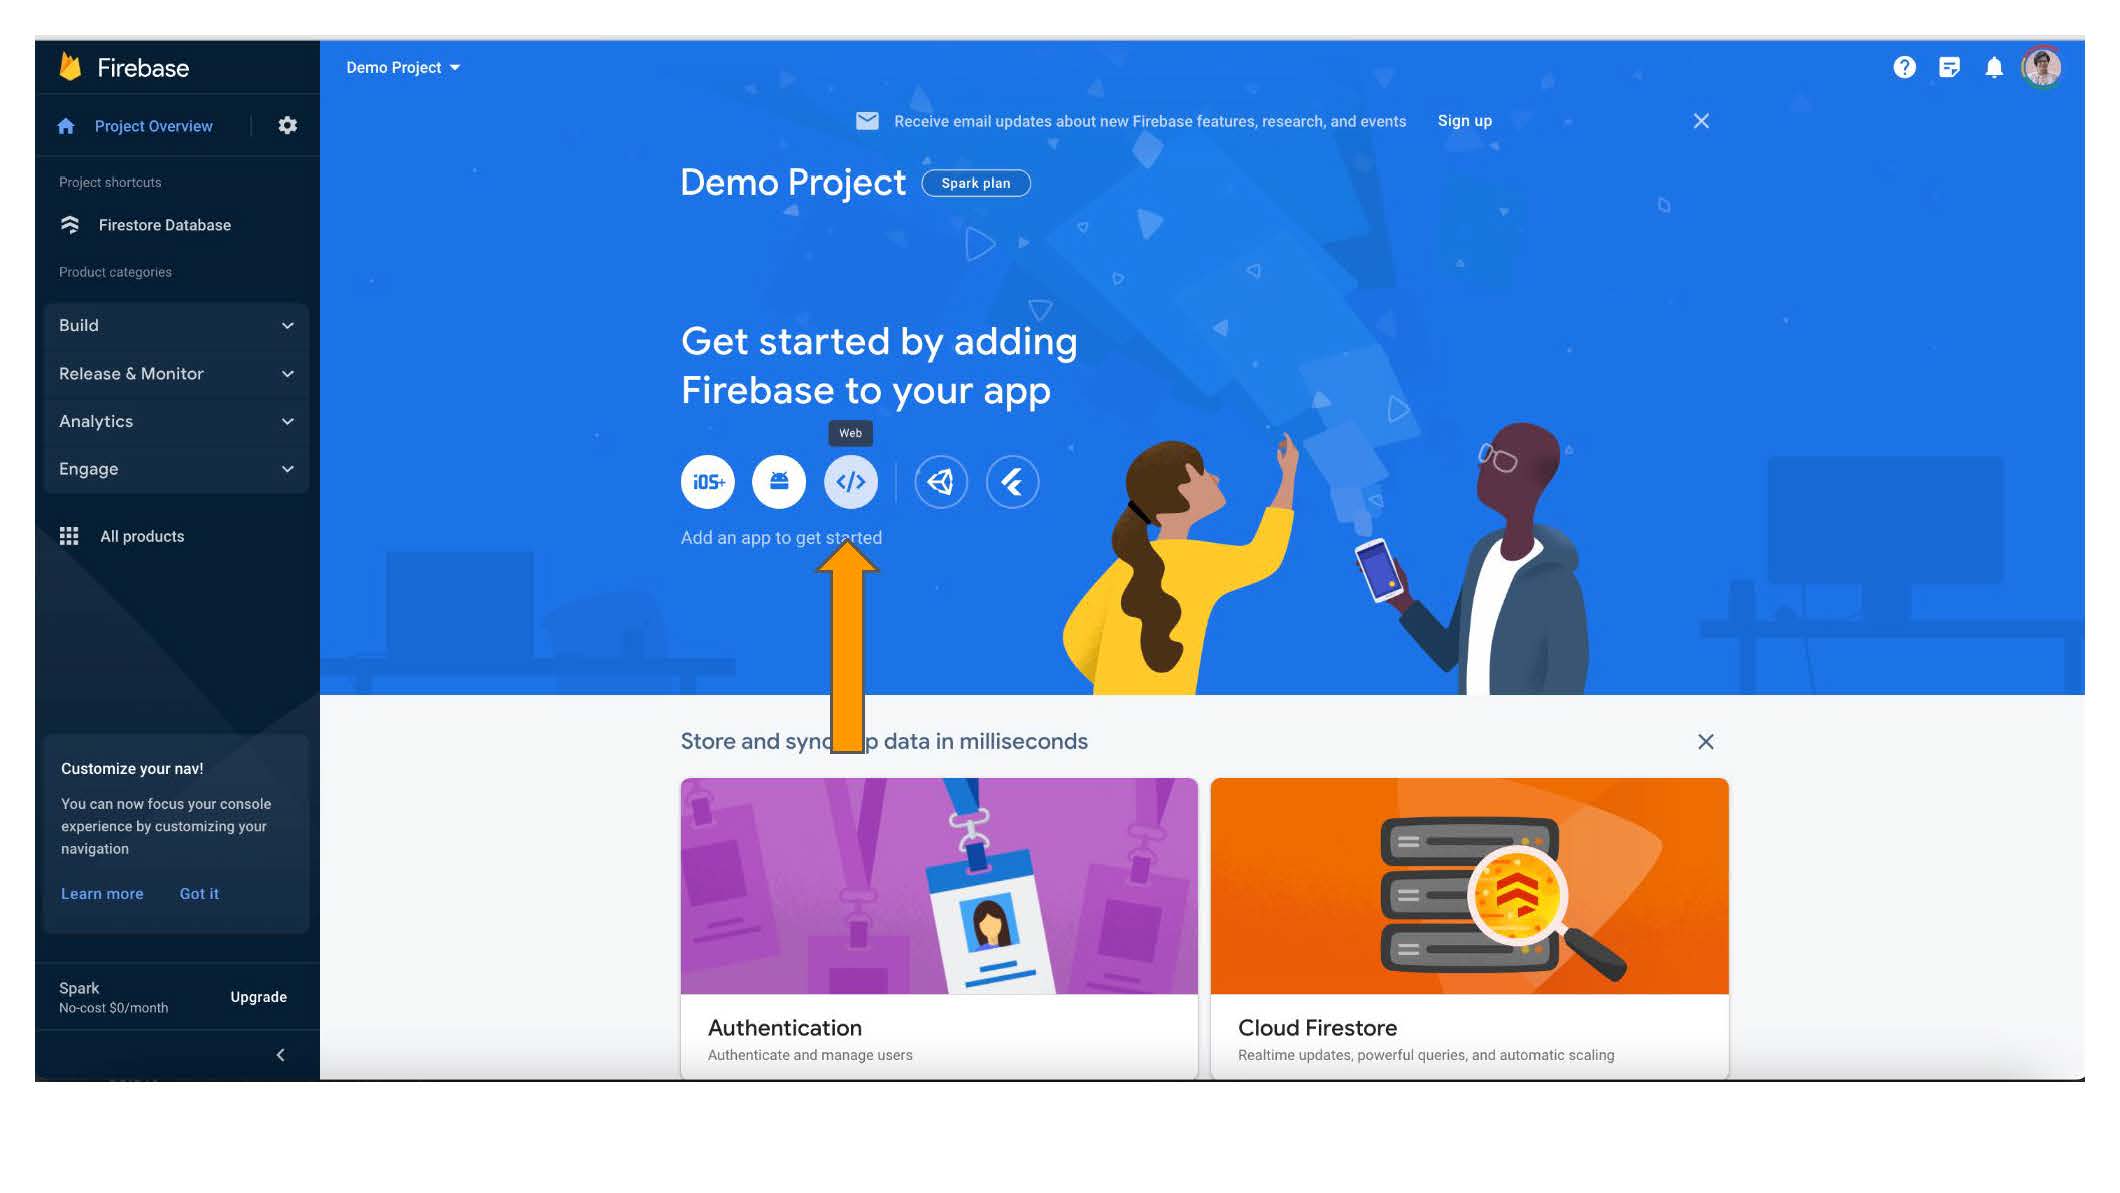
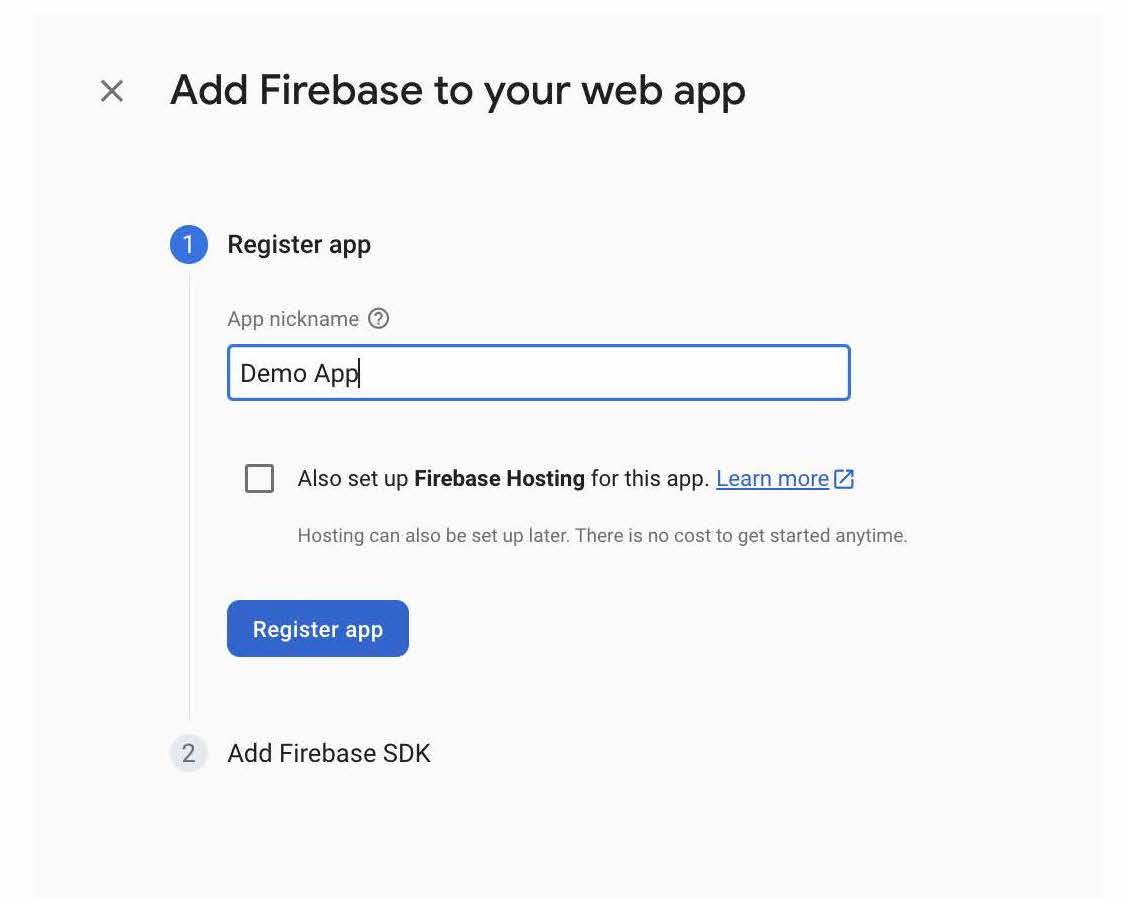
Adding an App to the Firebase Project
We are now going to add an app to your firebase project:
With the app set up, we are ready to copy over the app configuration to your revisit project. In the image below you will see a JSON object denoted as const firebase = { ... }.
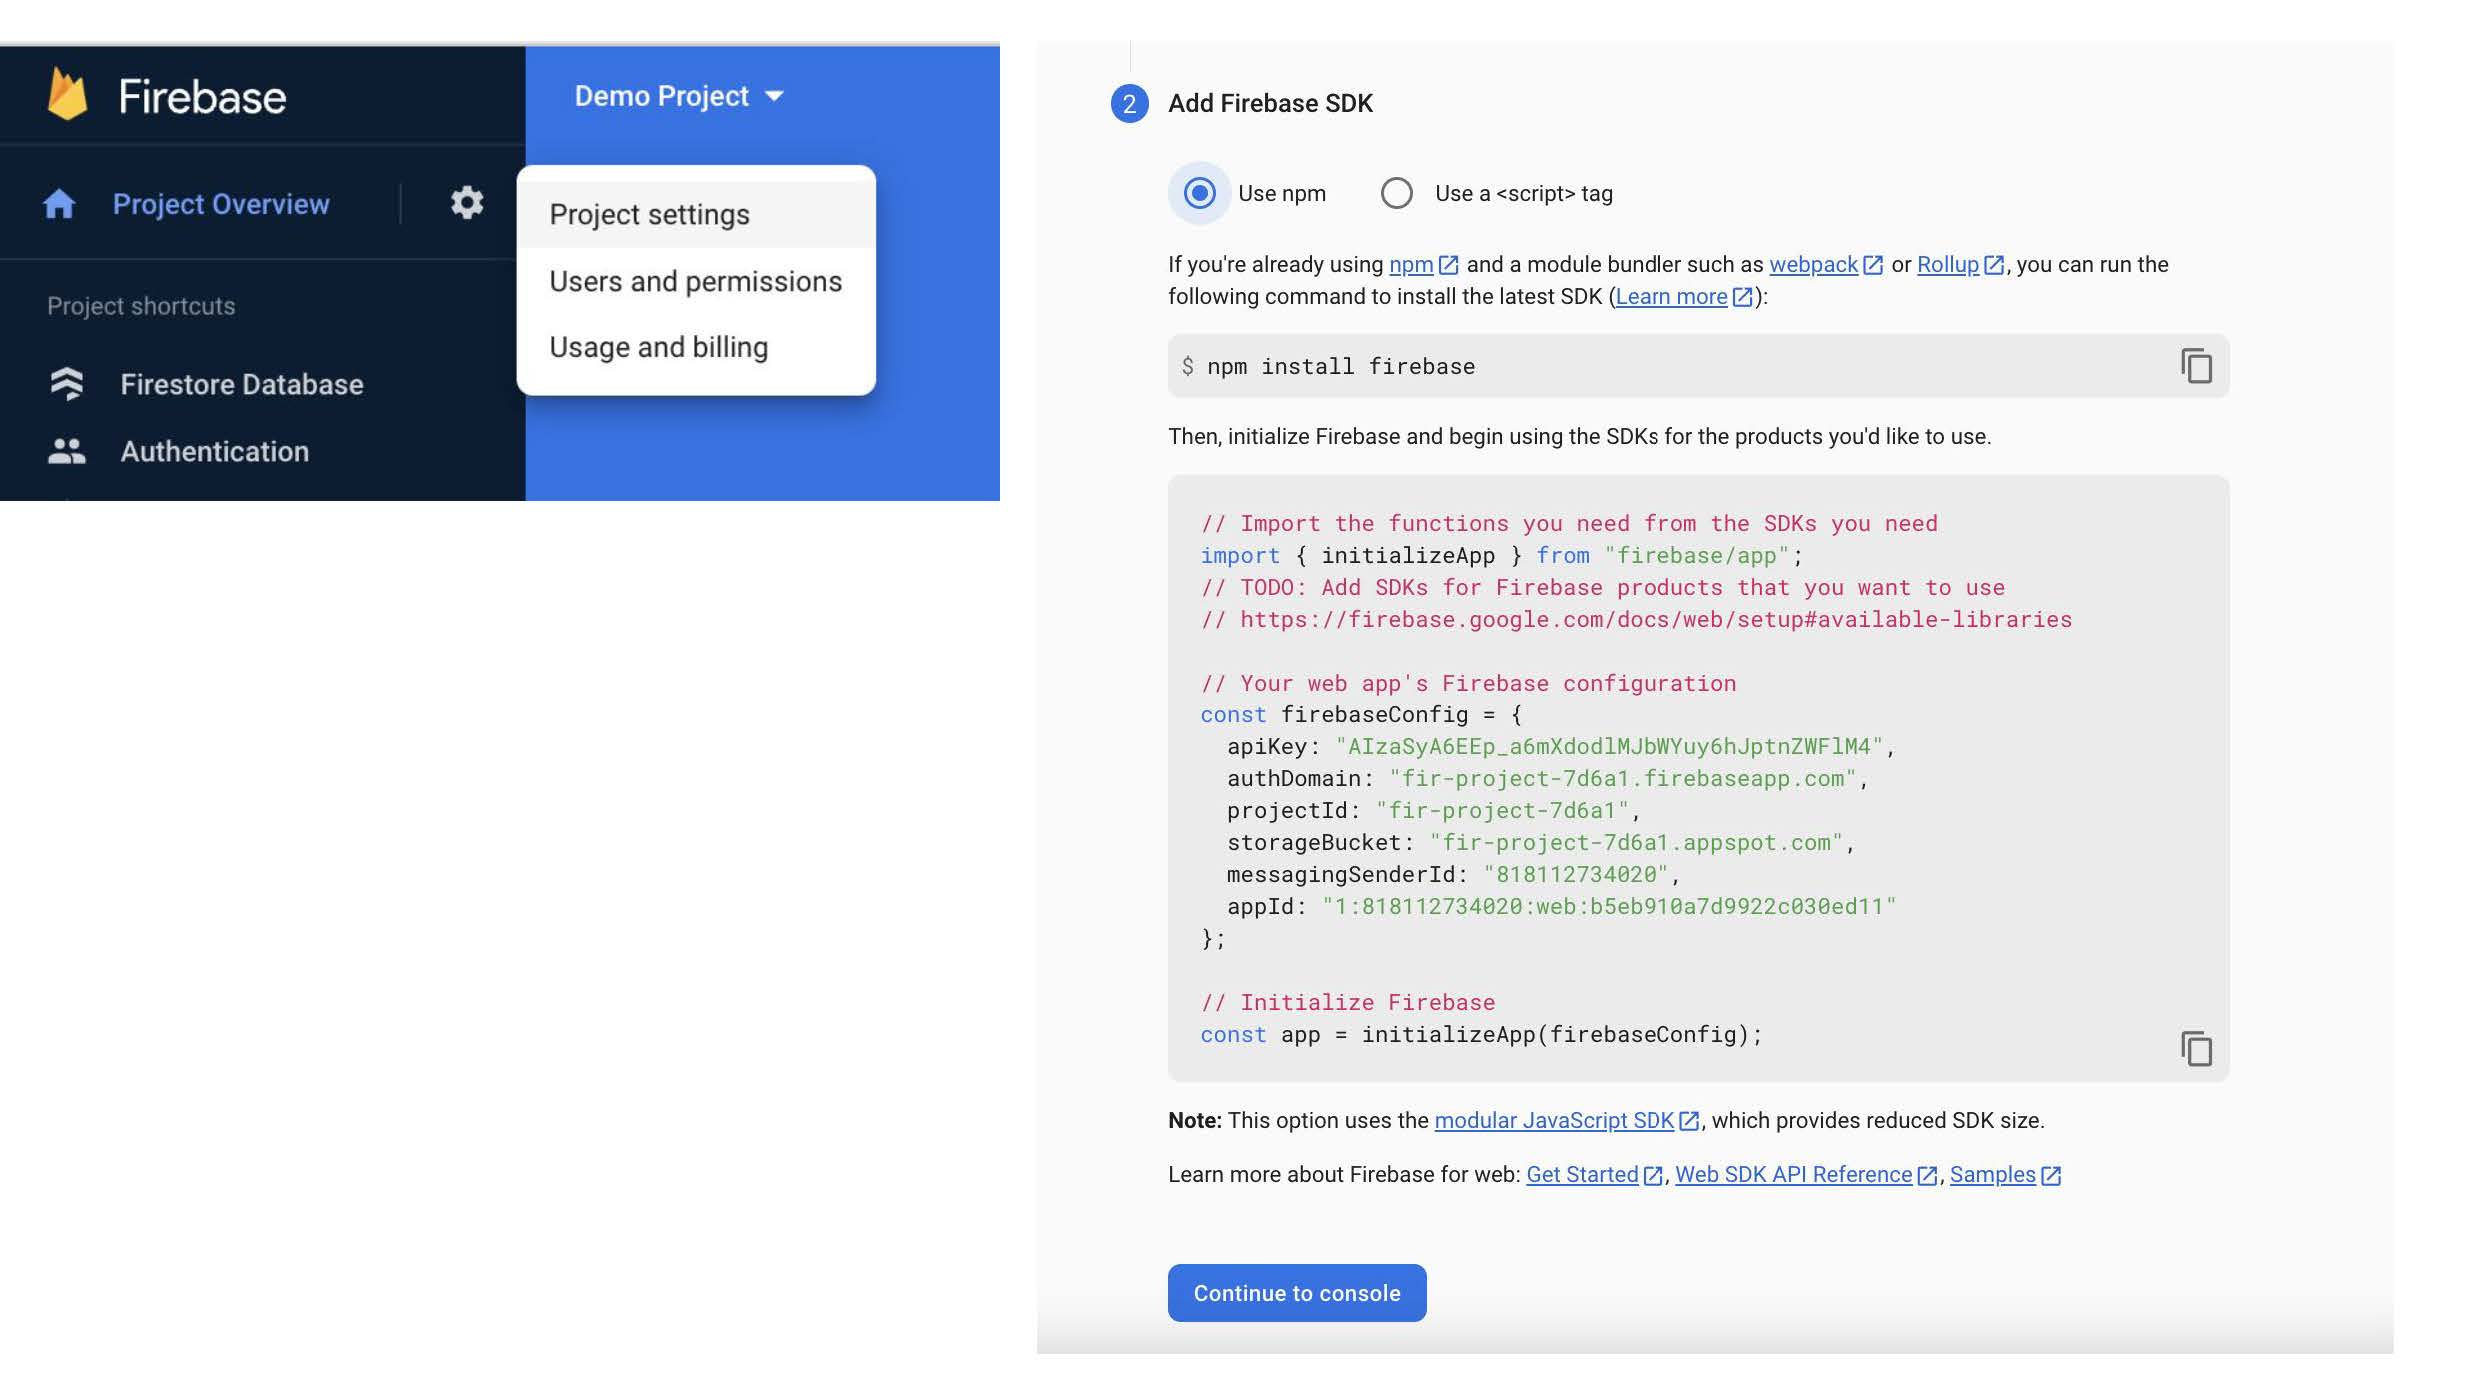
Copy the contents of that JSON object into the .env file for the variable VITE_FIREBASE_CONFIG. In the .env file, your VITE_FIREBASE_CONFIG variable should still be a JSON object that is escaped in single quotes.
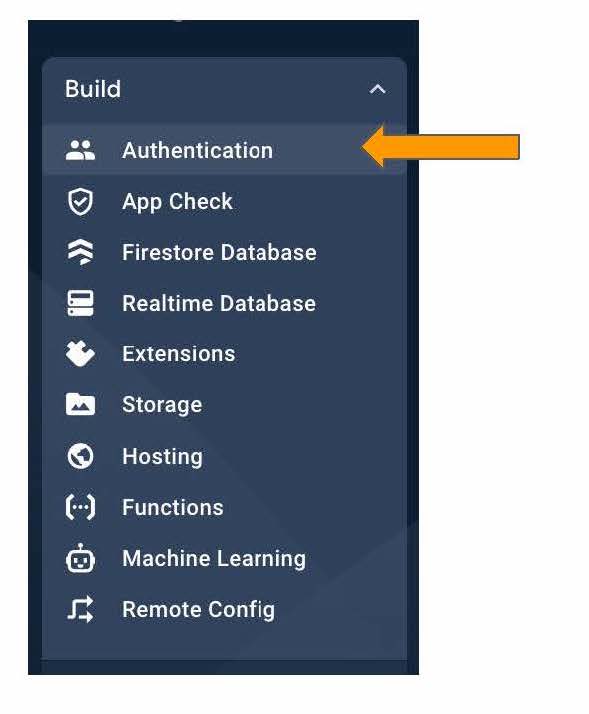
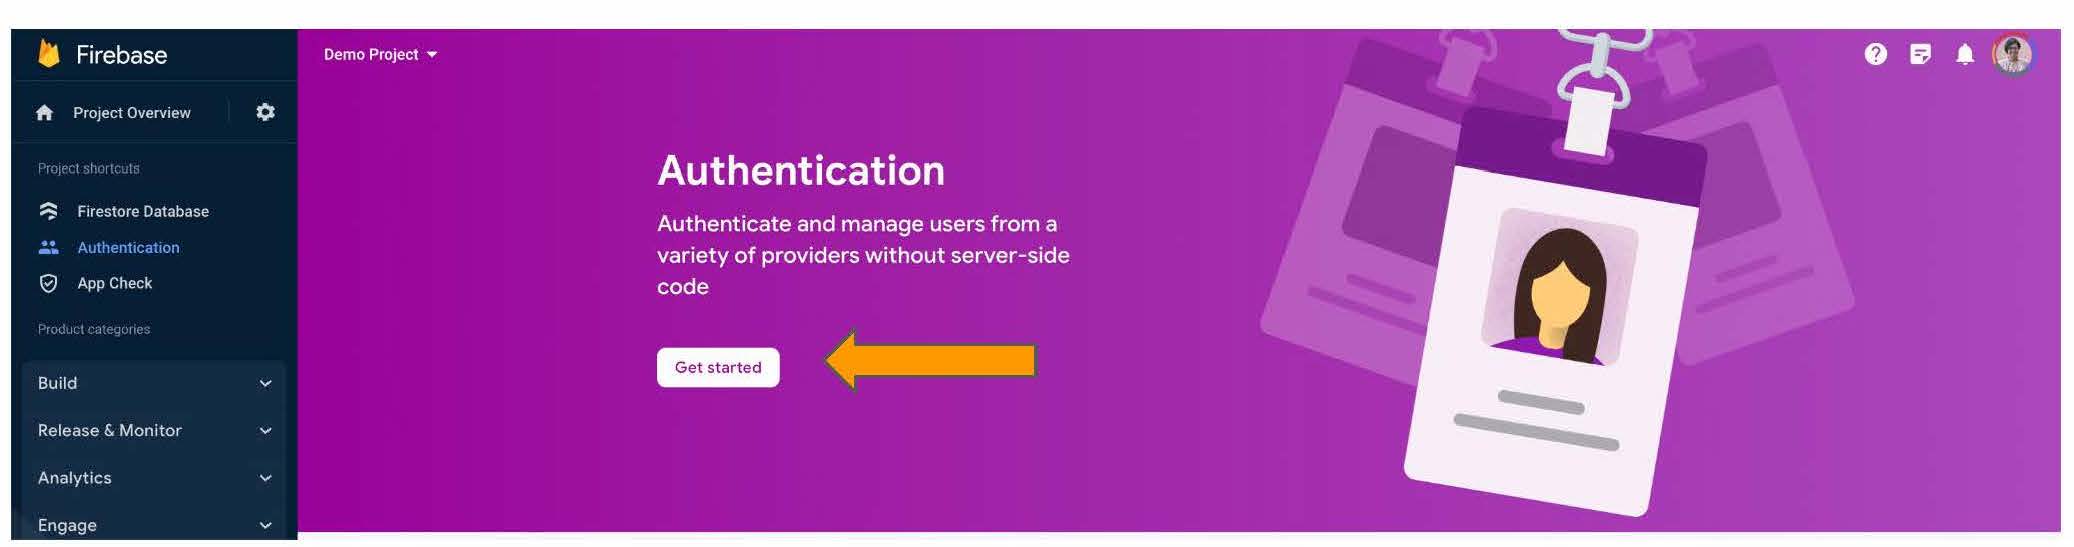
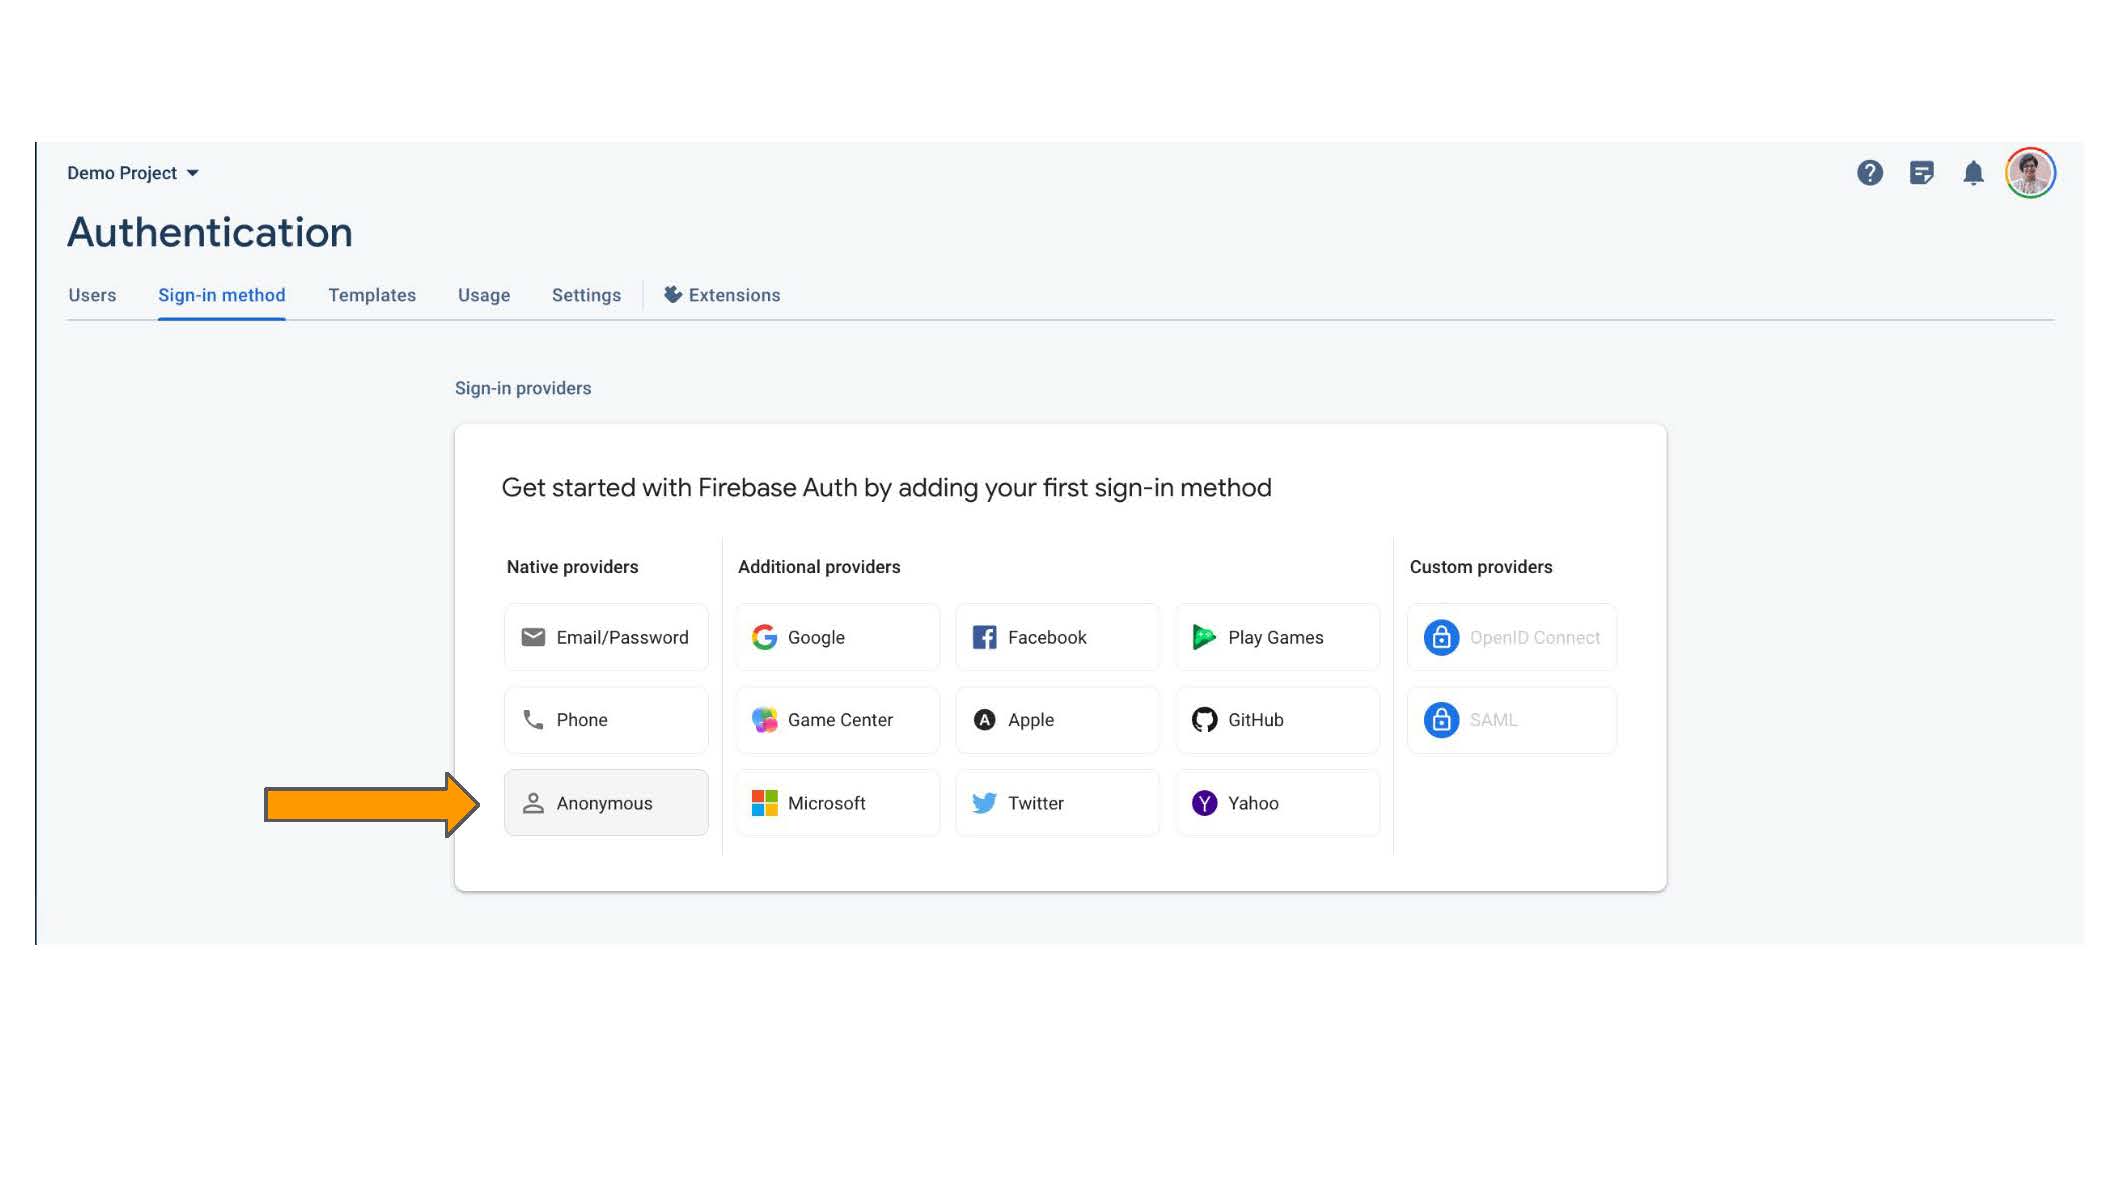
We are now going to set up the authentication so that your browser is authorized to communicate with your firebase database.

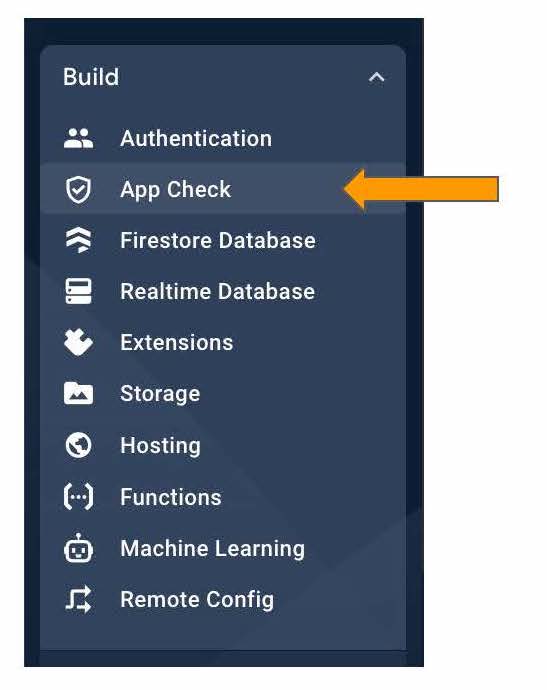
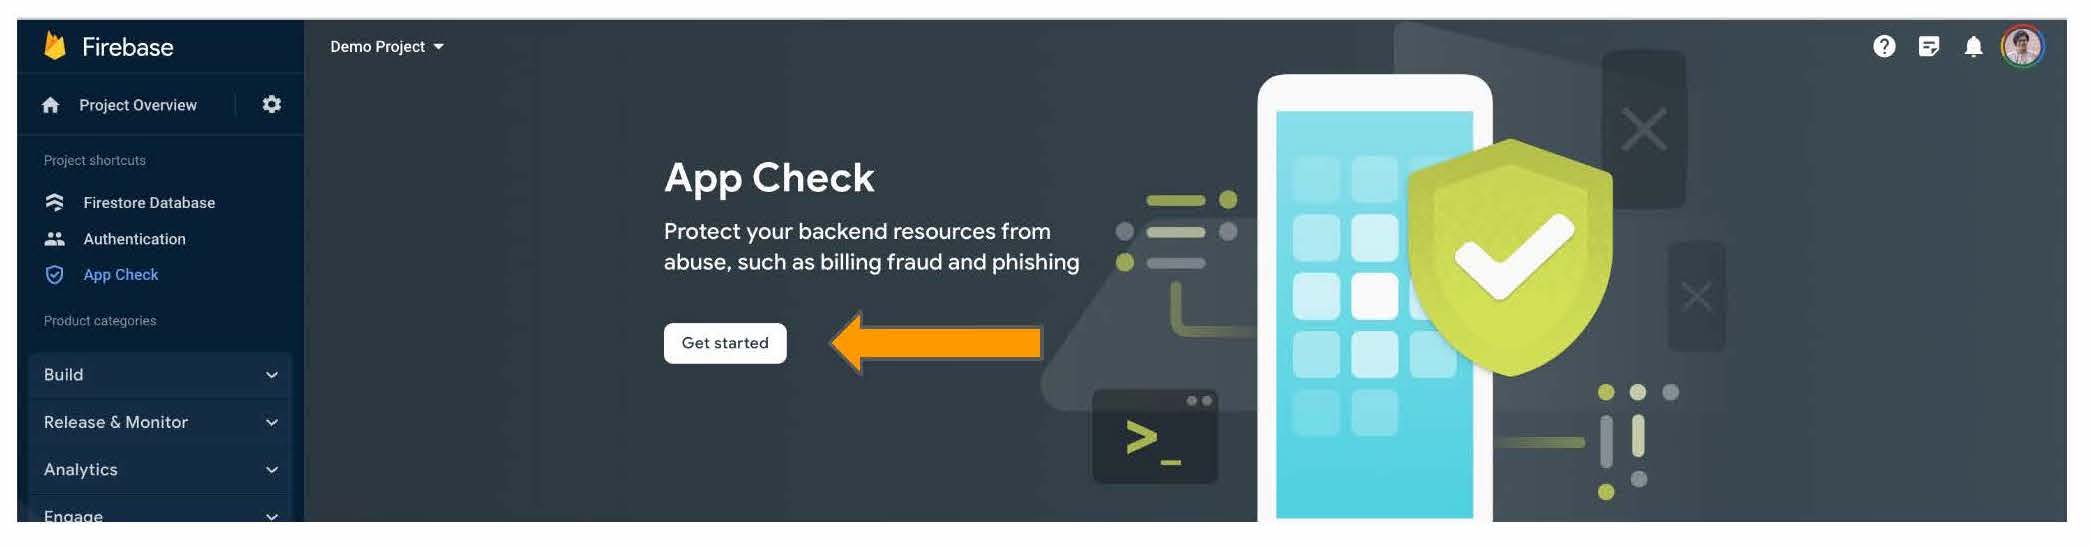
Our last step is to set up App Check.
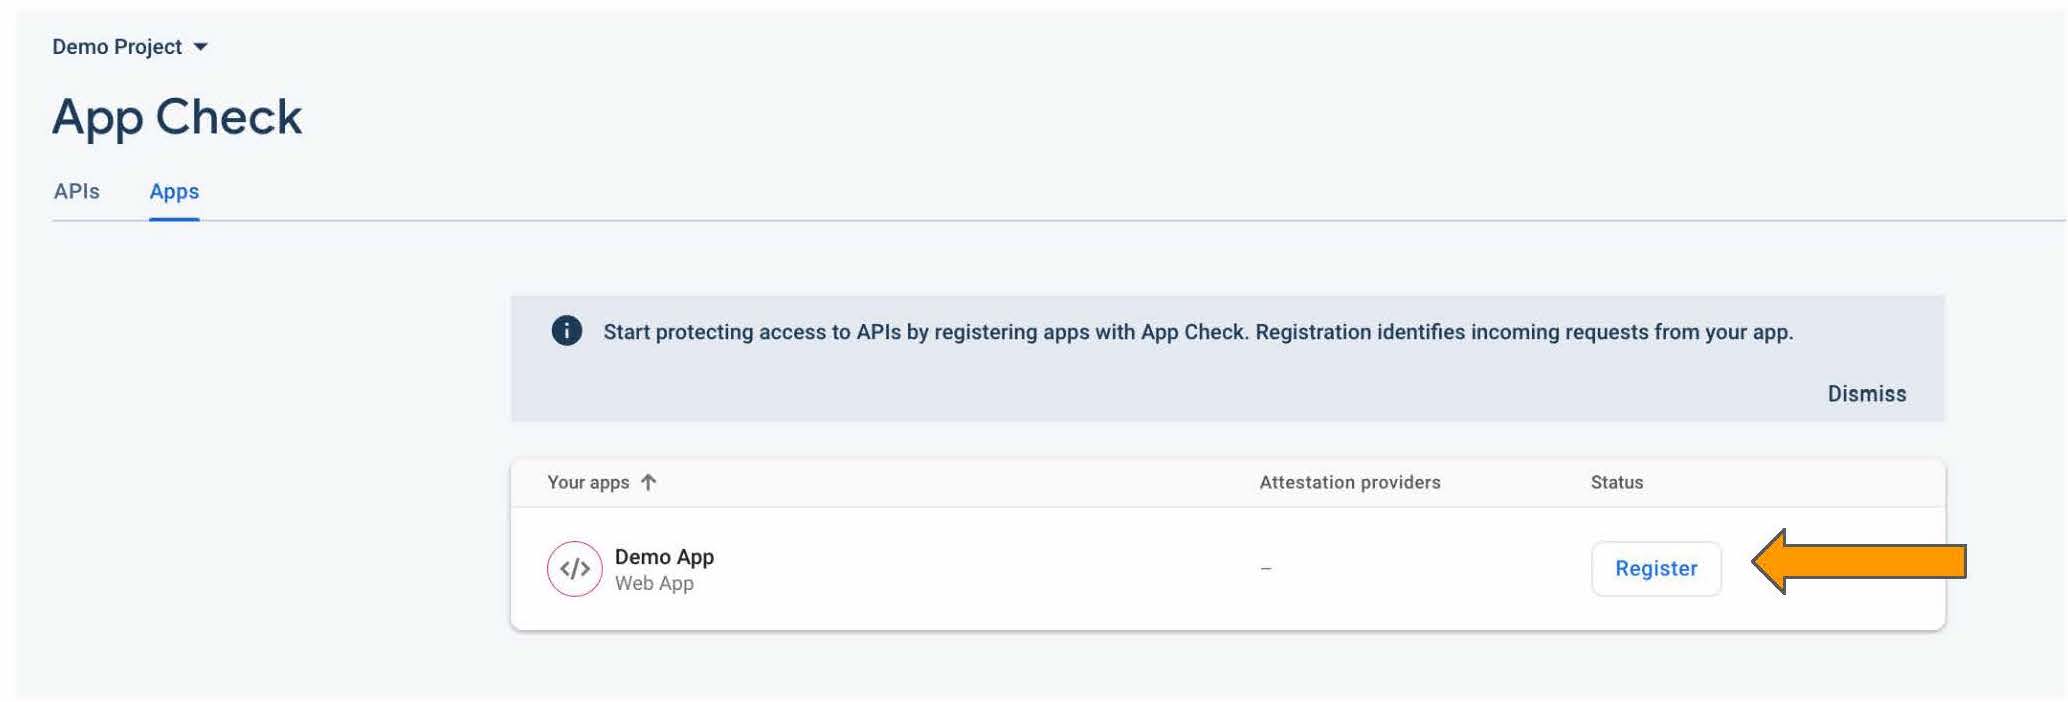
Click on register to register your app with recaptcha.
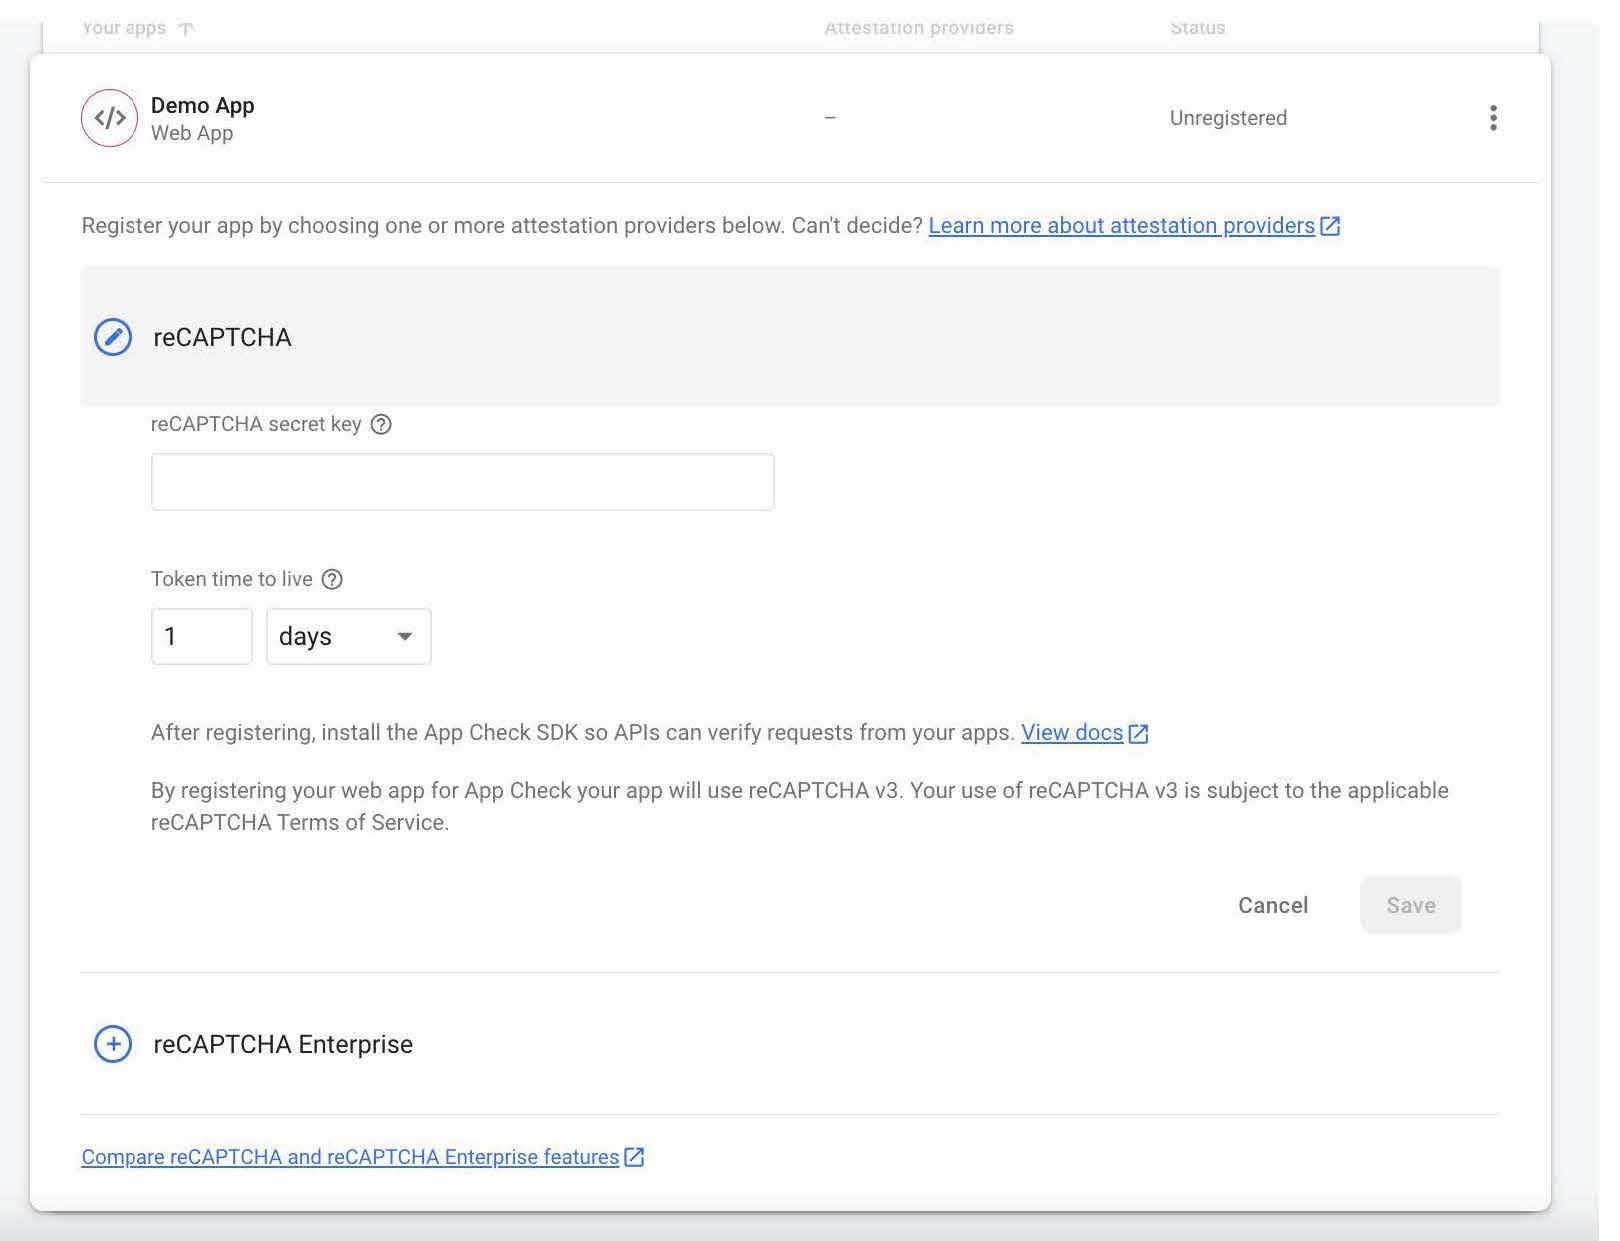
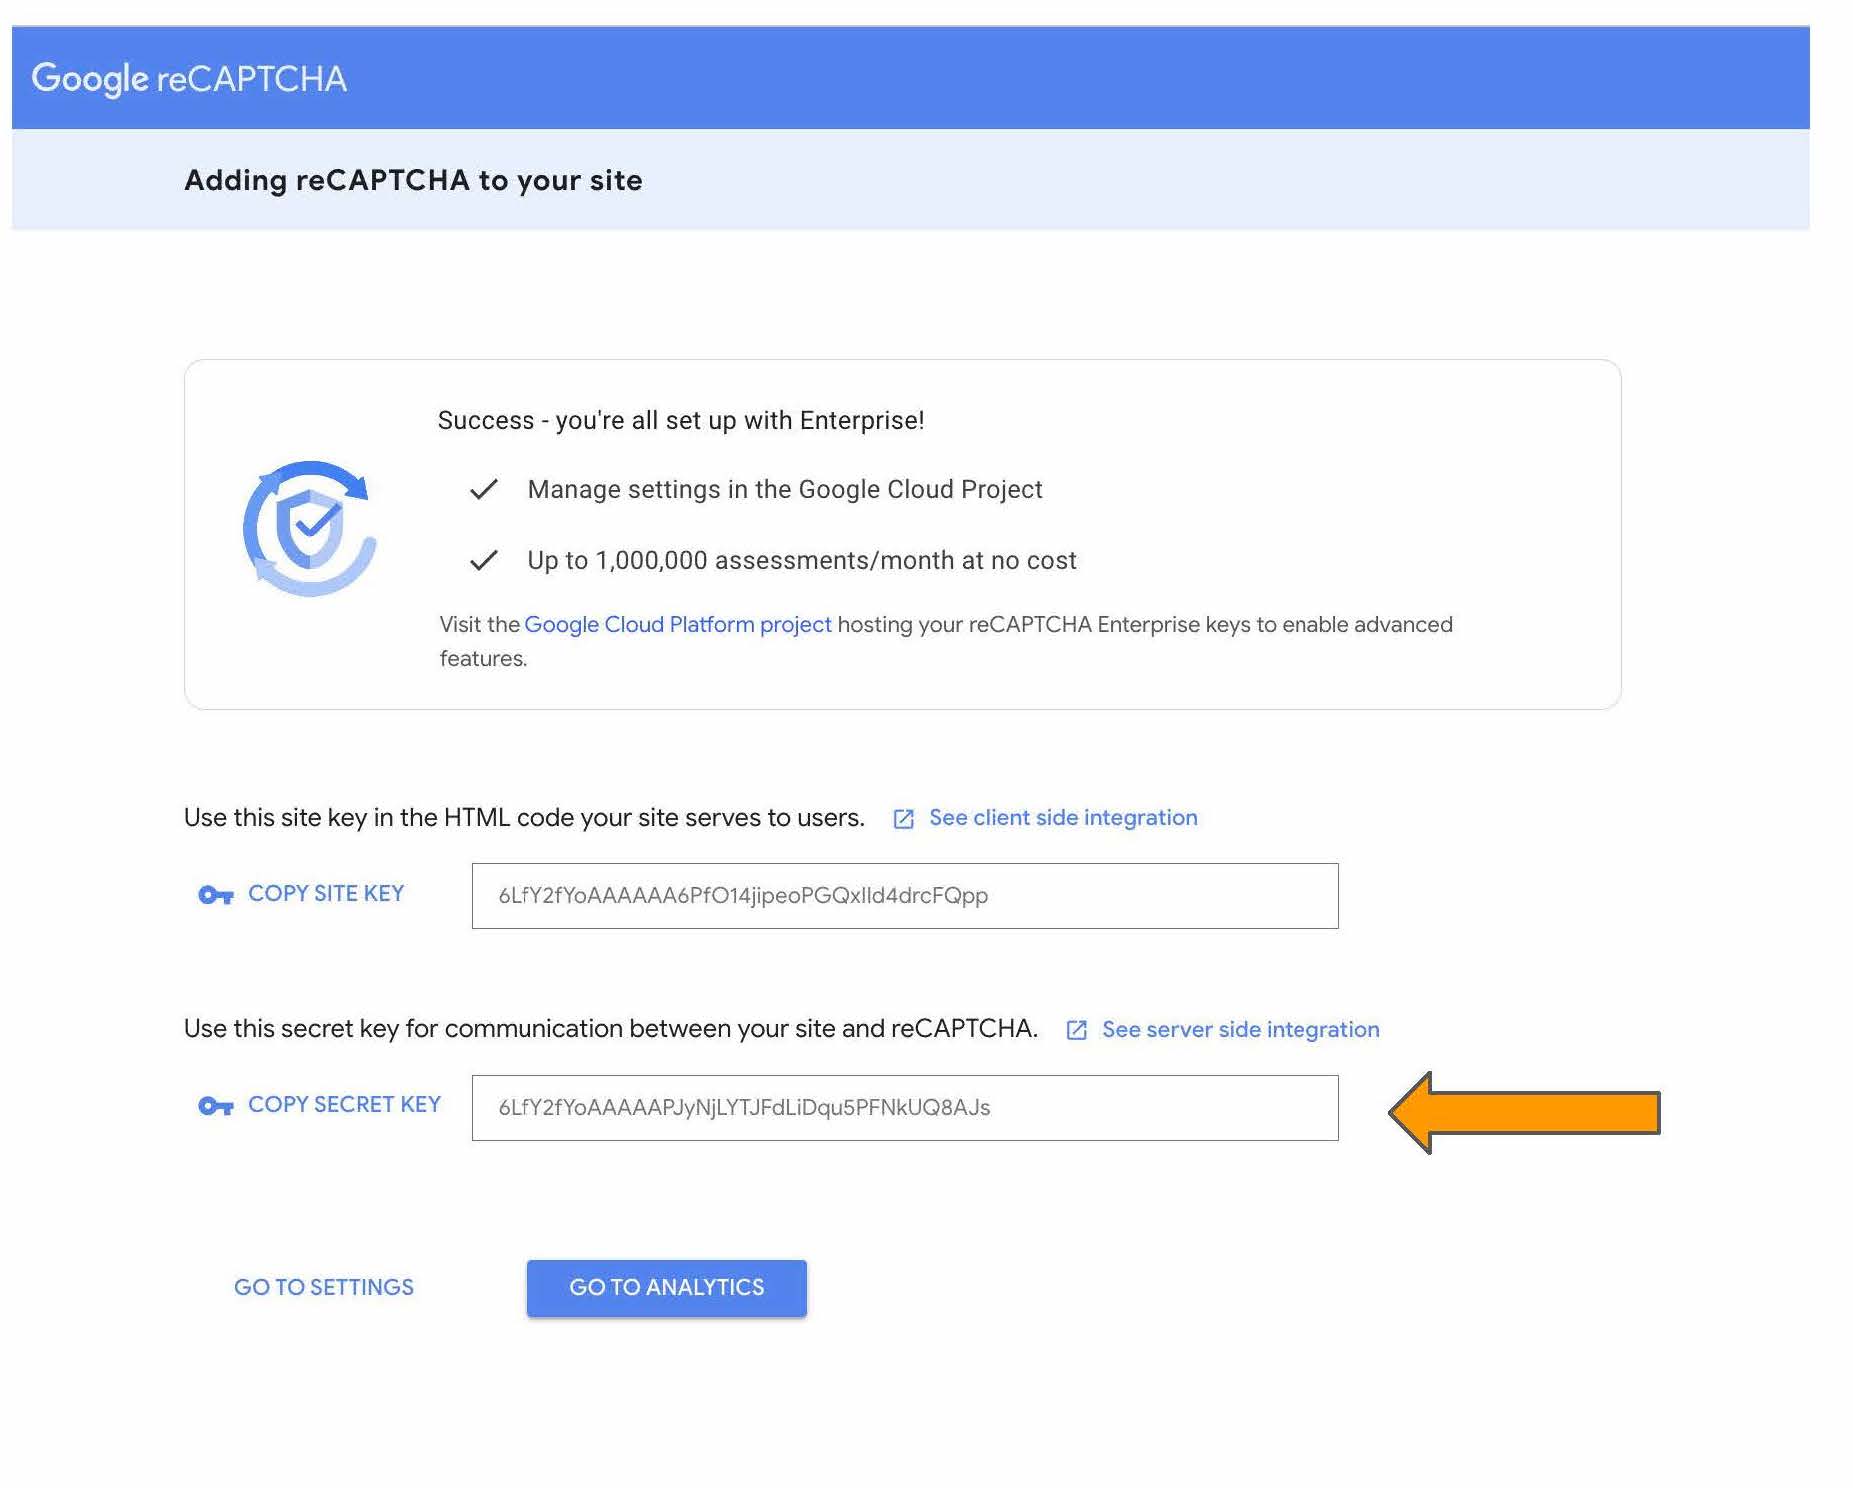
At this point you will need to navigate to Recaptcha to create a secret key.
The important part here is filling out the domains that you will allow to access the firebase database. Add localhost and 127.0.0.1 to test your survey on your local machine.
If you are planning on hosting this externally (such as using GitHub pages), you need to also enter the base URL for your website. For the Github pages deployment, you should enter your base github pages url (i.e. <username>.github.io).
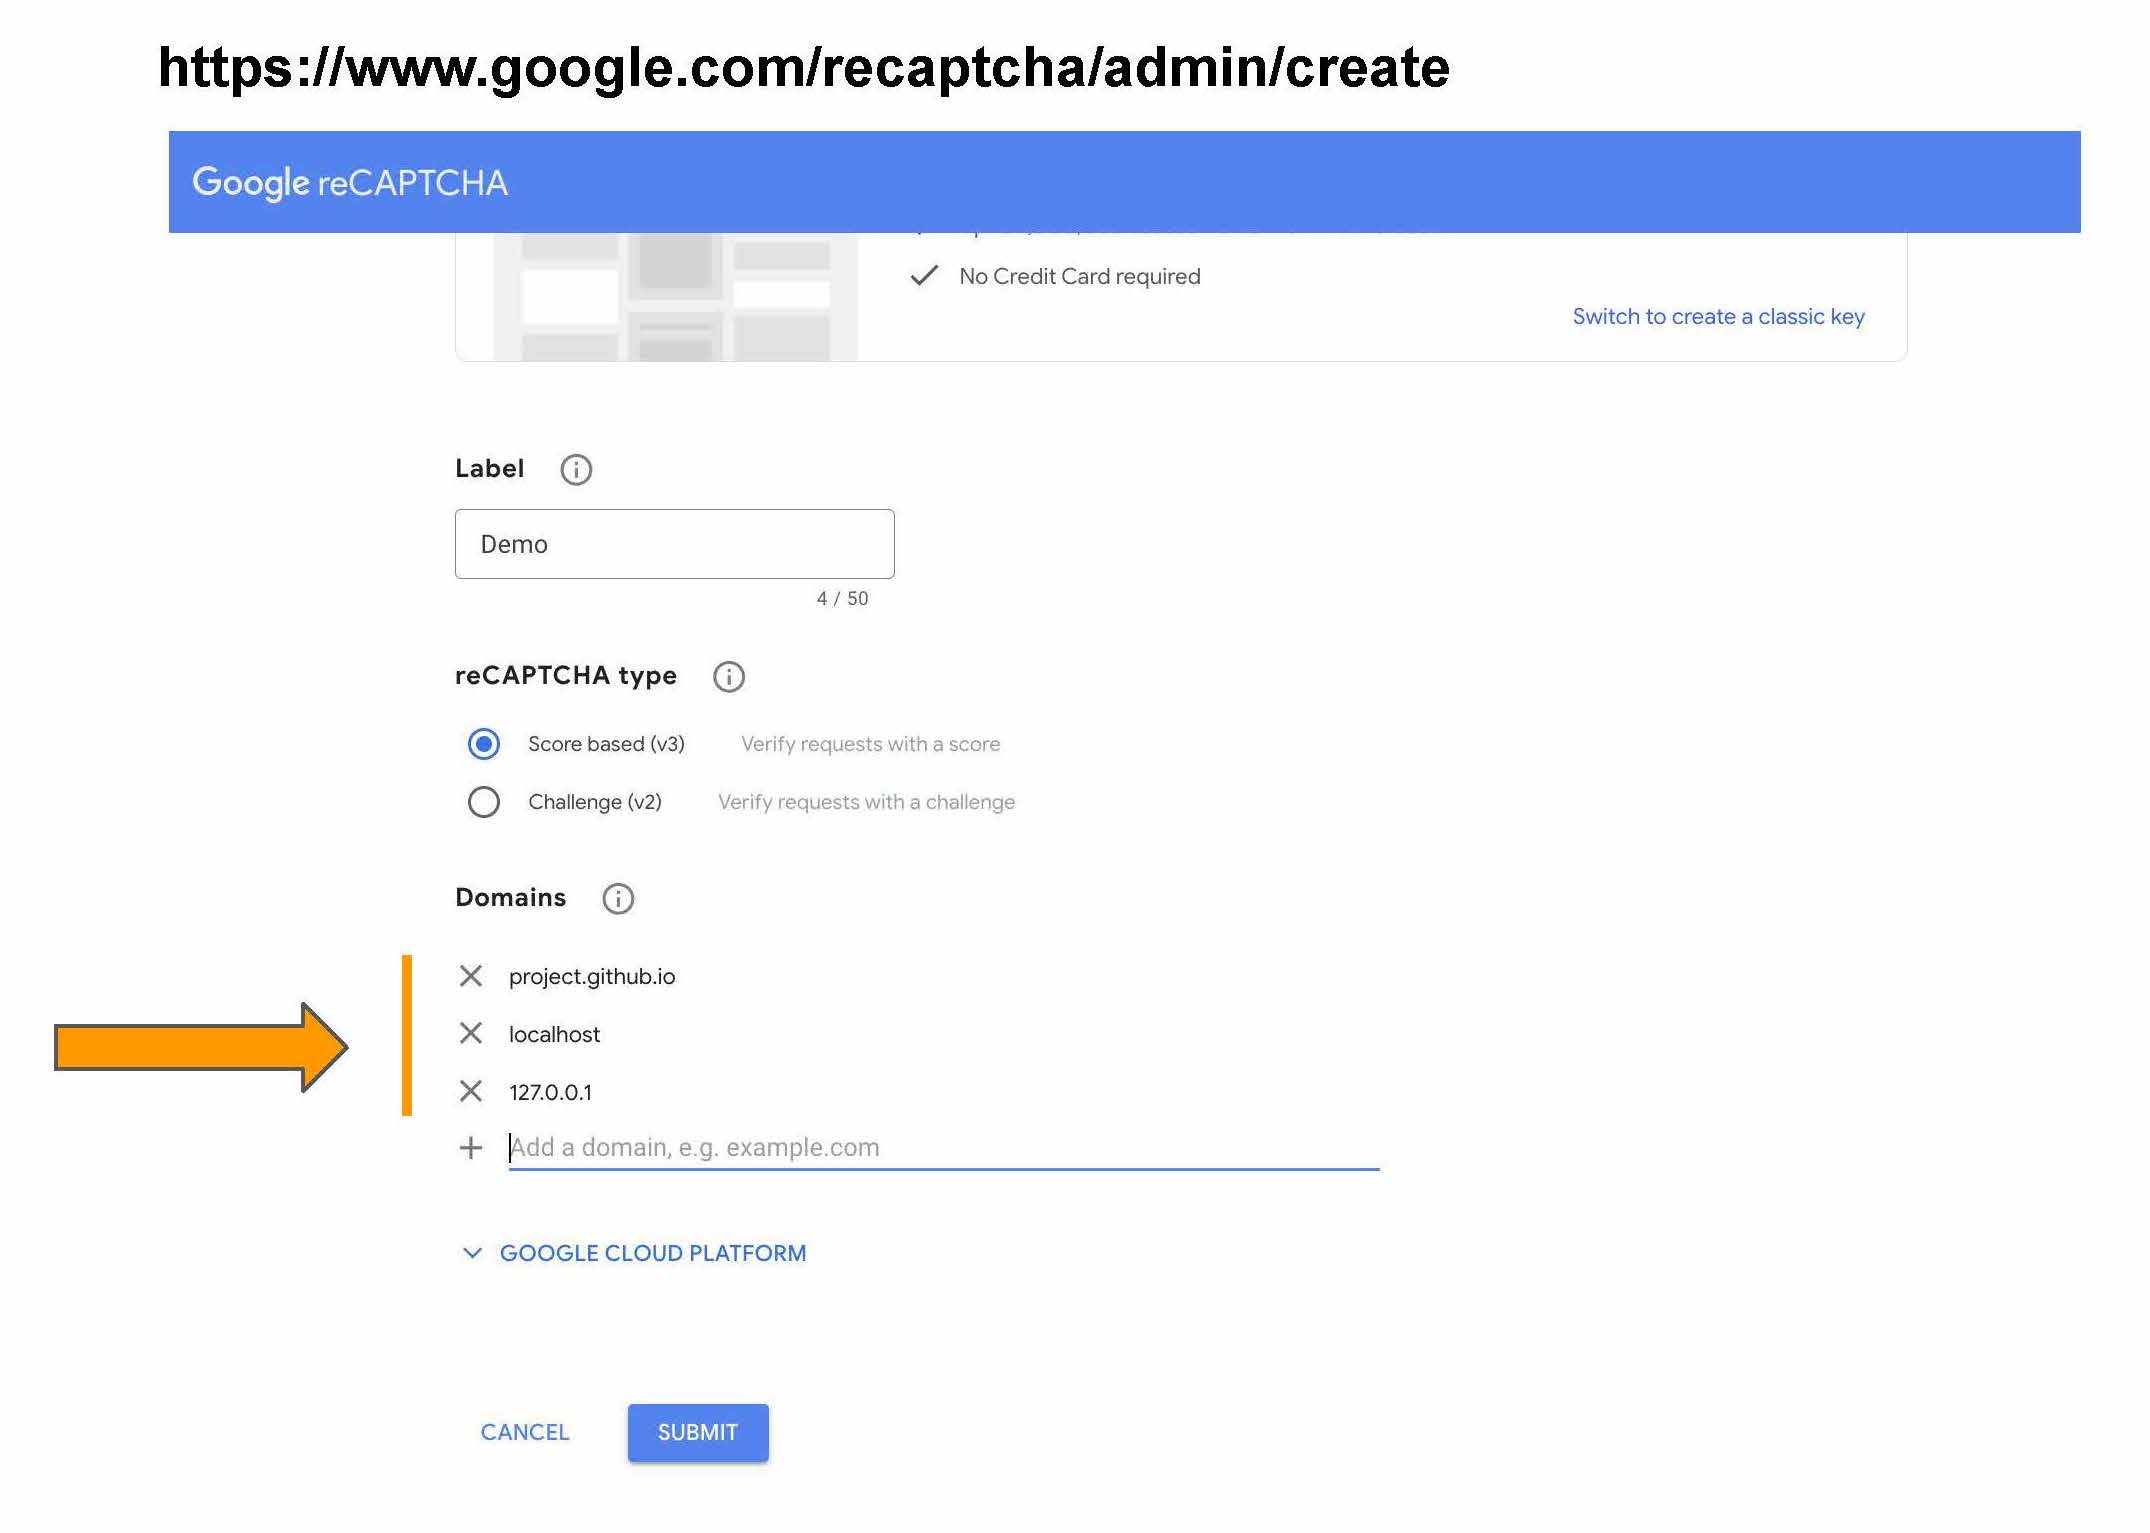
You should now see a SITE key and a SECRET key. First, copy the secret key and paste it back into the Firebase re-captcha page as shown in the following images.
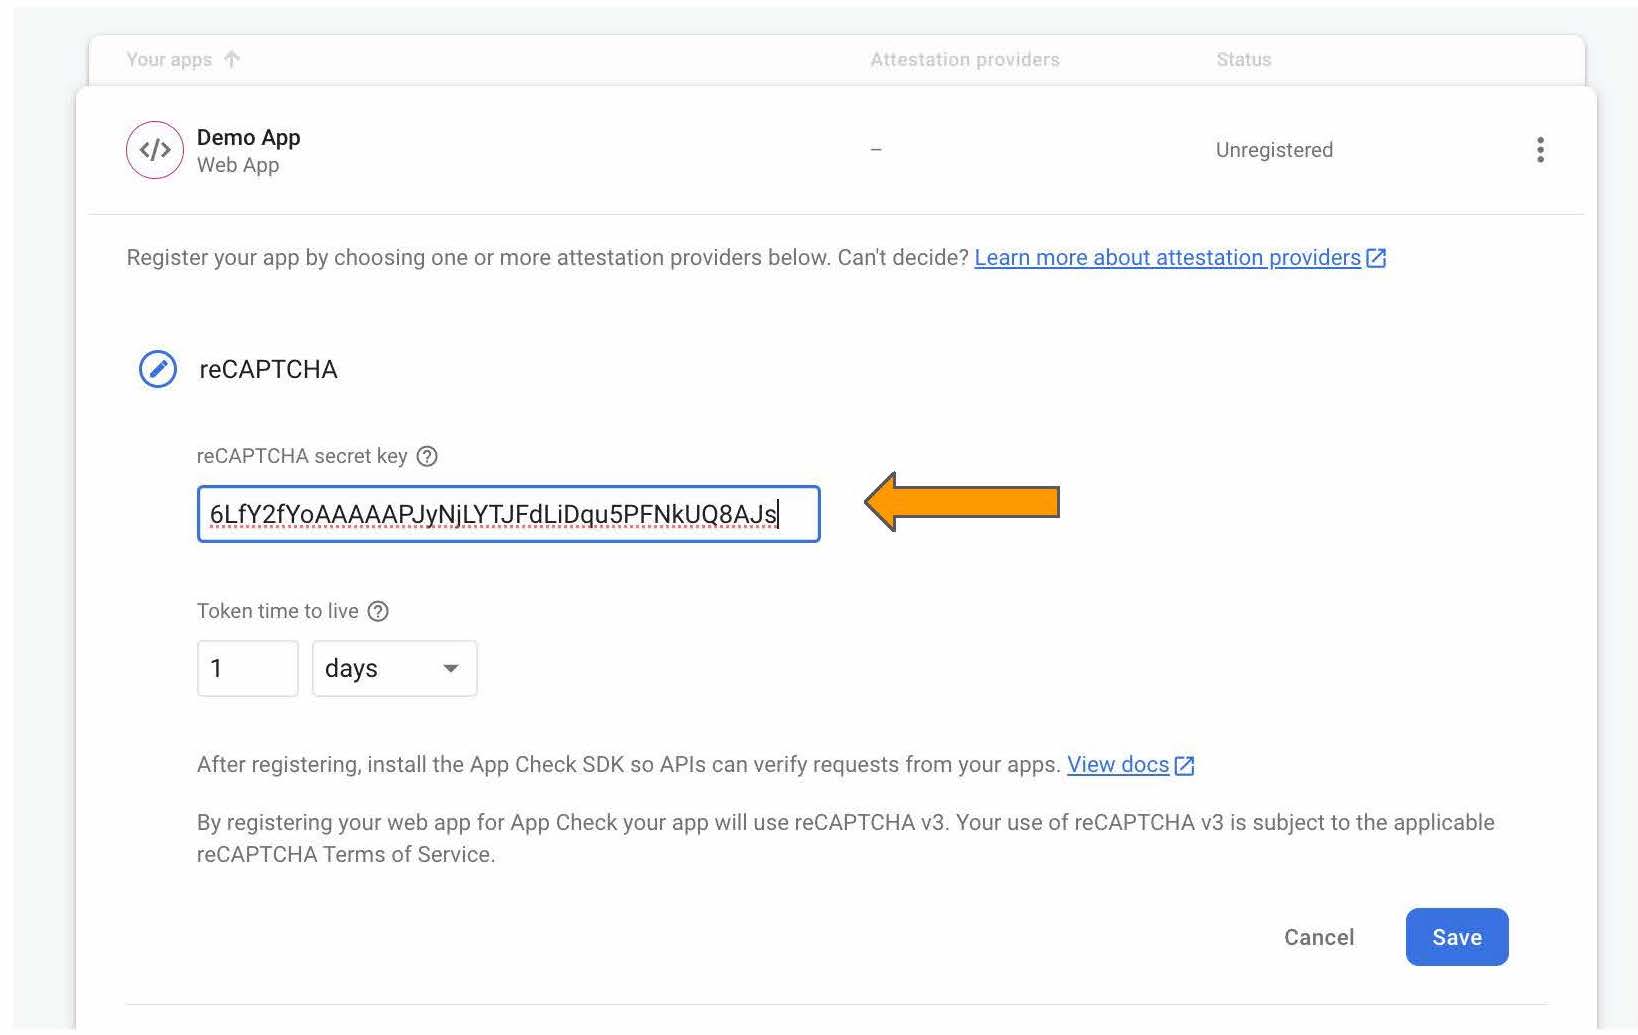
Now, copy the SITE key. That site should now go back into your .env file for the variable VITE_RECAPTCHAV3TOEKN.
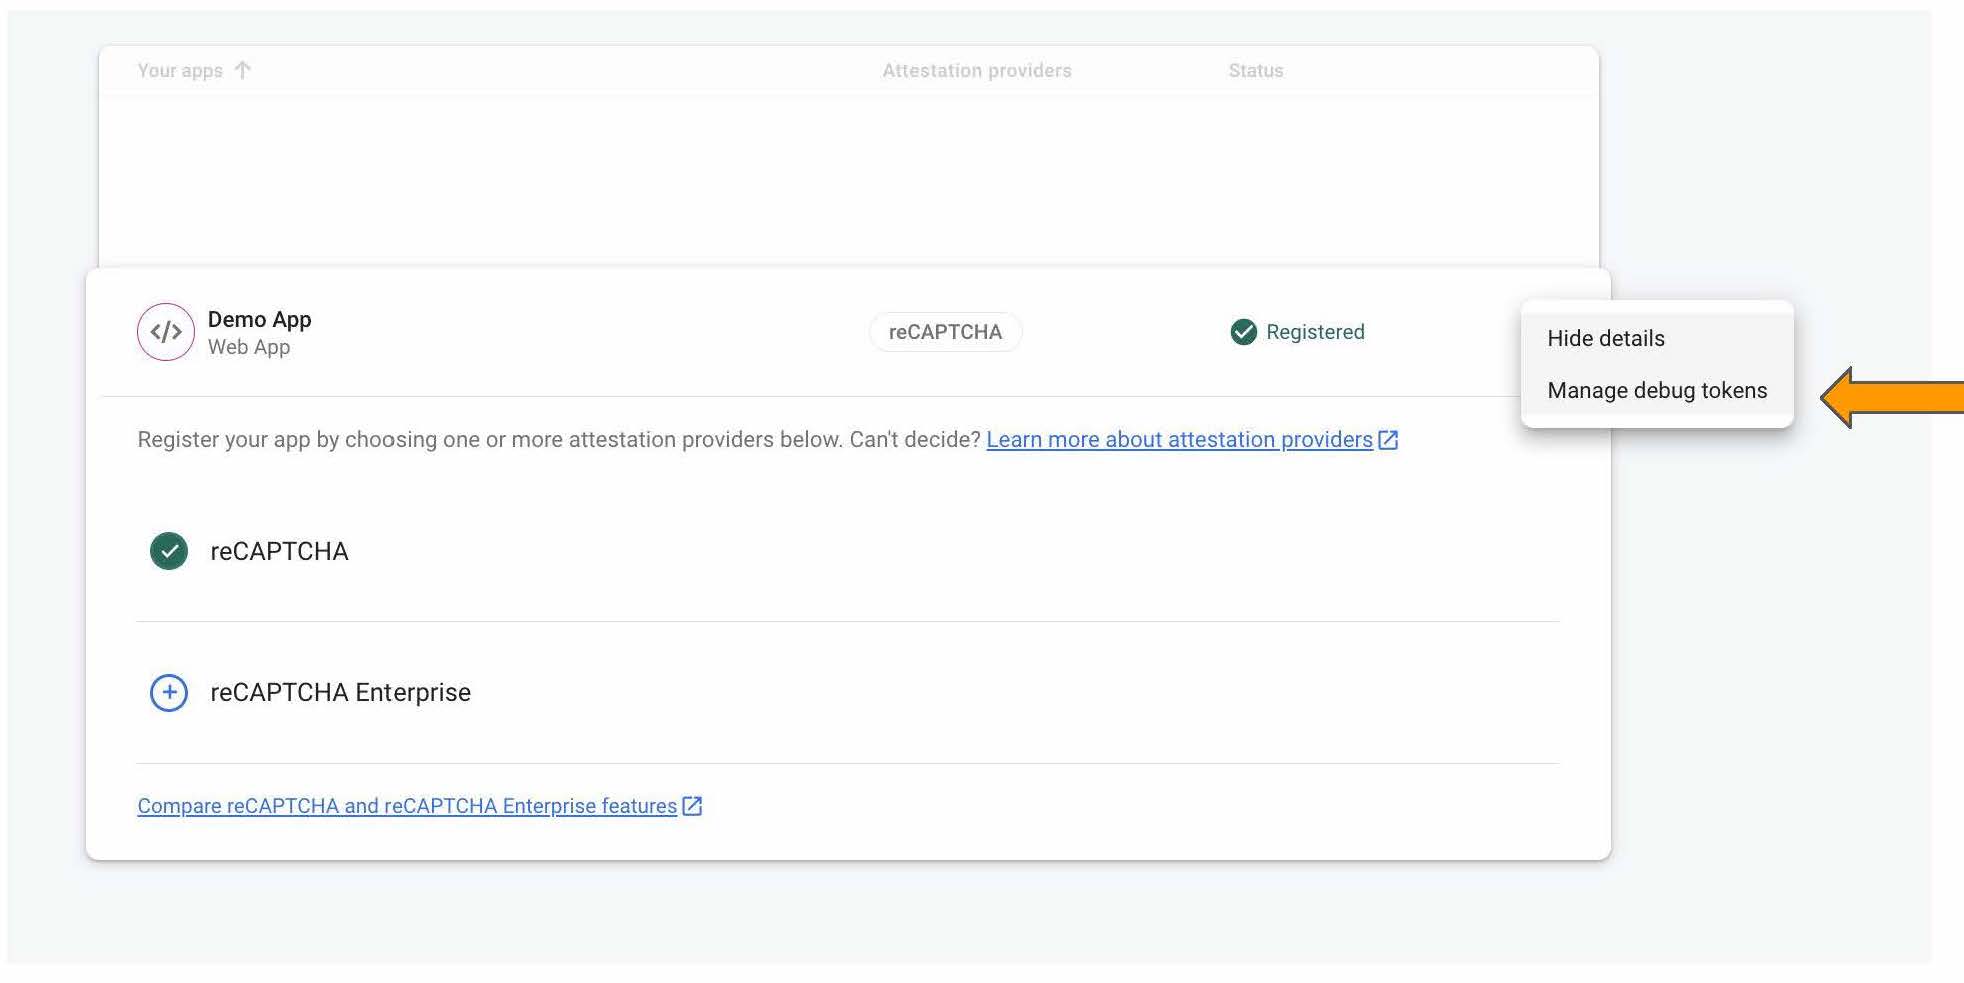
Now we will link your browser to your app through a debug key.
To see the debug token, you need to enable firebase storage. Open up the .env file in the root of the repository. Change the VITE_STORAGE_ENGINE variable value to "firebase". Once you have firebase already set up, you can switch between "localstorage" and "firebase" freely for development purposes.
-
Navigate to http://localhost:8080 and click on any demo study.
-
Open up the browser console. This differs depending on the web browser that you are using. You can find the various ways to view the browser console for popular web browsers here.
-
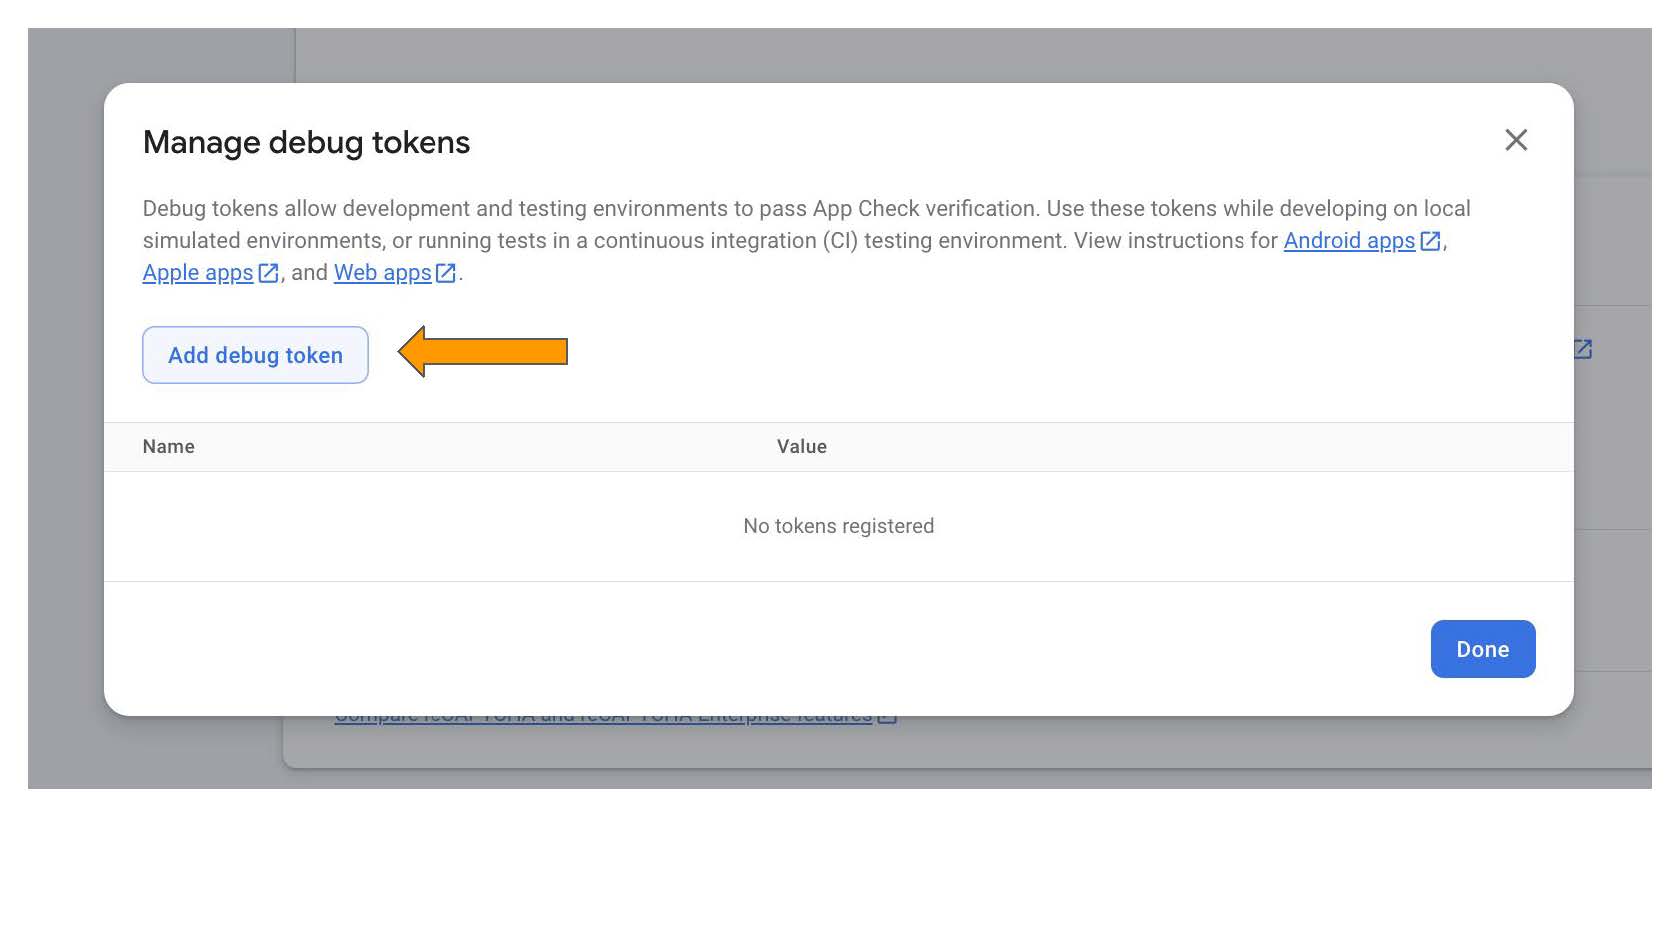
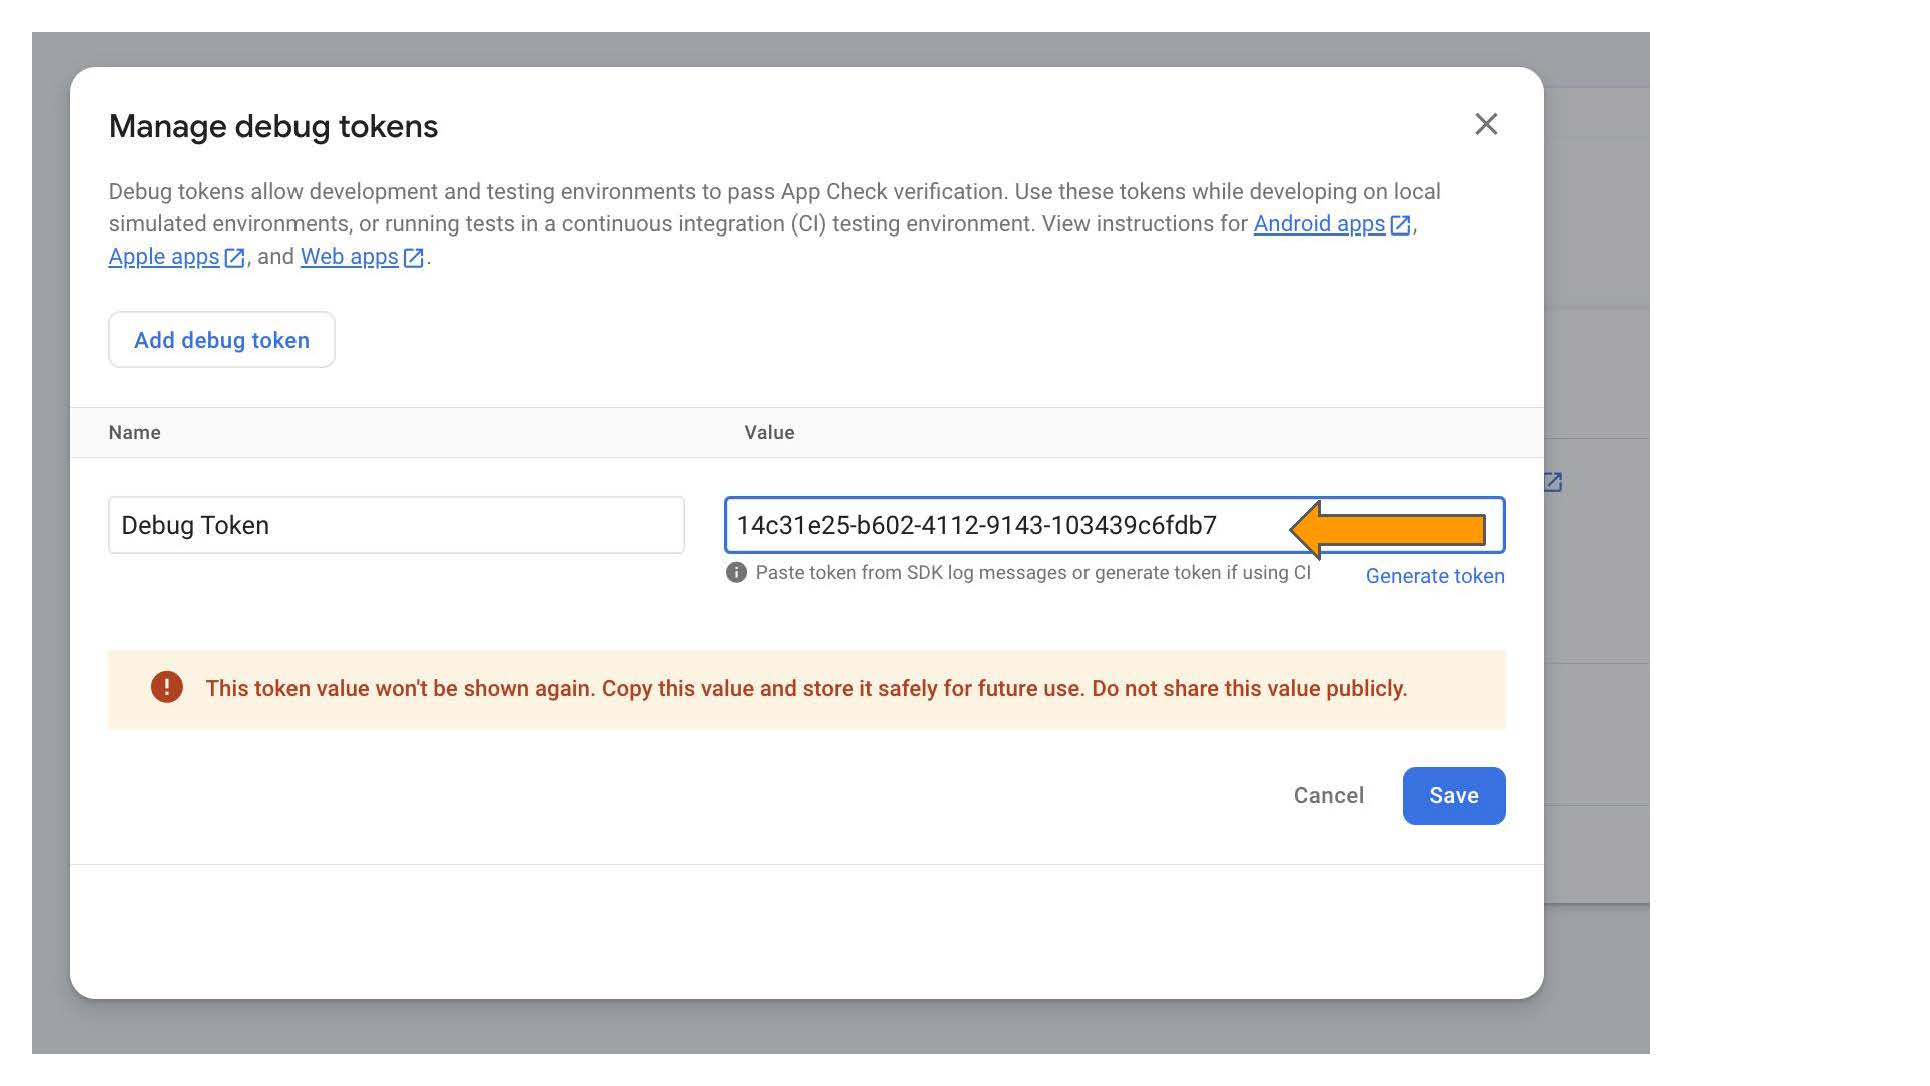
Copy the debug token from the console.

-
Navigate to your firebase instance and add the token as shown below:
Allowing for CORS requests
Once that is finished, we'll have to use Google's gsutil function in the terminal to set up a CORS policy so that the application can communicate with Firebase storage. Follow these steps on how to install gsutil on your local machine.
After installing gsutil, you need to navigate to the google-cloud-sdk/bin folder on your local machine. Create a new file called "cors.json" with the following contents:
[
  {
    "origin": ["*"],
    "method": ["GET"],
    "maxAgeSeconds": 3600
  }
]
Lastly, while still inside this same directory, call the following function:
gsutil cors set cors.json gs://<your-cloud-storage-bucket>
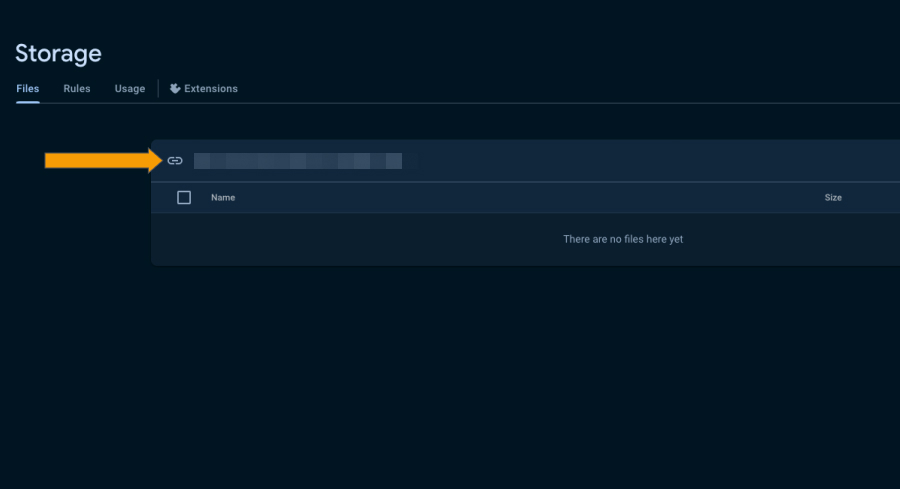
You can find the link for the storage bucket by navigating to the "storage" product in Firebase.
Assuming that you have already changed the VITE_STORAGE_ENGINE variable in the .env file to "firebase", you can now call yarn serve to launch the server and navigate to http://localhost:8080 to launch any demo study. All data from any participation will automatically be uploaded to the store.
When running yarn build, reVISit automatically uses the Firebase storage engine.