Setting Up Authentication
In order to use authentication, you must have a Firebase application already configured. To set up your firebase application, please see here.
Enabling Authentication in Firebase
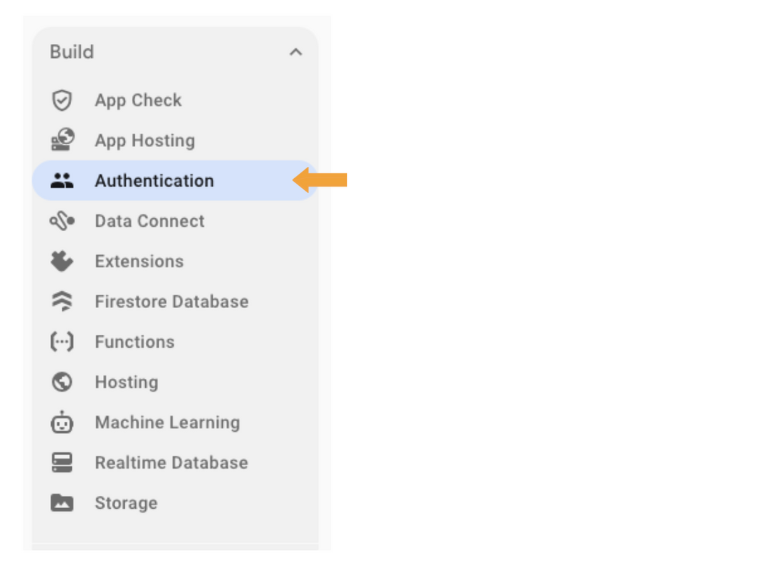
Start by navigating to your Firebase application dashboard. In the left-hand sidebar, choose the 'Authentication' tab.
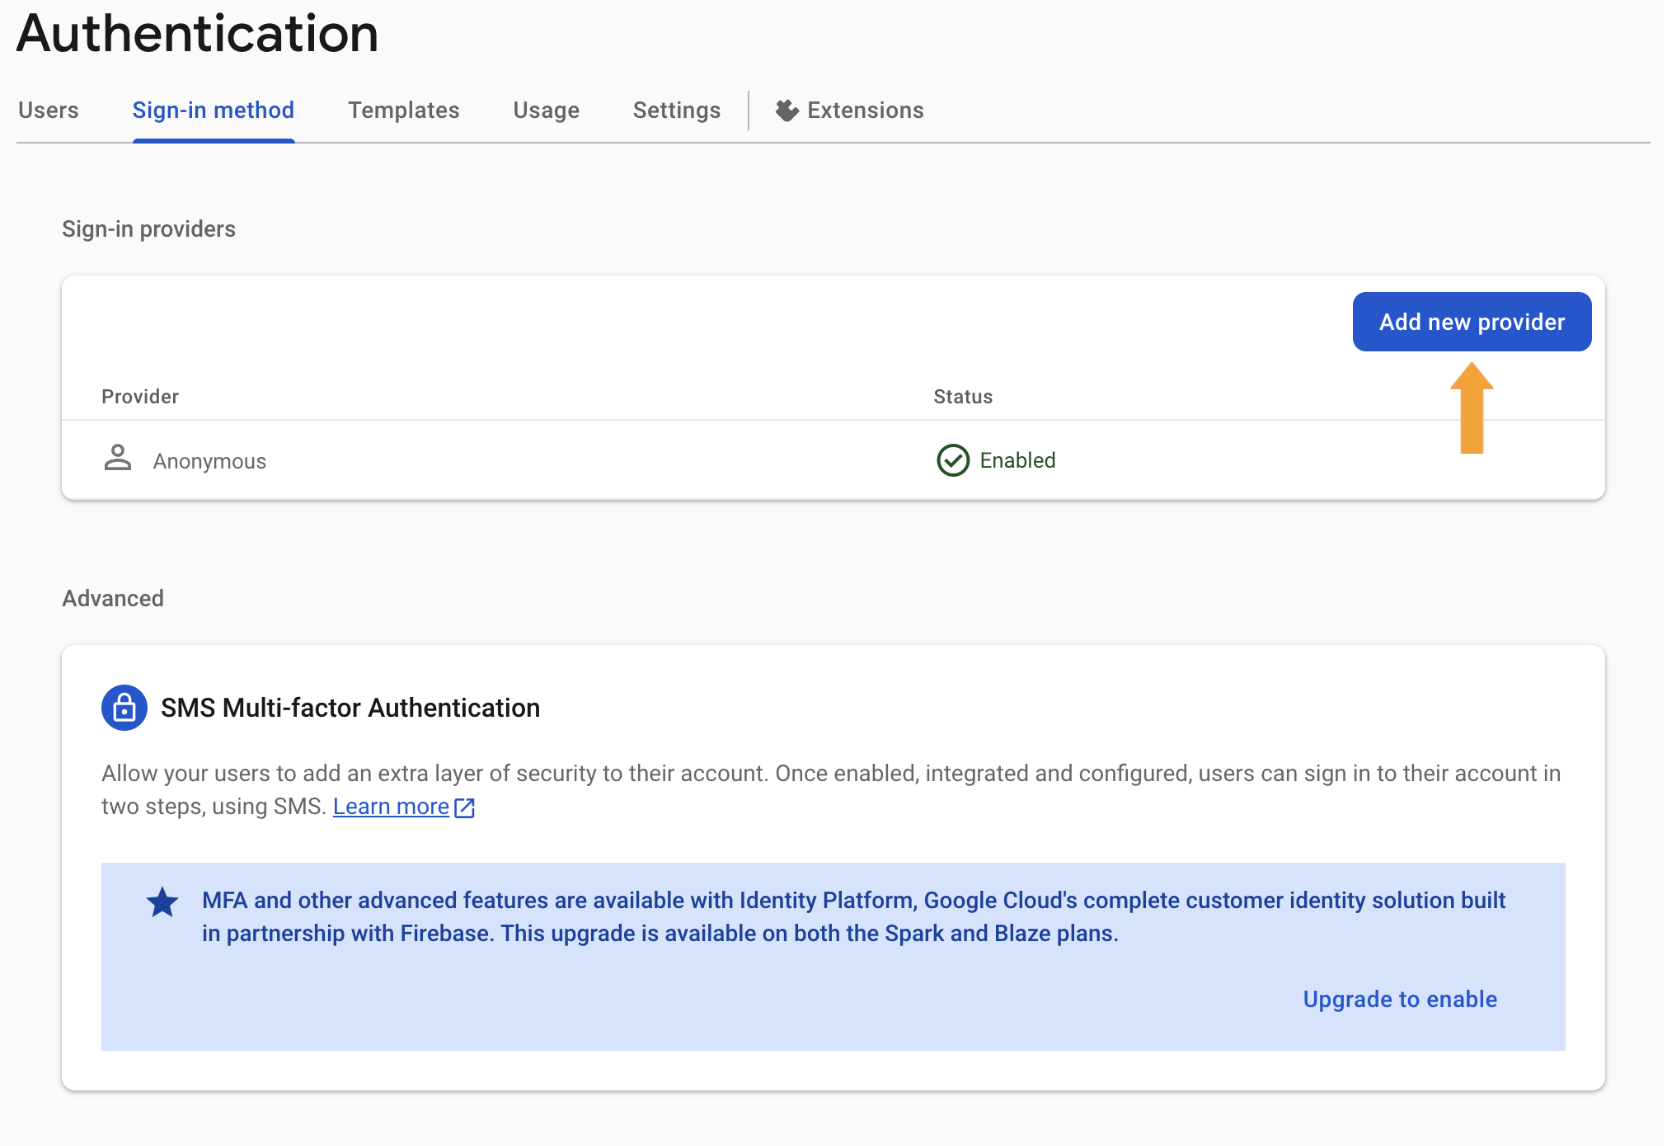
Once here, choose the "Sign-in method" in the top sidebar. Here we can add additional providers for signing in. ReVISit only allows for Google SSO. Click on "Add New Provider".
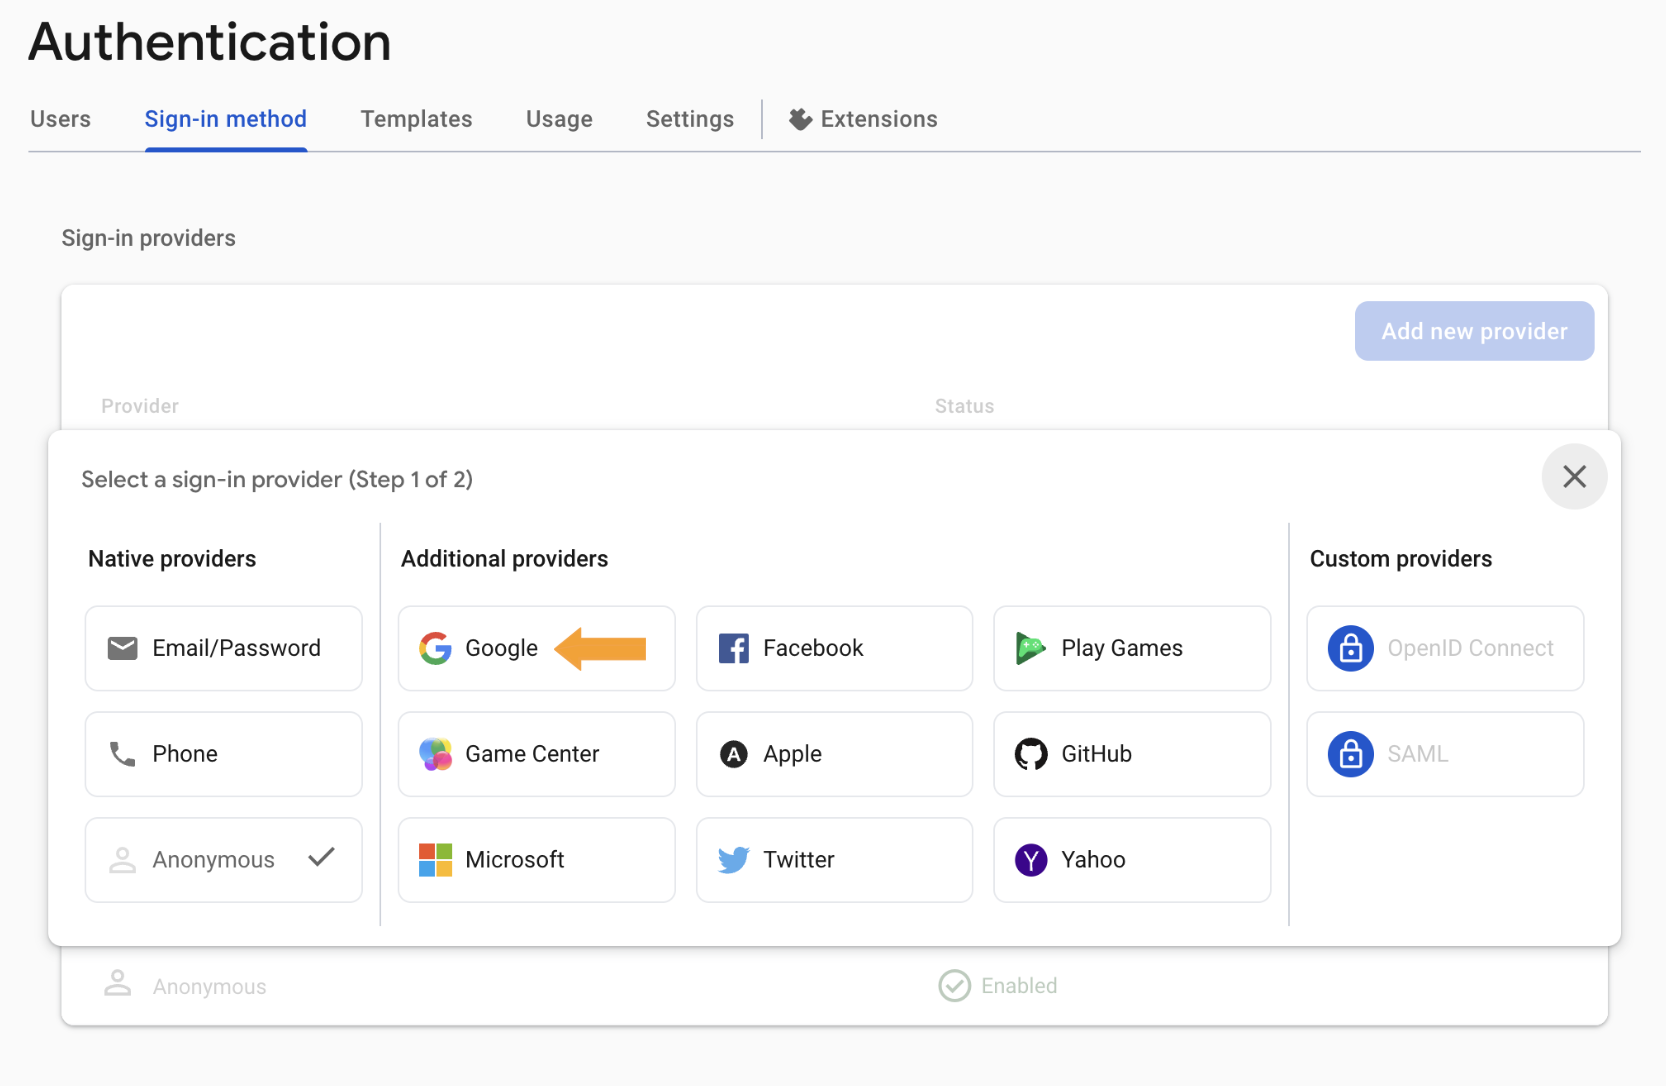
In the provider section, click on "Google".
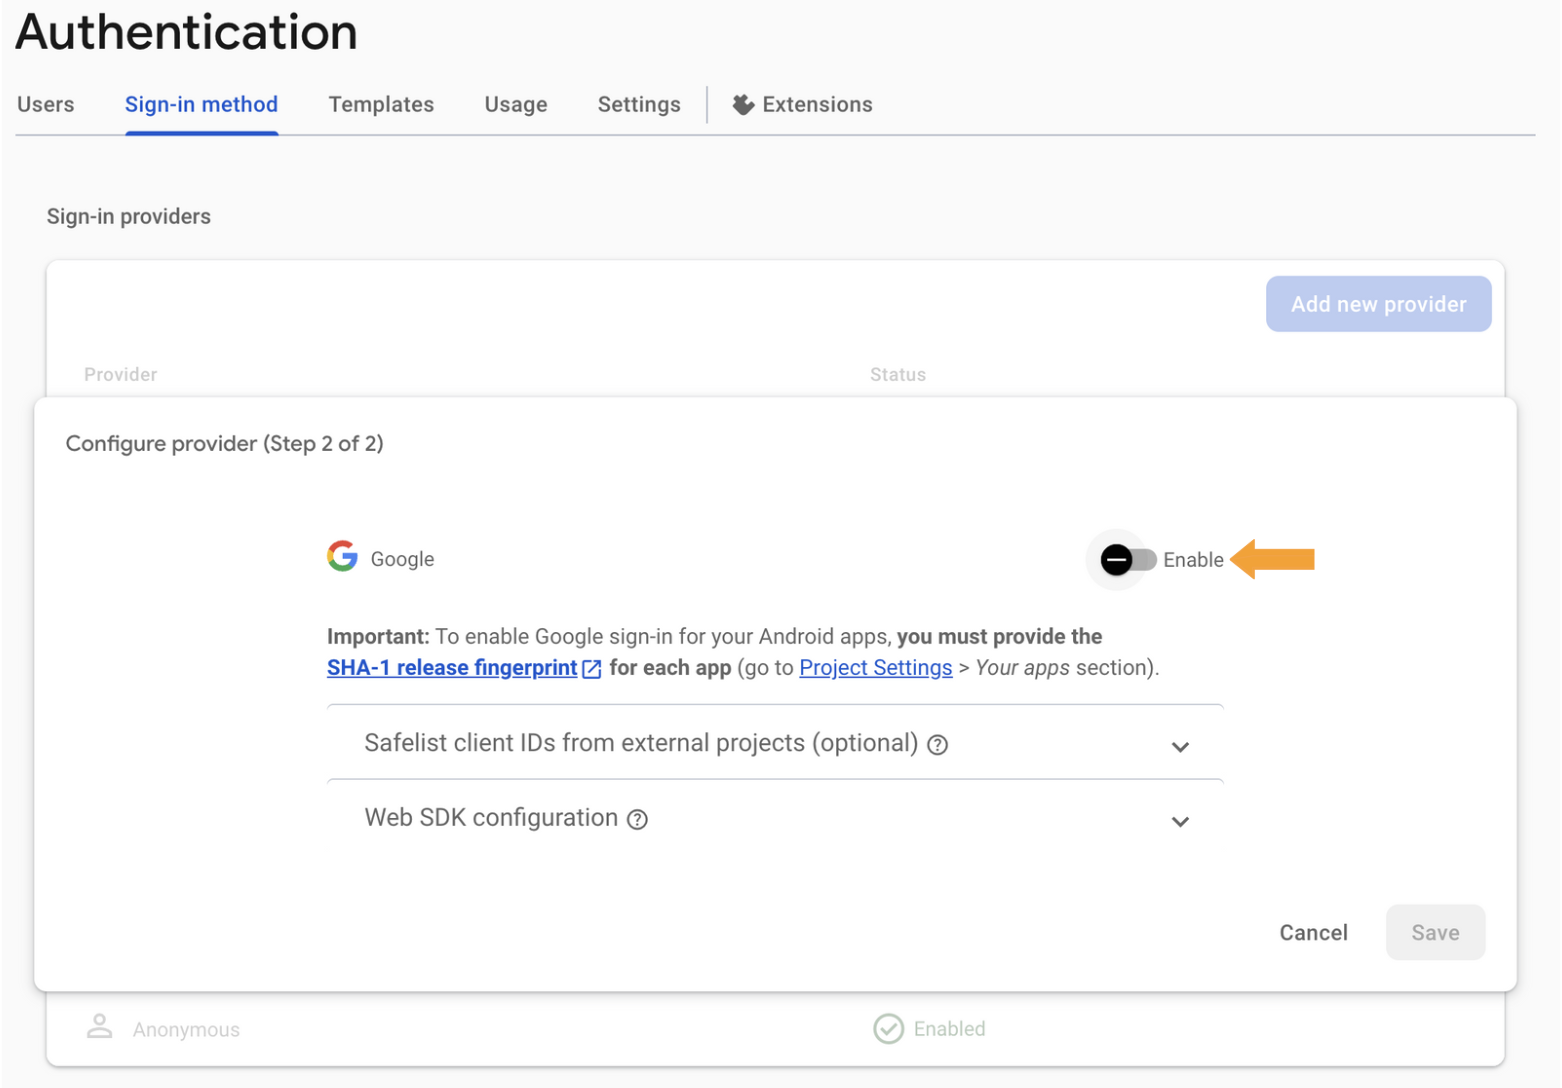
Upon clicking "enable", you will be prompted with providing some information about the application. You can leave these as their defaults. Click "save" and then Google SSO will be enabled in your application immediately.
Adding Authorized Domains
Once you have deployed your reVISit application to a website, you'll need to ensure that Google SSO is authorized to redirect back to your website once a user has signed in. To do this, navigate to the "Authentication" section of your Firebase application. In the "Settings" tab you will see an "Authorized Domains" section. Add your domain name(s) using the "Add domain" button on the right.
Enabling Authentication in reVISit
Note that if your application has been deployed but you have not added your custom authorized domain, then attempting to enable authentication will result in an error.
Through the navigation panel on the right of your reVISit application, navigate to the "settings" page. Here, you will see that authentication will be currently disabled with a button to enable authentication.
When you first enable authentication, you will be prompted to sign in using Google SSO. The account chosen will automatically be added as a user. Any other account attempting to log in to reVISit and access these protected routes will be redirected to the login screen.
Manage Administrators in reVISit
Adding Additional Users
To add another administrator, simply navigate to the settings page (where you enabled authentication) and click on the 'Add User' icon to the right of the "Enable Users" section. Enter the Google account email for the user and click save. They will now be an administrator and will immediately be able to log into your reVISit application
Removing A User
In the "Enabled Users" section, you will see the "delete" icon to the right of each user aside from yourself. Any administrator is capable of deleting any user from the reVISit system. The only restriction is that you cannot delete yourself and there can never be less than one user.